3D printing is becoming popular across different essential industries together with their 3D printing materials e.g. plastic filament, wax material, 3D printer resin, etc. Beyond gaining popularity, 3D printing helps professionals and enthusiasts become more creative and innovative.
That’s why we’ve prepared this case study on the practical applications of 3D printing using PETG thermoplastic filament. We are going to examine four successful printing cases - we’ll focus on:
● What 3D objects were printed
● Which FDM 3D printer they selected
● The printer's settings
We’ll also provide pro tips along the way to help you understand exactly what is needed of you to have a successful PETG 3D printing process.
Let’s get started! (All of the cases are from Flashforge Official User Group on Facebook)
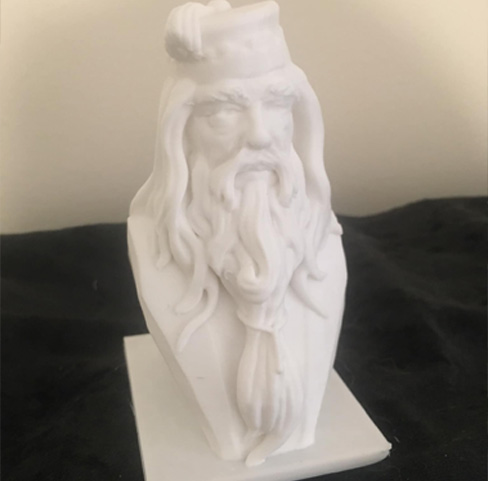
Case1: Printing with PETG - Paul Wright’s Figurine Head
Paul Wright has been printing 3D models using PETG for at least four months now. One of his successfully printed 3D models is a figurine's head which he printed without using support material, raft, or brim.
Unfortunately, he experienced slight warping on the front right corner which is quite common in 1.75mm PETG filaments. Remember, PETG is one of the most popular 3D printing materials for FDM 3D printers.
▲Figurine Head printed by Paul Wright with petg filament
Paul used Flashforge’s Adventure 3 Pro printer. Here’s how he set his printer for the best print:
- Extruder temperature: 230°C (446°F)
- Heating bed temperature: 80°C (176°F)
- Slicing software: Flashprint
Pro tip: Using the correct slicing software is essential as it significantly impacts the quality of print. It would be best to use the printer's manufacturer-recommended slicing software.
Paul would have avoided warping if he reduced his printer’s initial printing speed. When FDM 3D printers print too fast, PETG filament’s layers will not stick properly.
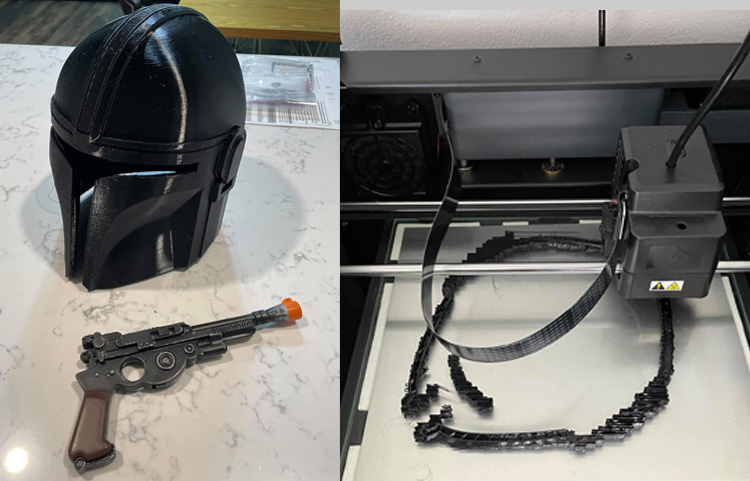
Case 2: Printing with PETG - Remy Moreth Life-size Darth Vader Helmet
Remy Moreth decided to print Darth Vader’s helmet for his son. Remy owns a Flashforge Guider 2S 3D printer and he used it to print the two 3D models. The 3D printing PETG process took 49 hours to complete.
▲ Darth Vader Helmet printed by Remy with petg filament
Just like Paul Wright (in our first case above), Remy did not use support material to print the helmet. Here are the printer settings he used to achieve the perfect 3D print:
- Extruder temperature: 230°C (446°F)
- Heating bed temperature (Glass bed): 77°C (170.6°F)
- Slicing software: Flashprint https://www.flashforge.com/product-detail/FlashPrint-slicer-for-flashforge-fdm-3d-printers
In addition to using a glass heat bed as his build surface, Remy also used a glue stick to ensure that the 3D printing PETG process was a success. Glue stick is one of the best adhesive materials you can use to prevent a permanent bond between the glass surface and molten PETG filament.
Pro tip: Consider using an adhesive e.g., glue stick or even hair spray on your printer’s build surface. Doing so will ensure the printed 3D model does not get damaged when separating it from the heating bed.
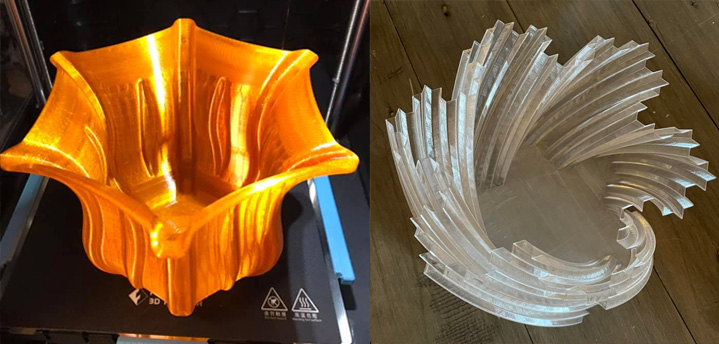
Case 3: Printing with PETG - Annie Morbeg’s Plastic Ornamental Pot
Annie Morbeg successfully printed plastic ornamental pots with PETG filament on her Flashforge Adventure 4 FDM 3D printer. Except for pots, Annie actually has printed a lot of works and showed them in the group. Guess you are interested in reading: How Annie Moberg’s 3D Printing Adventure Started and Live Life Her Own Way!
The printer took 13 hours to complete printing the yellow ornamental pot. She affirms that the 13 hours were problem-free.
▲Ornamental pots printed by Annie with PETG filament
Here’s how she managed to successfully print her yellow ornamental pot:
First, she ensured that her printer’s settings were correct. However, she clearly stated that she did not change any setting with the hope of trying to optimize the PETG 3D printing process. Here are her printer’s settings:
- Extruder temperature: 230°C (446°F)
- Heat bed temperature: 70°C (158°F)
- Slicing software: Flashprint 5
Annie advises her fellow 3D printing enthusiasts to acquire high-quality 3D printing materials as it makes 3D printing easier. In other words, simply buying a 3D printing filament without considering its quality could be the reason why 3D printing is a hectic affair for you.
Pro tip: Printing 3D models using PETG filament does not necessarily require the use of the printer’s cooling fans. If at all you need to use your printer’s cooling fan, be on the lookout for delamination and cracks.
Remember, printing without using your FDM 3D printer’s cooling fan enhances layer adhesion.
Case 4: Printing with PETG - Joseph Mcintire’s Tabletop Vases
Joseph Mcintire is yet again another 3D printing enthusiast who successfully printed tabletop vases. These vases can be used as stationery holders e.g., pens, pencils, erasers, etc. He managed to successfully print the vases by correctly setting up his Adventure 3 printer:
- Extruder temperature: 240°C (464°F)
- Heating bed temperature: 75°C (167°F)
▲Vases 3D printing with PETG filament
The entire printing process took him 11 hours to complete. It’s essential to note that he did not follow the instructions outlined on the 3D printing PETG filament’s spool. He instead used slightly higher temperatures which made his 3D printing process a success.
Joseph advises his fellow 3D printing enthusiasts not to rush the 3D printing process, especially when using PETG. Here's why: Trying to print 3D models quickly will certainly harm the quality of the printed model. Enjoy more exciting 3D printing cases: See how 3D prints make you shine!
Wrap-Up on Practical applications of PETG Filament
PETG filament indeed is one of the most popularly used 3D printing materials for FDM 3D printers. Each of the cases studied above clearly shows what you need to do to successfully print 3D models.
Let’s have a recap:
- Extruder’s temperature: 230°C - 250°C.
- Heat bed - not necessary. However, consider setting it between 70°C - 80°C.
- You can also print 3D models with the 3D printer’s chamber open.
- Use your 3D printer's manufacturer-recommended slicing software.
- We strongly recommend printing models at lower speeds. Higher printing speeds reduce the quality of the 3D-printed model. Beyond quality reduction, it may cause warping which you need to avoid at all costs.
- It would also be best if you’d use support material e.g., PLA when printing models with complex geometries.
- Consider getting all your 3D printing materials from a reputable manufacturer. Low-quality PETG printing materials will certainly make your 3D printing process a nightmare, to say the least.
Finding a good platform to buy 3D printing tools, like 3D printers, 3D printing materials, or accessories for your 3D printer, you can visit Flashforgeshop!
Guess you like:
3D printing applications in industries of healthcare, automotive, and fashion!
[User Story] 3D Journey with Sam Ward-Miller and the Kids
3D Printing is Now in Film