Our premium 3D printing filament offers versatile options for designers at all levels, designed to free your imagination and deliver outstanding results.
In last article A helpful explanation on commonly used 3D printing terms explained what is 3D printer slicer and why it’s an indispensable step to do model slicing before practical printing on a 3D printer. Here this article continues explaining 3D printing terms about model slicing.
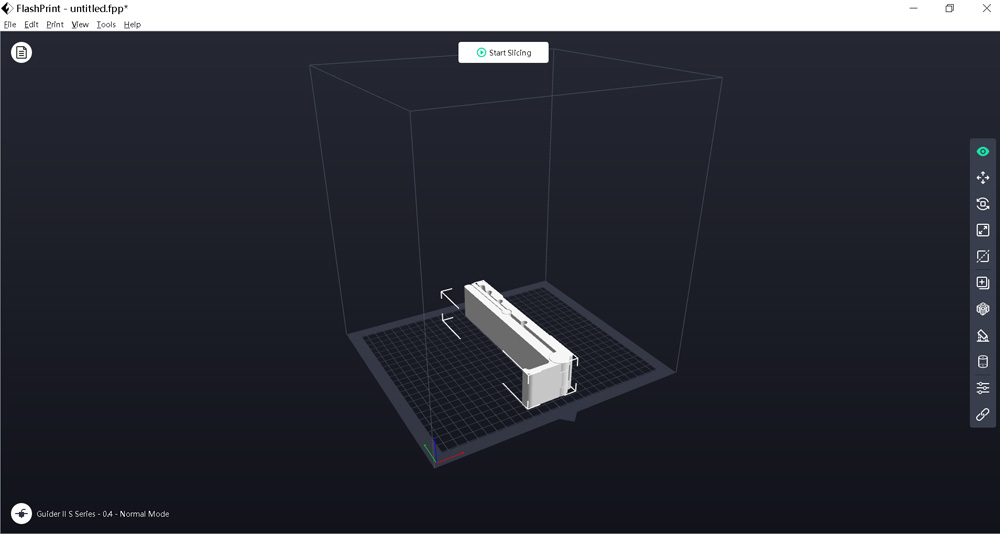
Inputting the 3D model file into the slicer App, we click the Start Slicing button and there pops up a window, showing many slicing parameters such as layer height, shell thickness, supports, infill, and print temperature. Only after knowing the concepts of those slicing terms will we know how to set those slicing parameters!
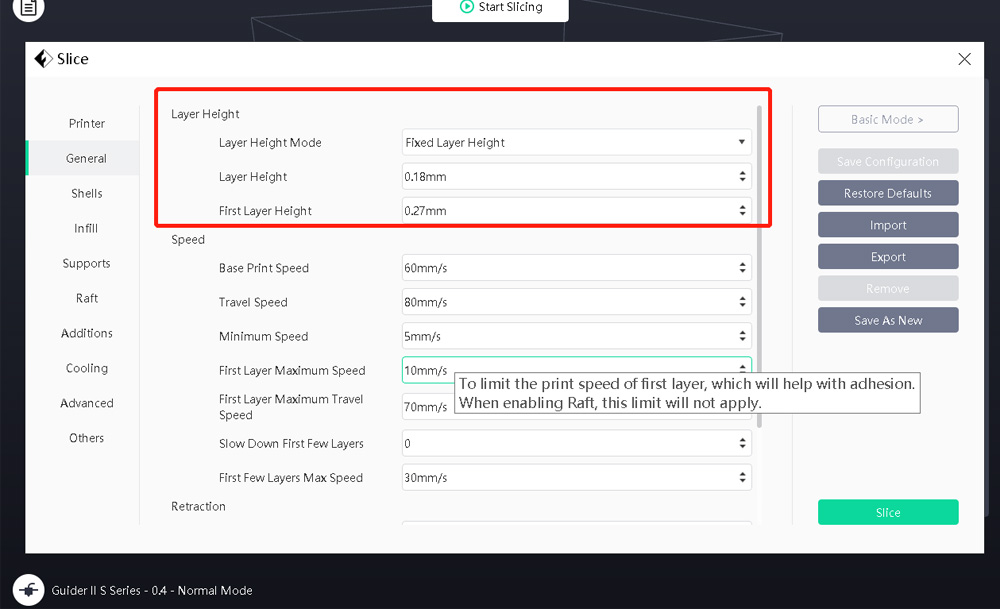
Layer height/thickness
3D model is sliced and printed layer by layer. Layer height means the thickness of each layer. This parameter directly affects the smoothness of outer surface of the print. The line texture on the printout surface is just the result of layer-after-layer printing. The thinner each layer is, the smoother the print surface looks. We can adjust layer height as shown below:
For the same print, as the value of layer height gets smaller, the number of layers will increase and the time for printing will get longer. One point to notice is that the lowest and highest layer height is related to the layer resolution of your 3D printer. Take Flashforge Adventurer 4 as example, it supports 0.1-0.4mm layer thickness (check it on the product user manual), which means if printing with Flashforge Adventurer 4 3D printer, the lowest layer height you can set is 0.1mm and the highest layer height you can set is 0.4mm, Otherwise, the print will fail. Generally for normal desktop FDM 3D printer, this parameter is set between 0.1 and 0.3 mm. Most set it to 0.2mm by default.
Shell/wall thickness:
Likening the 3D model to a watermelon that has melon rind and pulp, the printed 3D model also has shell and infill. Model shell is just as the melon rind that determines the shape and outer surface of the model. In FlashPrint slicer it reads Shell thickness, while in some other slicers (e.g., simplify3D, Makerbot, and VoxelMaker, and Ultimaker Cura), it reads Perimeter thickness or Wall thickness; the shall/perimeter/wall thickness refers to the thickness of the outer shell. We can set the entire wall thickness by modifying the number of shells. The value of wall thickness is the diameter of the printer nozzle multiplied by the number of shell. For instance, most desktop FDM printers on the market get 0.4mm nozzle in diameter. We can set the wall thickness to 0.8mm if using such a 0.4mm hot end and setting the number of shells to 2 (as the picture shows).
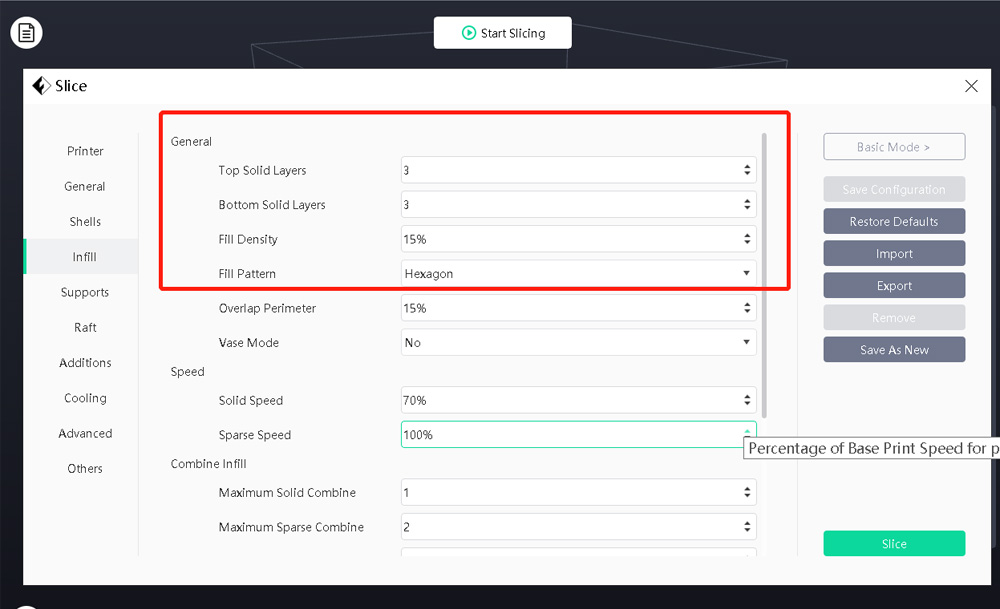
Infill:
Infill means what is filled in the 3D model. We always don't set a solid printout. If the infill density is set to 0%, we will print a fully hollow model. Setting the infill density to 100%, we print out a fully solid model.
Filling density is adjusted according to our own needs. Set the percentage value higher (e.g., 20% or more) if you want a sturdy model. For models used for decoration or for ornament less requirements for model strength, the infill density can be set lower to 10% - 20%. Generally we set it to 15% by default. For the purpose of saving printing time and filament, it is not recommended to set this parameter above 50%.
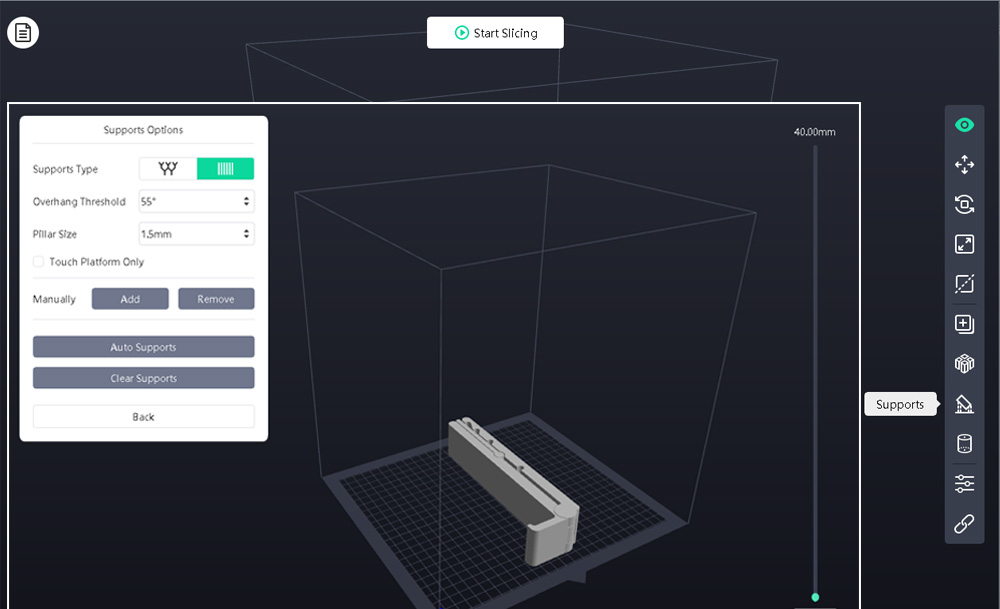
Supports:
Support is to 3D model printout what piers to a bridge. If the model has protruding parts, we need set supports for those parts. It’s easy to understand that the protruding parts of the model cannot be built on the air. They need supports. Actually nearly no models are of regular shape. Most models need setting supports in the slicer.
Click Supports button on the tool bar, and there appears Supports Option window. The Auto Supports is a wonderful feature! In some advanced setting, we need manually add supports, such as when controlling the amount of added support by modifying the critical angle of the support, and modifying the distance between the support structure and the model for the convenience of disassembly of the supports.
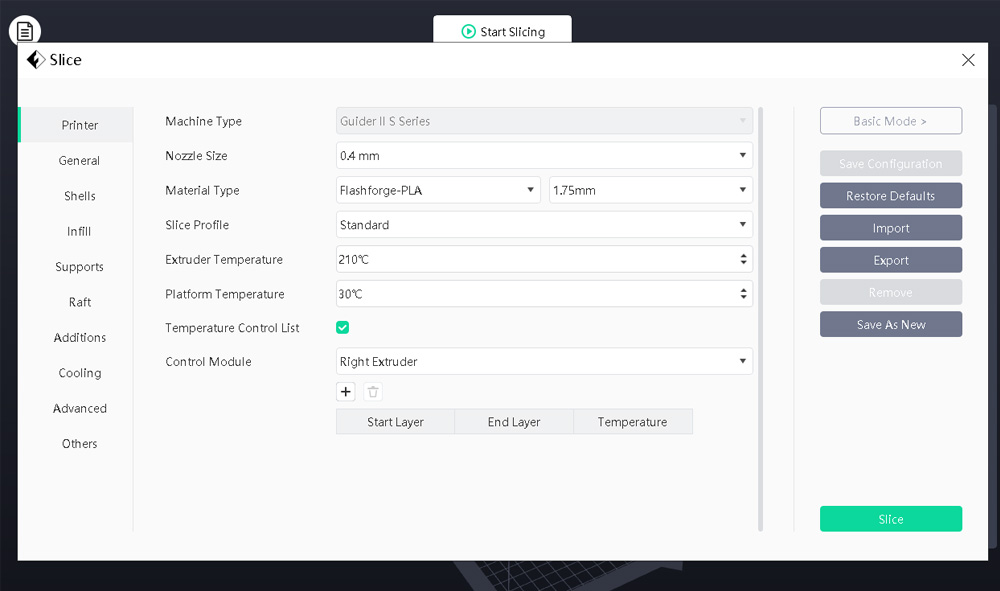
Print temperature:
Print temperature, nozzle size, and materials are all set according to what machine type (which 3D printer) we are using. As to printing temperature, two parameters should be considered: extruder temperature and platform temperature. A good platform temperature is helpful for bottom layers to well stick onto the platform, which is vital for successful printing. Extruder temperature is set according to what temperature your 3D printer material needs and whether the 3D printer support such a high degree temperature.
Extruder temperature being too high might cause filament flowing/extruded too fast, hence print parts stuck together; Extruder temperature being too low may lead to nozzle clog.