


A properly leveled 3D printer bed helps create a consistent first layer, improves adhesion, and reduces failed prints. Depending on your printer, leveling may involve manual adjustment or an automatic calibration system. This guide explains how both methods work, how to level a 3D printer bed step by step, and how to choose the right approach for different printing needs. It also covers Z offset adjustment, first layer testing, and common leveling problems so you can achieve more reliable results with less trial and error.
Start With Your 3D Printer Bed Leveling Needs
Before leveling your 3d printer bed, identify your printer’s leveling method, how often you print, and how much manual control you prefer. This helps you choose the right approach and achieve a more consistent first layer.
Check Your Printer’s Leveling Type
Bed leveling can feel very different from one 3D printer to another. A printer with adjustment knobs under the build plate usually requires you to check the nozzle gap at several points and fine tune each corner by hand, especially after moving the machine or changing the build plate. With auto bed leveling, much of this routine work is handled by sensors that measure surface variations before printing. Some models use a hybrid system, combining automatic measurement with limited manual adjustment, so the printer manual is the best place to confirm which steps actually apply.
Consider Your Leveling Frequency
How often you need to re-level the bed depends on the printer design and how it is used. Manual beds may need more frequent checks after moving the printer, changing the nozzle, removing the build plate, or adjusting hardware. Auto bed leveling reduces routine calibration, but running a new leveling cycle is still useful after maintenance or when the first layer starts to look uneven.
Choose Between Control and Convenience
Manual leveling gives you more direct control over the build plate and helps you understand how nozzle height affects first-layer adhesion. However, it usually takes more time and practice. Auto bed leveling simplifies setup by handling most surface measurements automatically, making it especially useful for beginners and frequent printing. The better option depends on whether you value hands-on control or faster, more consistent setup.
Manual vs Auto Bed Leveling: What’s the Difference?
Manual and auto bed leveling both keep the nozzle at a consistent distance from the build surface. Manual leveling requires physical adjustments, while auto leveling uses sensors and software compensation to simplify setup.

How Manual Bed Leveling Works
With manual bed leveling, the goal is to create a consistent nozzle to bed gap across the entire build plate. At each corner, users typically slide a sheet of paper or a feeler gauge under the nozzle and adjust the bed until the resistance feels similar. After moving a printer to a new desk or changing the nozzle, for example, this process may need to be repeated to restore an even first layer. Manual leveling gives more direct control, but small differences between adjustment points can still cause weak adhesion or uneven extrusion.
How Auto Bed Leveling Works
Many auto bed leveling systems use probe measurements to create a bed mesh that compensates for small surface variations during printing. During a typical morning setup or after reinstalling the build plate, this can reduce the need to adjust each corner by hand and helps produce a more consistent first layer. Some systems still require occasional Z offset tuning, especially if the nozzle height looks slightly too high or too low after calibration. The Flashforge AD5M Series printing tips show how auto leveling, Z offset adjustment, and first layer testing work together in practice.
Manual vs Auto Bed Leveling Comparison
Both methods can produce a reliable first layer, but they differ in setup time, user involvement, and maintenance. The table below highlights the main differences to help you choose the approach that best fits your printer and workflow.
| Feature | Manual Bed Leveling | Auto Bed Leveling |
|---|---|---|
| How It Works | Bed height is adjusted manually at several points. | Sensors measure the bed and apply software compensation. |
| Ease of Use | Requires more practice and attention. | More beginner-friendly and automated. |
| Setup Time | Usually takes longer. | Usually faster. |
| Control | Offers more hands-on control. | Reduces manual adjustment. |
| Z-Offset | Typically adjusted manually. | May still need occasional adjustment. |
| Re-Leveling | May require more frequent checks. | Usually requires less manual re-leveling. |
| Best For | Users who prefer direct control and manual tuning. | Users who prioritize convenience and repeatability. |
In practice, manual leveling is better suited to users who want direct control over bed adjustment, while auto leveling is more convenient for beginners or frequent printing. Whichever method you use, always verify the first layer, since proper leveling still depends on the correct nozzle-to-bed distance.
How to Level a 3D Printer Bed Step by Step
The exact leveling process depends on your printer, but the goal is always the same: maintain the correct distance between the nozzle and build plate across the printable area. Follow these steps for either manual or auto bed leveling.

Step 1: Choose Your Bed Leveling Method
First, confirm which leveling system your printer uses.
- Manual bed leveling: Best for printers that require you to adjust the build plate using knobs, screws, or similar hardware.
- Auto bed leveling: Used on printers with sensors that probe the build surface and compensate for height variations automatically.
Always check the printer manual before making physical adjustments, especially if the machine includes an automatic leveling system.
Step 2: Clean the Nozzle and Build Plate
Remove filament residue from the nozzle and wipe the build plate clean. Debris on either surface can affect the measured gap and lead to inaccurate leveling, so following a proper 3D printer bed cleaning guide can help prevent calibration and first layer problems. Make sure the plate is also seated correctly before calibration.
Step 3: Home and Prepare the Printer
Home the printer so the X, Y, and Z axes return to their reference positions. If your printer manufacturer recommends leveling at printing temperature, preheat the nozzle and bed first, as thermal expansion can slightly change the nozzle-to-bed distance.
Step 4: Level the Bed Using Your Chosen Method
The procedure now differs depending on the leveling system.
- Manual leveling: Move the nozzle to each leveling point and check the gap between the nozzle and bed. Adjust the knobs or screws gradually until the spacing feels consistent across all points. Recheck each position after making adjustments, since changing one corner can affect another.
- Auto leveling: Start the printer’s automatic leveling or calibration function. The sensor will probe multiple points across the build plate and use those measurements to compensate for surface variations. Avoid touching or moving the printer during this process.
Step 5: Adjust the Z-Offset if Needed
Bed leveling and Z-offset are related but not identical. If the nozzle is consistently too high or too low after leveling, fine-tune the Z-offset. A nozzle that is too high can cause poor adhesion, while one that is too low may over-compress the first layer or scrape the build plate.
Bed leveling is only one part of printer setup. For a complete workflow covering Z-offset, extrusion, temperature, dimensional accuracy, and vibration compensation, follow our 3D printer calibration guide.
Step 6: Test the First Layer
Finish by printing a first-layer test with your usual 3d printer filament. The extrusion lines should appear even, connected, and slightly pressed onto the build surface without being overly flattened. If some areas look different from others, repeat the leveling process or adjust the Z-offset before starting a larger print.
Best Bed Leveling Methods by Use Case
The best bed leveling method depends on how much control you want, how often you print, and the leveling system used by your fdm 3d printer. Manual leveling suits users who prefer direct adjustment, while auto leveling is generally more practical when speed, consistency, and ease of use matter. For users still comparing machines, a first desktop 3D printer guide can help put bed leveling alongside other factors such as ease of use, speed, and enclosure design.
Best for Hands-On Control: Manual Bed Leveling
Manual bed leveling is a good choice if you want direct control over the nozzle-to-bed gap and do not mind spending extra time on calibration. It also helps users understand how small height changes affect first-layer adhesion. The trade-off is that adjustments may need to be repeated after moving the printer, changing hardware, or noticing an uneven first layer.
Best for Beginners: Auto Bed Leveling
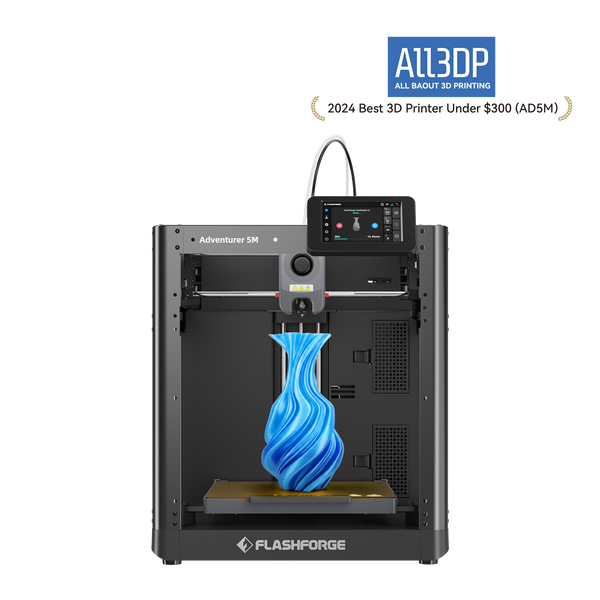
For beginners, repeated bed adjustments can quickly become one of the most frustrating parts of setup. The Adventurer 5M uses automatic leveling to reduce manual calibration, while its all-metal CoreXY structure helps maintain stable motion during printing. For users who want an affordable machine with less setup before the first print, this combination makes the learning curve easier to manage.
Best for Home and Classroom Use: Auto Bed Leveling
In frequently used environments, reducing repeated calibration can save meaningful setup time. The Adventurer 5M Pro combines full-auto leveling with an enclosed design and a dual-layer HEPA and activated-carbon filtration system. These features make it better suited to regular use in homes, classrooms, or shared workspaces where easier setup and a more controlled printing environment are priorities.
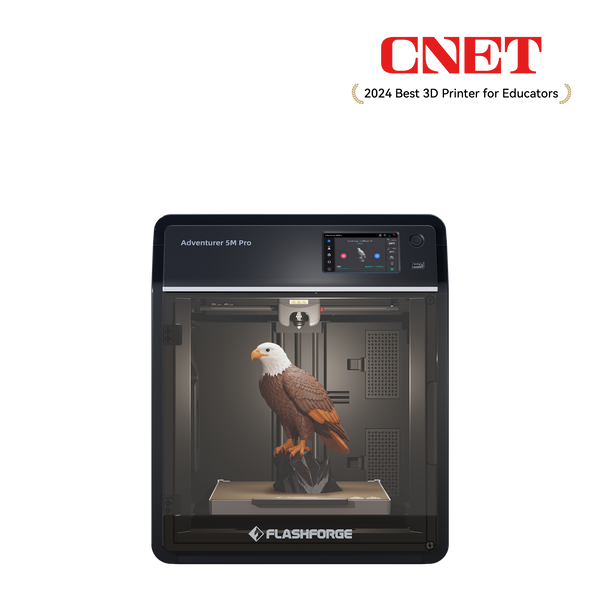
Flashforge Adventurer 5M Pro 3D Printer, Enclosed CoXY Metal Structure, Safe for Home Use
Tips to Prevent 3D Printer Bed Leveling Problems
Good bed leveling is easier to maintain than to fix repeatedly. A few simple habits can help keep the nozzle-to-bed distance consistent and reduce first-layer problems over time.
Keep the Printer on a Stable Surface
Place the printer on a flat, rigid surface that does not wobble during movement. An unstable table or frame can introduce vibration and small alignment changes, especially during fast prints, which may affect first-layer consistency.
Keep the Build Plate and Nozzle Clean
Dust, grease, filament residue, or hardened material on the nozzle can interfere with leveling accuracy. Clean the build plate regularly and remove residue from the nozzle before calibration so measurements reflect the actual nozzle-to-bed gap.
Check the Z-Offset Regularly
Even after successful bed leveling, the Z-offset may still need fine-tuning. If the first layer looks too loose, overly compressed, or inconsistent, check the offset before re-leveling the entire bed. Small adjustments are often enough to restore proper adhesion.
Re-Level After Hardware Changes
Run a new leveling cycle after changing the nozzle, removing or replacing the build plate, adjusting the hotend, or moving the printer. These changes can slightly alter the relationship between the nozzle and bed, so recalibration helps prevent avoidable first-layer failures.
Conclusion
A well leveled 3D printer bed is essential for reliable first layers and consistent print quality. Manual leveling offers more direct control, while auto bed leveling reduces setup time and simplifies calibration for beginners and frequent users. Whichever method your printer uses, keeping the build plate clean, checking the Z offset, and recalibrating after hardware changes can prevent many common first layer problems. The best method is the one that matches your printer, workflow, and need for consistent results.
FAQ
Should You Level a 3D Printer Bed Hot or Cold?
For manual leveling, using the manufacturer’s recommended bed temperature can account for changes caused by thermal expansion. Printers with automatic calibration should follow the leveling procedure specified by the manufacturer. The bed and nozzle can expand slightly when heated, which changes the nozzle-to-bed distance. However, if your printer uses an automated calibration routine, follow the manufacturer’s recommended procedure rather than preheating manually.
Can You Level a 3D Printer Bed With a Spirit Level?
No. A spirit level measures whether a surface is level relative to gravity, but 3D printer bed leveling is about keeping the build plate correctly aligned with the nozzle and motion system. A bed can be perfectly level to the floor and still be poorly calibrated for printing.
What Can You Use Instead of Paper for Bed Leveling?
A feeler gauge is one of the best alternatives to paper because it provides a known, repeatable thickness. Dedicated calibration tools or first-layer test prints can also work. The key is to maintain a consistent nozzle-to-bed gap across the build surface.
Can Bed Leveling Fix a Warped Print Bed?
Bed leveling can compensate for minor surface variations, but it cannot physically flatten a severely warped bed. Mesh leveling may correct small height differences through software compensation, while larger warping may require reseating, inspecting, or replacing the build plate or bed.
Why Is My First Layer Still Uneven After Auto Bed Leveling?
An uneven first layer after auto leveling usually means another setup issue still needs attention. Common causes include an incorrect Z-offset, nozzle residue, a dirty or poorly seated build plate, or loose hardware. Check these factors before repeating the entire leveling process.
Is Mesh Bed Leveling the Same as Auto Bed Leveling?
No. Mesh bed leveling refers to creating a height map of the build surface, while auto bed leveling describes how those measurements are collected automatically with a sensor. Many auto-leveling systems use a mesh, but some printers also allow a mesh to be created or adjusted manually.