


Table of Contents
Multi-color and multi-material 3D printing can make a model more functional, easier to customize, and more efficient to produce. A prototype may need a rigid body with a flexible grip. A classroom model may use several colors to separate key structures. A small business may need personalized products without repeated manual filament changes.
A standard single-extruder printer can handle some of these projects, but it has clear limitations. When several materials share one nozzle, the printer must unload one filament, load the next, and clear the remaining material from the melt zone. Frequent changes can increase print time and filament waste.
A multi-tool head 3D printer uses a different approach. Each toolhead holds its own filament and nozzle. When the print requires another material, the machine parks the active toolhead and picks up the next one.
This guide explains how multi-toolhead printers work, where they offer the most value, and which models are worth comparing in 2026.
What Is a Multi-Tool Head 3D Printer?
A multi-tool head 3D printer uses several independent toolheads within one machine.
Each toolhead has its own nozzle and filament path. Instead of feeding every material through a shared melt zone, the printer switches between dedicated tools during the same print job.
This structure supports more efficient color changes, cleaner material transitions, and more flexible multi-material combinations.
Dedicated Toolheads Hold Separate Filaments
Each toolhead can be assigned a different color or material.
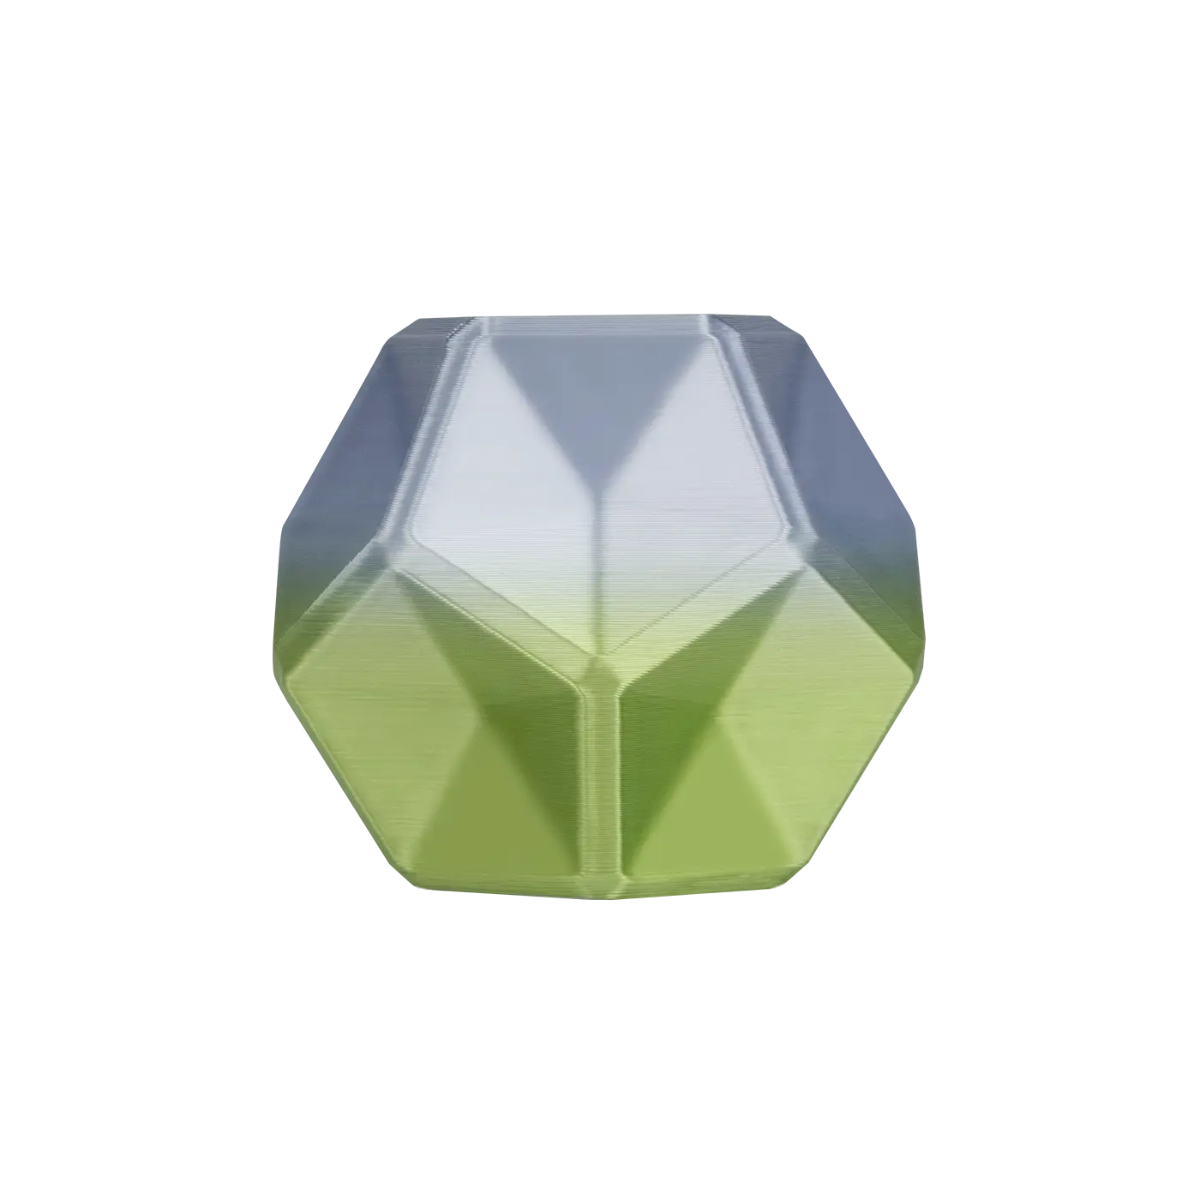
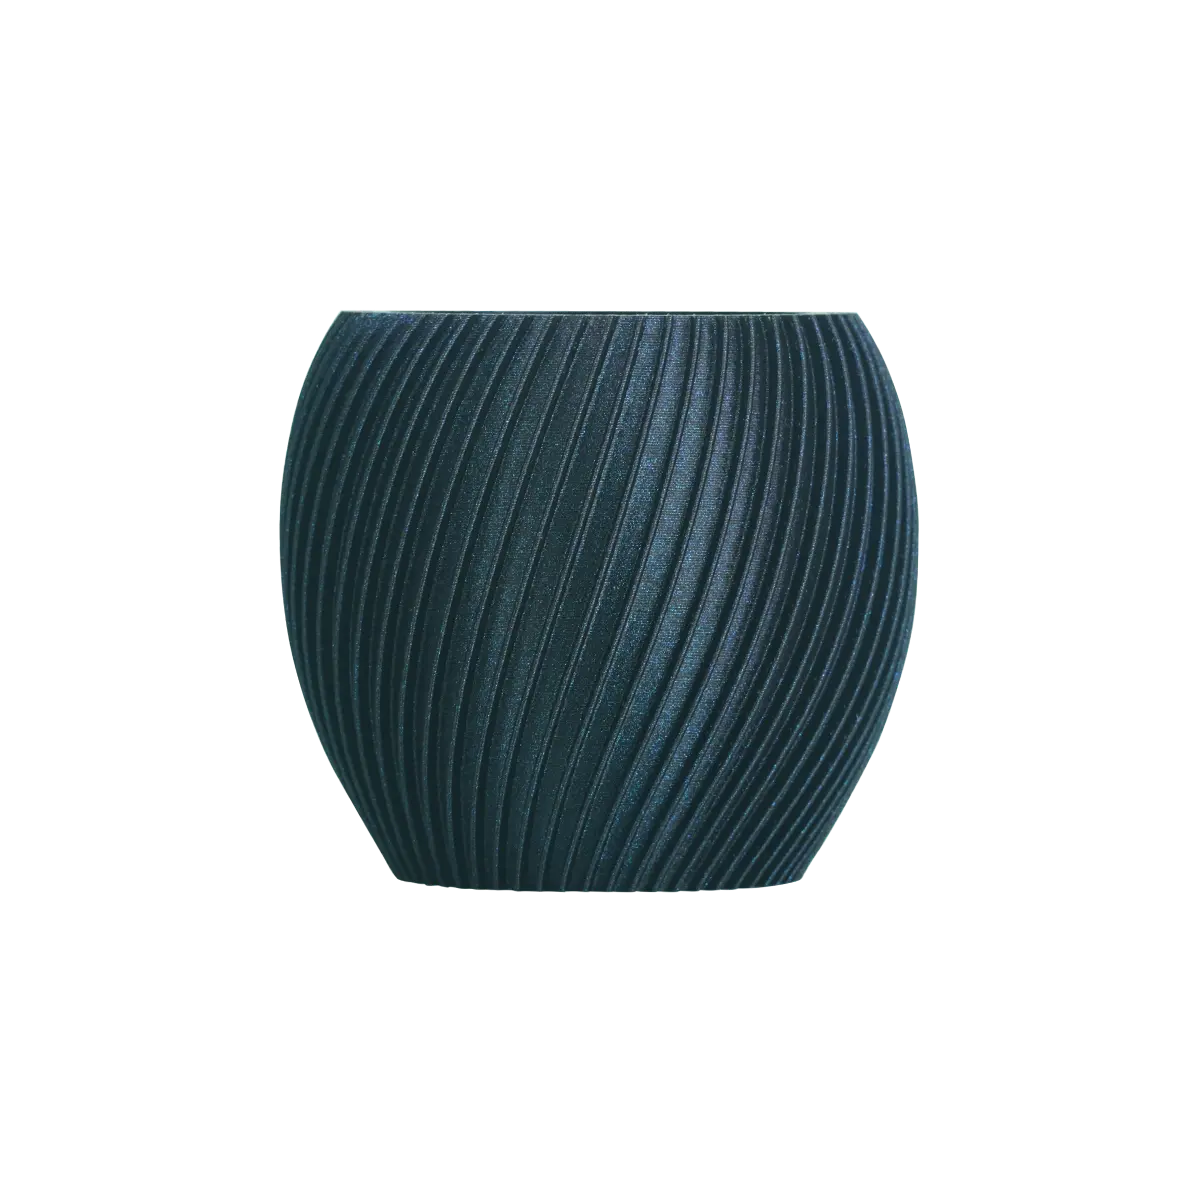
One toolhead may print the main body in PLA. A second can add a contrasting label. Another can print a support interface. A fourth can handle TPU sections that need flexibility.
Because the materials remain separated, the printer does not need to clear the same nozzle every time the design changes color or function.
This advantage becomes more noticeable as the number of swaps increases. A simple two-color logo may only need a few transitions. A detailed model or functional prototype may require hundreds of tool changes.
Docking Stations Park Inactive Toolheads
Instead of moving all toolheads across the print bed simultaneously, a tool changer keeps only the active toolhead in use while the others remain parked.
Inactive tools remain parked in docking stations. When the print requires another material, the carriage returns the current toolhead to its dock and retrieves the next one.
This design limits unnecessary moving mass and keeps inactive nozzles away from the printed surface. It also allows each toolhead to remain assigned to a specific filament.
The result is a more efficient workflow for projects that need several materials without placing additional weight on the moving assembly.
How It Differs From Single-Nozzle Multi-Material Systems
Instead of assigning a dedicated nozzle to each material, a single-nozzle multi-material printer feeds several filaments into one shared extrusion path.
This approach makes multi-color printing easier to access, but every transition requires unloading, loading, and purging. The process becomes slower and more wasteful when a model contains frequent color changes.
A tool changer keeps each filament in a dedicated toolhead. The printer switches tools instead of repeatedly flushing one nozzle.
The Flashforge Blog article What Is a Dual Extruder 3D Printer? Types, Benefits, and Best Uses Explained explains how fixed dual extruders, IDEX systems, single-nozzle filament changers, and multi-toolhead printers solve different production needs.
Common Applications of Multi-Tool Head 3D Printers
For personalized products, separate toolheads can print different colors without repeated manual filament swaps. This works well for signs, toys, nameplates, teaching models, and branded components.
For functional prototypes, each toolhead can carry a material with a different property. A rigid housing may include a flexible TPU grip. A mechanical part may use a dedicated support interface material to improve the underside surface of an overhang.
Tool changers also fit small-batch production. When a studio prints several customized designs, shorter transitions and lower purge waste can improve throughput.
A basic single-color part may not need this level of hardware. The strongest use cases involve frequent swaps, support materials, or functional material combinations.
How Does a Multi-Tool Head 3D Printer Work?
The slicer assigns different sections of the model to separate toolheads. During printing, the machine uses one tool until the next section requires another color or material. It then parks the active toolhead and retrieves the required one.
The process is automatic, but accurate calibration and suitable slicer profiles remain essential.
The Toolhead Pickup and Swap Mechanism
A tool change begins when the active toolhead finishes its assigned section.
The carriage moves to the docking area and parks the current tool. It then connects to the required toolhead and returns to the model.
The exact locking method varies by machine. The goal remains the same: the newly selected nozzle must return to the correct position with minimal delay.
A well-designed mechanism keeps each toolhead stable during printing while allowing repeatable swaps throughout a long job.
Software and Slicer Workflow
The slicer software determines when the printer should switch between toolheads during the print.
Before slicing, the operator assigns colors or materials to different areas of the model. The software then creates a toolpath that includes the required changes.
The workflow should remain clear even when the hardware is advanced. A practical slicer needs material assignment, toolhead mapping, calibration support, and a preview that shows where each filament will appear.
The Flashforge Creator 5 Series supports Orca-Flashforge and OrcaSlicer, allowing makers and production teams to prepare multi-color and multi-material projects within a familiar workflow.
What Happens During a Single Toolhead Swap
The carriage moves to the dock, releases the current toolhead, picks up the next one, and returns to the model. Depending on the slicer profile, the printer may also use a small prime or wipe structure before applying the next material to the part.
This distinction matters. Tool changers reduce the large purge volumes associated with clearing a shared nozzle. However, some projects may still use a small prime tower to stabilize extrusion pressure.
The main benefit is not that every project becomes completely waste-free. The benefit is that a tool-changing workflow can substantially reduce material waste during frequent transitions.
How Calibration Keeps Every Nozzle Aligned
Accurate calibration is essential because every toolhead must return to the same coordinate system.
Even a small offset can create visible seams, uneven surfaces, or weak connections between materials. Accurate X, Y, and Z offset calibration is therefore essential.
The Flashforge Creator 5 and Flashforge Creator 5 Pro include automatic multi-toolhead offset calibration and compensation features.
Calibration should also be checked after maintenance. A nozzle replacement, toolhead change, or collision may require the printer to repeat the process before the next production run.
Why Use a Multi-Tool Head 3D Printer?
A tool changer offers the most value when a project requires frequent material transitions.
The main benefits are lower purge waste, more efficient multi-color printing, cleaner support workflows, and greater flexibility when combining materials.

Reduce Purge Waste Between Material Changes
A shared-nozzle system must clear the previous color from the melt zone before the next filament reaches the model.
A tool changer avoids repeated flushing because each toolhead keeps its assigned filament ready. This can reduce material waste and shorten the delay between transitions.
The Creator 5 Series uses four independent FlashSwap toolheads. Flashforge describes the system as eliminating purge waste during material switching. In practice, a small prime structure may still be used when the slicer needs to stabilize flow before the nozzle returns to the part.
The difference is scale. Tool changing reduces the amount of filament discarded during frequent swaps.
Complete Multi-Color Prints More Efficiently
Multi-color printing slows down when every change requires unloading, loading, and purging.
Independent toolheads reduce these interruptions. Each nozzle remains assigned to one material and stays ready for use.
This improves efficiency for toys, decorative models, educational aids, branded parts, and personalized products.
The Flashforge prototyping workflow guide explains how faster printing and more efficient material handling can reduce delays during repeated prototype iterations.
Combine Functional Materials in One Print
A tool changer can combine materials with different properties in one job.
A rigid part may need a flexible grip. A product enclosure may include a TPU seal. A prototype may use a structural material with a contrasting label or support interface.
These combinations require planning. The materials must use compatible temperatures and provide suitable bonding for the intended application.
Multi-material printing expands what a desktop printer can produce, but it does not replace design validation.
Print Support Materials With Less Waste
Complex geometries often need support beneath overhangs, bridges, and internal channels.
A dedicated toolhead can print a support interface material without repeatedly clearing the main nozzle. This makes soluble or low-adhesion support materials more practical for detailed prototypes.
Cleaner support removal can improve underside surfaces and reduce post-processing.
This is especially useful for engineering parts, presentation models, and internal structures that are difficult to reach after printing.
How Do Tool Changers Compare With Other Systems?
A tool changer should be compared with single-nozzle filament switching, IDEX dual extruders, and nozzle-swapping systems. Each structure has a different balance of cost, efficiency, waste, and material flexibility.
Tool Changers vs. Single-Nozzle Filament Switching
Single-nozzle systems are often easier to access.
They can print several colors through one nozzle, but they need to unload, load, and purge filament during each transition. This increases print time and waste when a model contains many changes.
Tool changers use separate nozzles and filament paths. They are more mechanically complex, but they can complete swap-heavy projects more efficiently.
A single-nozzle system remains practical for occasional decorative models. A tool changer becomes more valuable as the number of swaps increases.
Tool Changers vs. IDEX Dual Extruders
IDEX stands for independent dual extruder.
An IDEX printer uses two independently controlled extruders. It can print two materials, handle support interfaces, and support duplication or mirror-mode workflows on compatible machines.
A multi-toolhead printer extends the concept beyond two tools. It can assign several colors or materials to separate toolheads within one project.
IDEX remains useful for two-material jobs and repeat production. A tool changer is more flexible when the model needs three or four materials.
Tool Changers vs. Nozzle-Swapping Systems
A nozzle-swapping system changes the active nozzle or hotend rather than the complete toolhead.
This can help a printer switch nozzle sizes or material paths. However, not every nozzle-swapping design keeps separate extruders, heaters, and filaments ready at the same time.
A complete toolhead changer swaps a larger print module. Each tool can remain configured for its assigned material and nozzle.
A nozzle swap may be enough when the goal is to change print resolution. A full tool changer is more useful when the model requires frequent transitions between distinct materials.
Compare Speed, Waste, and Material Flexibility
The main differences can be summarized clearly.
| System | Tool Structure | Main Strength | Main Trade-Off |
| Single-nozzle filament switching | One nozzle with several filament inputs | Accessible multi-color printing | More loading, unloading, and purge waste |
| Fixed dual extruder | Two nozzles on one carriage | Two materials remain available | Heavier carriage and inactive-nozzle management |
| IDEX | Two independently controlled extruders | Two-material printing and duplication modes | Limited to two active tools |
| Nozzle-swapping system | Swappable nozzle or hotend | Flexible nozzle sizes or material paths | Capability depends on the mechanism |
| Multi-toolhead system | Several independent toolheads with docks | Faster swaps, lower purge waste, and broader material combinations | Higher mechanical complexity and upfront cost |
What Are the Best Multi-Tool Head 3D Printers in 2026?
The best 3d printer for a multi-tool workflow depends on the projects you plan to produce.
A desktop maker may prioritize efficient multi-color printing. A design studio may need broader material support. A larger workshop may need additional build volume or another toolhead.
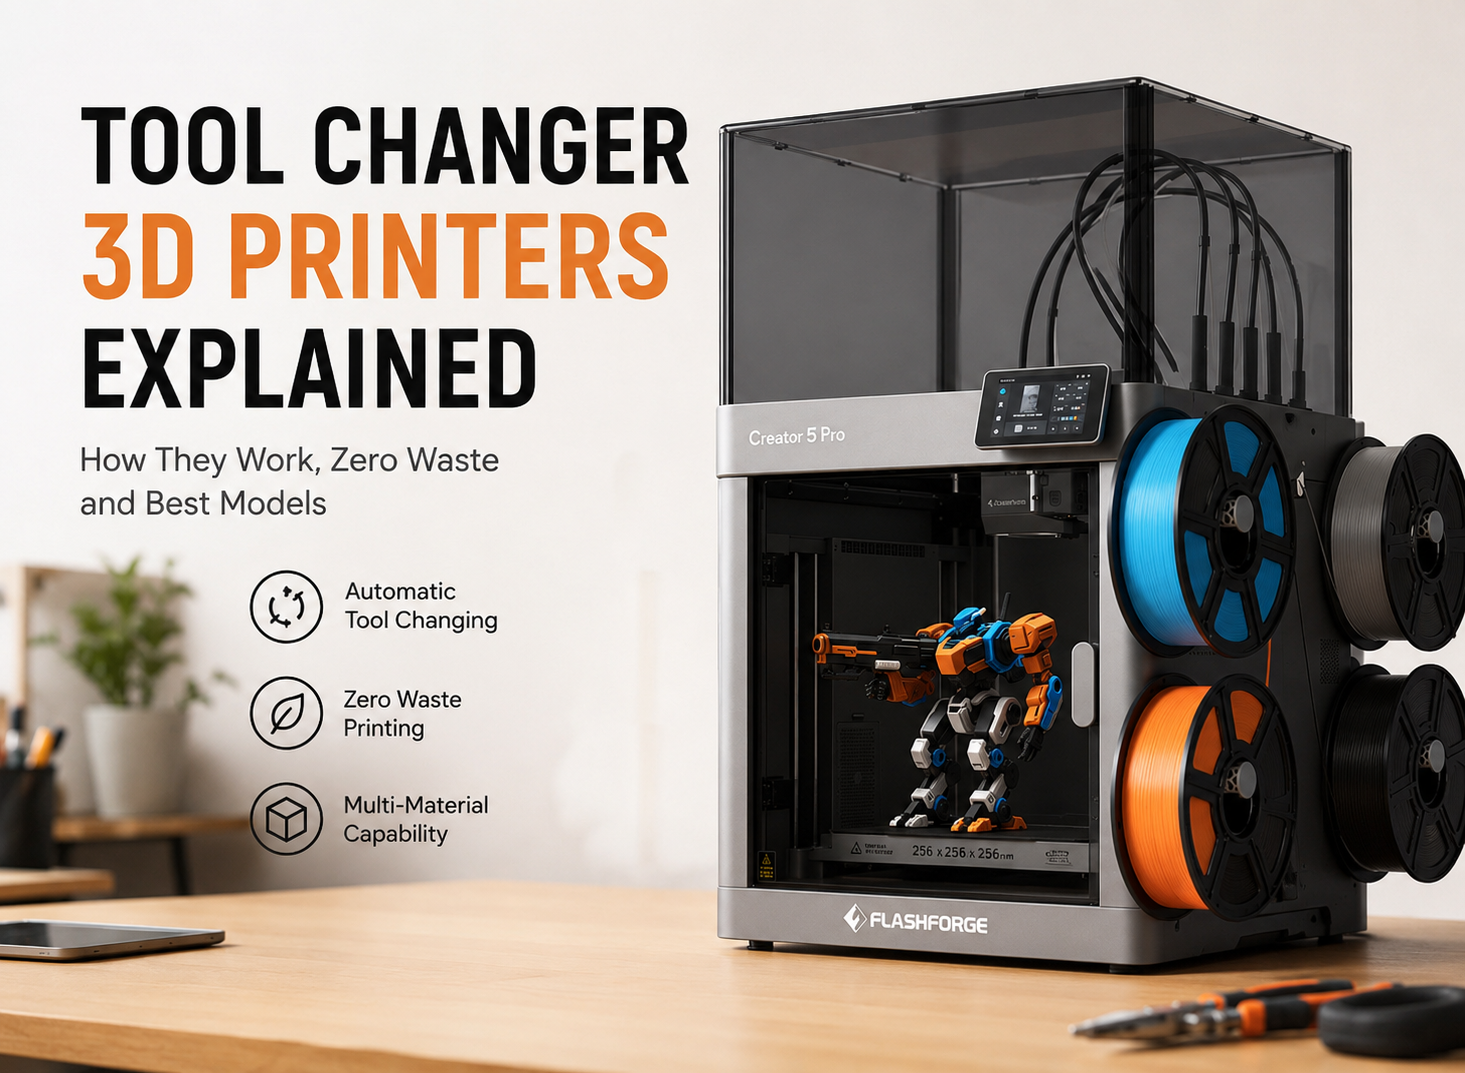
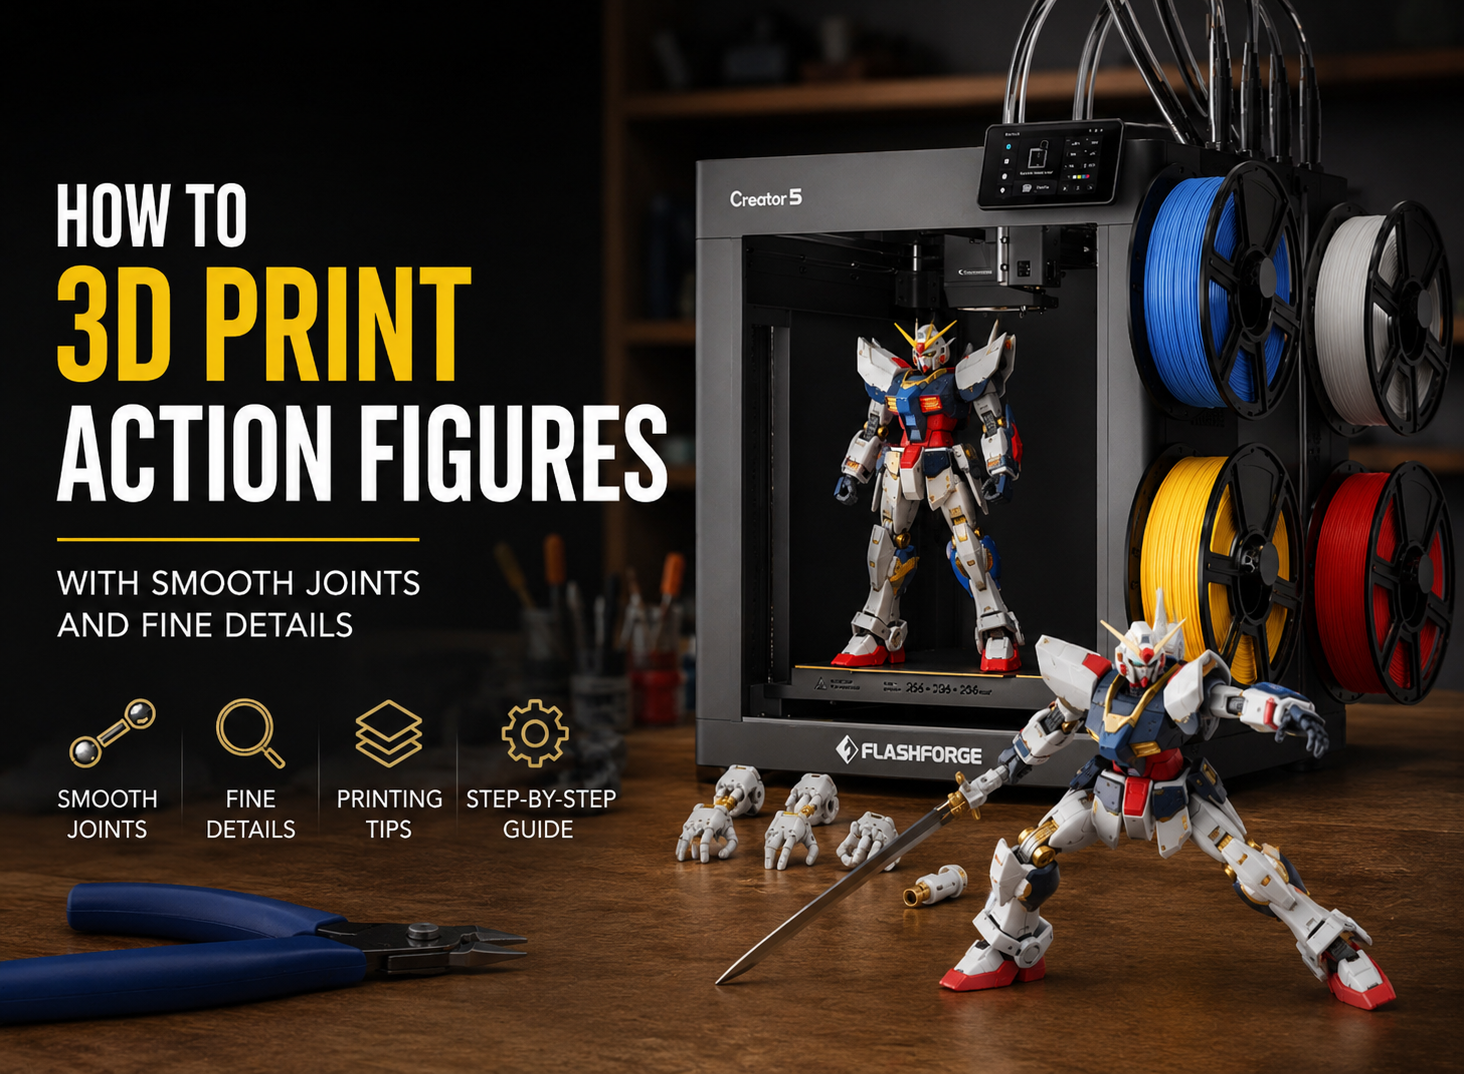
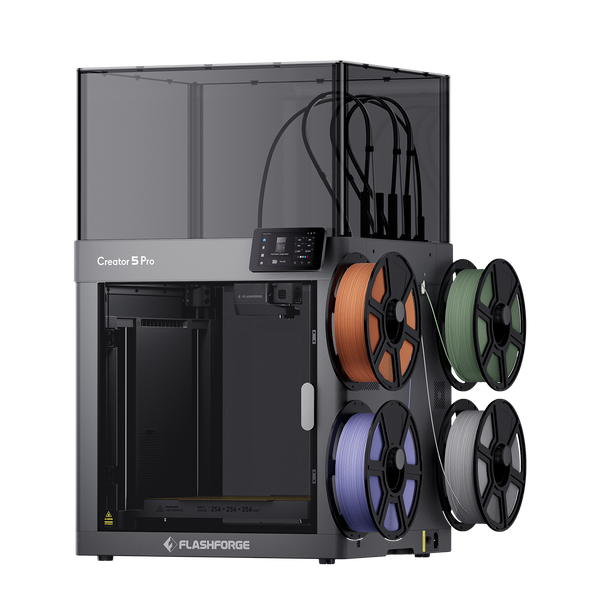
Flashforge Creator 5 for Desktop Workflows
The Flashforge Creator 5 is a practical desktop tool changer for creative and small-batch workflows.
It uses four independent FlashSwap toolheads and provides a 256 × 256 × 256 mm build volume. The open-frame structure suits makers, education, print farms, and small businesses that focus on multi-color and multi-material projects.
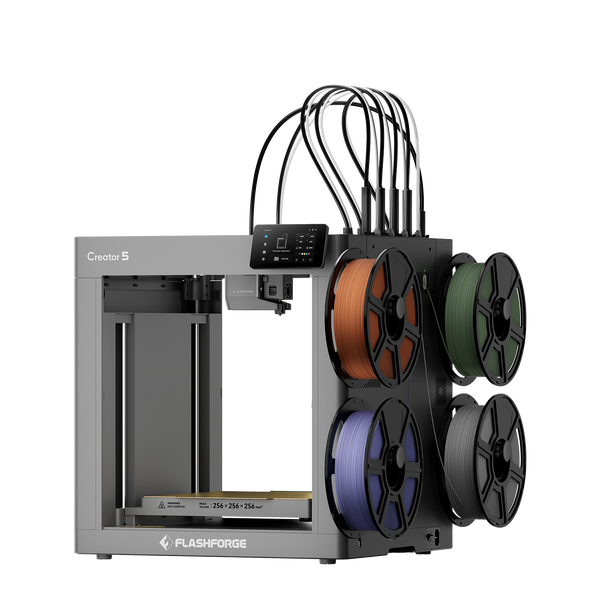
Flashforge Creator 5 4-Toolheads Multi-Color 3D Printer | 500% Faster, Zero Purge Waste
For buyers comparing a high speed 3d printer, the Creator 5 offers more than rapid motion. Its independent toolheads reduce repeated loading and purging during projects with frequent material changes.
The printer supports automatic multi-toolhead offset calibration, automatic leveling, remote monitoring, and multi-printer management. Its maximum print speed is 300 mm/s, while its maximum travel speed reaches 600 mm/s.
The Creator 5 works well for personalized products, teaching models, colorful prototypes, TPU projects, and support-material workflows. Its open-frame design is less suitable when chamber-dependent engineering materials require tighter temperature control.
Flashforge Creator 5 Pro for Engineering Filaments
The Flashforge Creator 5 Pro is the stronger option for professional prototyping and engineering-material workflows.
It uses the same four-toolhead FlashSwap architecture and 256 × 256 × 256 mm build volume as the Creator 5. It also adds a rigid enclosed frame, active chamber heating up to 65°C, HEPA13 with activated-carbon filtration, and an adaptive airflow system.
The enclosure expands the practical material range. Flashforge lists PC, PA, PC-ABS, and PPS-CF among the materials supported with the enclosed environment.
The Creator 5 Pro suits design studios, engineering teams, print-service providers, and selected small-batch production workflows. Its value comes from combining multi-color, multi-material, and engineering-filament capability in one desktop platform.
Flashforge Creator 5 Pro 4-Toolheads Enclosed Multi-Color 3D Printer | 500% Faster, Zero Purge Waste
Original Prusa XL for Larger Projects
The Original Prusa XL is a larger-format tool changer.
It provides a 360 × 360 × 360 mm build volume and can be configured with up to five toolheads. This makes it relevant for larger parts and projects that need an additional material path.
Its enclosure is optional. Buyers planning to work with temperature-sensitive materials should include the enclosure and total workspace requirements in the comparison.
The XL is most relevant when build volume and expandable toolhead count matter more than a compact desktop footprint.
Snapmaker U1 for Compact Multi-Color Printing
The Snapmaker U1 is another four-toolhead desktop option.
It provides a 270 × 270 × 270 mm build volume and uses a tool-changing workflow designed for faster filament transitions. Its compact desktop format suits makers who want a larger build area without moving into a large-format machine.
Buyers should compare material support, enclosure needs, calibration, software integration, and long-term maintenance before choosing a model.
Quick Comparison Table
| Model | Toolheads | Build Volume | Enclosure | Main Strength | Best For |
| Flashforge Creator 5 | 4 | 256 × 256 × 256 mm | Open frame | Efficient FlashSwap desktop workflow | Makers, education, personalization, and creative production |
| Flashforge Creator 5 Pro | 4 | 256 × 256 × 256 mm | Enclosed with active chamber heating up to 65°C | Engineering-material support in a desktop tool changer | Studios, prototyping teams, and selected production workflows |
| Original Prusa XL | Up to 5 | 360 × 360 × 360 mm | Optional enclosure | Larger build volume and expandable toolhead count | Larger multi-material parts and advanced workshops |
| Snapmaker U1 | 4 | 270 × 270 × 270 mm | Check current configuration | Compact four-toolhead workflow | Desktop multi-color and multi-material projects |
Product configurations and regional availability may change. Check the current listing before ordering.
How Should You Choose the Right Model?
When reviewing a 3d printer for sale, compare more than the initial price. Toolhead count, build volume, enclosure design, material support, calibration, and long-term filament use all affect the value of the machine.
Do not choose a model only because it has the highest toolhead count. The right printer should support the projects you plan to make without adding unnecessary complexity.

Match Toolhead Count to Project Complexity
For many users, two toolheads are enough to handle a wide range of practical printing tasks.
A primary material and a support interface can solve a wide range of prototype problems. Two colors are also sufficient for simple signs, labels, and product markings.
Three or four toolheads become more useful when a print needs several colors, flexible sections, or a separate support material.
A fifth toolhead adds more options, but it also increases cost and system complexity. Choose the number of tools according to the designs you expect to print regularly.
Check Build Volume Before Comparing Speed
Before comparing print speed or tool-changing efficiency, make sure the printer's build volume is large enough for the parts you plan to produce.
Measure the model and leave enough space for skirts, brims, and support structures. Check whether the docking system affects the usable build area.
Build volume matters most for enclosures, fixtures, product samples, cosplay components, and larger teaching models.
Compare travel speed, print speed, acceleration, and material flow only after confirming that the machine can handle the required part size.
Choose an Enclosure for Engineering Filaments
As you move from standard materials to engineering-grade filaments, enclosure design becomes increasingly important.
PLA and PETG often work well in open-frame machines. ABS, ASA, PC, PA, and fiber-reinforced materials need more careful temperature control.
Creator 5 is the stronger fit for open-frame creative workflows. Creator 5 Pro adds a fully enclosed structure and active chamber heating for more demanding materials.
The enclosure should match the filament and finished-part requirements, not simply the printer category.
Compare Calibration and Maintenance Requirements
Maintaining a multi-tool printer also means ensuring accurate nozzle alignment.
Check whether the machine calibrates toolhead offsets automatically and whether the process needs to be repeated after maintenance.
Review access to the docks, nozzles, toolheads, build plate, and filament paths. A capable machine still needs a workflow that your team can maintain.
Software support also matters. Clear profiles and tool-assignment settings reduce setup time and make repeat jobs easier to manage.
Estimate Long-Term Filament Waste and Cost
The total cost of ownership extends beyond the initial purchase price.
A single-nozzle multi-color print can consume extra filament during repeated purging. A tool changer reduces that waste by keeping separate materials ready in dedicated toolheads.
The type of 3d printer filament also matters. Material cost, print temperature, support requirements, and the number of tool changes can all affect the total cost of a project.
The savings become more noticeable on models with frequent color transitions or repeated prototype iterations.
Estimate the number of swaps, filament cost, print volume, and expected production frequency. A more capable tool changer may deliver stronger long-term value when it reduces waste and shortens production time.
Conclusion
A multi-tool head 3D printer offers more than multi-color printing. By keeping multiple materials ready in separate toolheads, it reduces purging, improves support-material workflows, and enables functional multi-material parts. Creator 5 suits makers and creative projects, while Creator 5 Pro adds enclosure control and broader material support for professional use.
When choosing a model, compare toolhead count, build volume, material compatibility, and calibration features. The best option is the one that fits your workflow without unnecessary complexity.
FAQ
Is a Tool Changer Better Than AMS?
It depends on the project.
A single-nozzle filament-switching system is often easier to access and suitable for occasional multi-color prints. However, repeated swaps require loading, unloading, and purging.
A tool changer becomes more valuable when a model needs frequent color changes, several materials, or dedicated support interfaces. Separate toolheads reduce purge waste and shorten the delay between transitions.
Do Multi-Tool Printers Need Purge Towers?
They may still use a small prime or wipe tower.
A tool changer avoids the large purge volumes required to clear a shared nozzle during every material change. However, the slicer may still create a small structure to stabilize extrusion pressure before the active nozzle returns to the model.
The exact behavior depends on the printer, filament, slicer profile, and model.
Can Toolheads Print Different Materials Together?
Yes, when the materials are compatible.
A tool changer can combine rigid and flexible materials, several colors, or a primary material with a support interface filament.
Check print temperature, adhesion, shrinkage, and finished-part requirements before combining materials in one model.
Is IDEX the Same as a Tool Changer?
No.
An IDEX printer uses two independently controlled extruders. A tool changer parks inactive toolheads and can switch between several tools during the same print.
Both systems support multi-material printing, but a tool changer provides more toolhead options and a different mechanical workflow.
How Many Toolheads Do You Actually Need?
Two toolheads are enough for a main material and a support interface.
Three or four tools are more useful for colorful models, functional material combinations, and designs that need separate support materials.
Choose the number of tools according to the projects you print regularly. More toolheads are useful only when the workflow benefits from them.
Are Multi-Tool Head Printers Worth It?
They are worth considering when multi-color or multi-material printing is a regular part of your workflow.
A tool changer can reduce purge waste, shorten transition time, and make support-material printing more practical.
For occasional single-color prints, a simpler machine may offer better value. For studios, product teams, and small-batch workflows, a multi-toolhead printer can expand capability while reducing material waste and manual work.