



A 3D printer opens up plenty of possibilities, from custom desk organizers to replacement parts around the house. Getting started, however, brings a few questions: how do you prepare a model, which settings matter, and what should you check before pressing print? This guide explains how to use an FDM 3D printer step by step, helping you complete your first project and avoid common beginner mistakes.
What Do You Need Before Your First 3D Print?
Before switching on a desktop 3D printer, gather a compatible spool, a simple model, and the software needed to connect the two.
A 3D Printer and Compatible Filament
For a first project, ordinary PLA is a practical starting point. It suits indoor objects such as pen trays, decorative models, and cable organizers. Check that the spool’s diameter and material are supported by your machine.

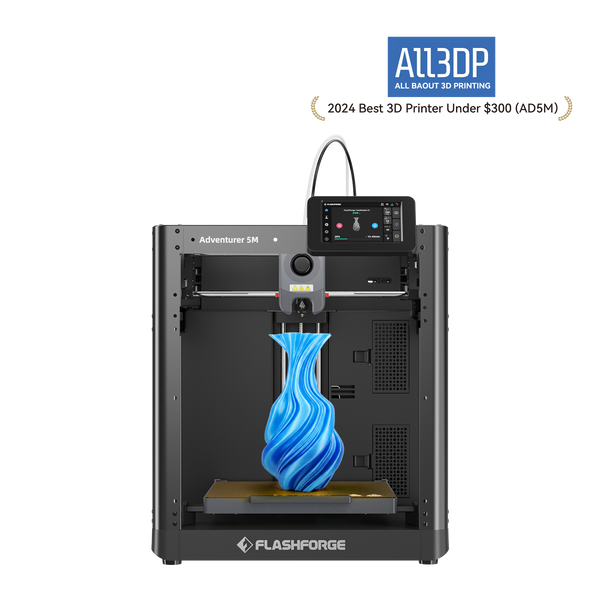
If those are the projects you have in mind, the Flashforge Adventurer 5M offers automatic leveling to reduce manual setup, plus quick-release nozzles for easier maintenance. You can spend more time learning how a model prints and less time adjusting the hardware.
A Printable 3D Model and Slicing Software
Downloading an STL file gives you the shape of an object, but the printer still needs instructions for building it. Slicing software creates those instructions, determining where the nozzle moves, how much material it extrudes, and which temperatures to use.
For supported Flashforge machines, Flash Studio Desktop, formerly Orca-Flashforge, provides printer profiles and tools for preparing models. Install it before your first session and select your exact machine and nozzle size.
A Suitable Workspace and Basic Tools
Give the printer a stable surface with enough room for moving components and freely rotating spools. A crowded desk where cables catch on the filament is likely to cause frustration. Keep the supplied tools, small cutters, and an approved plate cleaner nearby. Follow the manufacturer’s ventilation and electrical requirements, and position the machine where children and pets cannot reach hot or moving parts.
How to Use a 3D Printer: Step-by-Step
With your printer, filament, and software ready, you can begin your first 3D printing project. The steps below take you through setup, model preparation, printing, and removal; follow your printer’s quick start guide wherever the procedure differs.
Step 1 — Unpack and Set Up Your Printer
First, unpack your home 3D printer and place it on a stable, level surface with enough space for moving parts and filament spools. Keep the quick start guide nearby and check that all supplied components are present.
Follow the guide to remove protective packaging and shipping restraints, then install any detached parts, such as the display or spool holder. Check the cable connections and filament tubes. If the printer has a voltage selector, confirm that it matches your local power supply before plugging it in. Once these checks are complete, switch on the printer and follow the initial setup prompts.
Step 2 — Load the Filament and Prepare the Build Plate
3D printer filament is the plastic material your printer melts to build an object. To load it, place the spool on its holder, find the loose end, and insert it into the filament inlet shown in your printer’s guide. Select the loading option on the screen and follow the prompts. The printer will heat the nozzle and feed the material through it. Wait until melted plastic flows steadily from the nozzle, and check that the spool can turn freely as filament is pulled in.
Next, prepare the build plate—the surface your model will print on. With the plate cool, clean it using the manufacturer’s recommended method and make sure it is seated correctly. Apply adhesive only if the instructions recommend it for your plate and filament.
One color is enough for your first print. When you are ready to try a drawer label with contrasting lettering or another multicolor project, the Flashforge AD5X supports four-color printing through its integrated Intelligent Filament System (IFS). It switches between loaded filaments automatically during printing; you simply need to load them as instructed and assign the corresponding colors in the slicing software.

Step 3 — Level the Bed and Run Initial Calibration
The first layer needs a consistent gap between the nozzle and build surface. Run the leveling and calibration routines specified during setup, or follow the manual adjustment procedure if your machine requires one.
Automatic leveling cannot correct a dirty plate or a scrap of filament trapped underneath it. Check those physical conditions before changing software settings. Leave the Z offset alone unless your printer’s instructions or first-layer diagnosis indicate an adjustment is needed.
Step 4 — Find a Simple Model for Your First Print
An elaborate dragon may be tempting, but a shallow tray with a flat bottom gives you a clearer introduction. There are fewer overhangs, less support material, and fewer places for a problem to hide.
Read the designer’s printing notes before downloading. Check the dimensions, suggested orientation, and support requirements. When importing a 3MF project, review its settings carefully: it may contain profiles intended for someone else’s printer.
Step 5 — Slice the Model and Preview the Print
Open the model in Flash Studio Desktop and confirm the printer, nozzle, plate, and filament selections. Start with a standard quality preset.
Before slicing, think about how the object will be used. A tray needs to sit flat; a phone stand must hold the device at a useful angle. Turning a model can change both its support requirements and the strength of its printed features.
| Setting | A Sensible First Check |
|---|---|
| Layer height | Keep the standard preset for your nozzle |
| Infill | Use the preset for a simple decorative object |
| Supports | Check overhangs and the designer’s recommendations |
| Brim | Consider extra contact area for narrow bases |
| Temperatures | Follow the material and build-plate guidance |
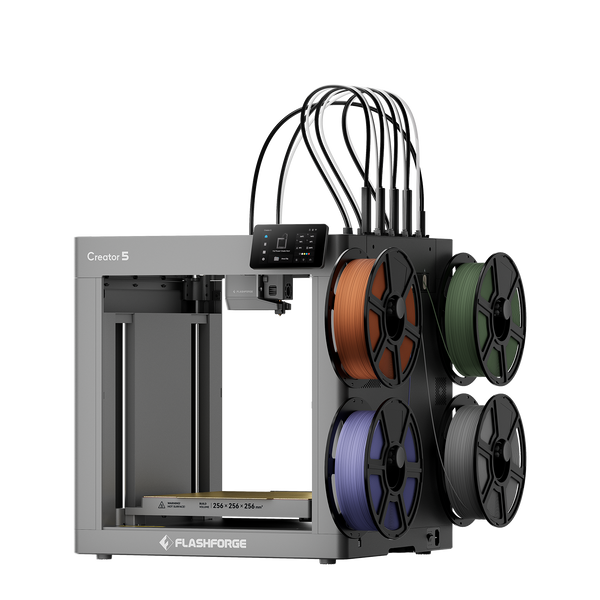
As your projects develop, you may want separate colors or compatible materials within one object. The Flashforge Creator 5 uses four independent toolheads for that workflow. Assign the relevant model regions to each tool, then check their positions in the preview. Different materials also need compatible printing conditions and bonding behavior.
Inspect the sliced layers before exporting. Confirm that the base meets the plate, required supports are present, and the estimated time fits your schedule.
Step 6 — Transfer the File and Start Printing
Transfer the sliced file using a supported method, such as USB or network connection. The printer requires a compatible output format; changing a filename extension does not convert it. At the machine, confirm the file and loaded material, then start the job. Heating, homing, and enabled calibration routines may take place before the model begins.
Step 7 — Check the First Layer and Monitor Progress
Even with a fast 3D printer, stay nearby for the opening layers. Look for connected lines that remain on the plate as the nozzle moves away. Large gaps, raised ridges, or material dragging behind the nozzle are reasons to investigate. If your cable clip slides across the bed, stop the print. Continuing will usually add loose material rather than repair the base. Once the print is established, check it periodically; remote viewing is useful but does not replace safe operation.
Step 8 — Let the Print Cool, Then Remove and Finish It
When printing finishes, resist the urge to pull the model straight off. Allow the plate and object to cool according to the material instructions. A removable flexible plate can often release a print with gentle bending. For a stubborn model, follow these methods for removing a 3D print from the bed without damage. Avoid levering against thin features. Remove supports carefully, then inspect the underside and edges before deciding whether anything needs adjustment.
What Should You Do When Your First Print Goes Wrong?
With any FDM 3D printer, a failed print is easier to diagnose when you describe what happened: did material stop flowing, did the base lift, or did fine strands appear between features?

The Filament Is Not Coming Out
Check the spool and feeding path first. Filament caught around a holder can resemble a nozzle problem. If the path is clear, confirm the loading state and temperature. Clicking or grinding may indicate resistance or a blockage. Use the manufacturer’s unloading and cleaning procedure instead of repeatedly forcing extrusion.
The First Layer Will Not Stick
Inspect the plate for fingerprints, residue, or incorrect seating, then verify the material and bed-temperature settings. Run leveling when required and assess nozzle height using your machine’s procedure. A brim can help a narrow part stay attached, but adding one will not solve contamination underneath it.
The Print Turns Into Strings or Comes Loose
Fine hairs between separate features may relate to temperature, retraction, or moisture. A tangled mass above a detached object is a different failure. Stop a loose print, remove debris safely, and investigate adhesion or missing supports before restarting. Treating both symptoms as “stringing” can send you toward the wrong settings.
How to Keep Your Printer Ready for the Next Project
Once a useful little tray takes its place on your desk, a few minutes of cleanup will make the next project easier.
Store Filament Properly and Keep the Build Plate Clean
Secure the filament end before storing an opened spool in sealed packaging with desiccant. A spool left beside an open window may gradually absorb moisture, even when it still looks normal.
This guide to storing 3D printer filament explains how storage needs vary by material and environment. If drying is necessary, follow the supplier’s temperature and duration guidance. Desiccant helps maintain dry storage; it does not replace active drying. Clear residue from the plate and avoid touching its printing area unnecessarily.
Follow the Printer’s Routine Maintenance Schedule
Remove loose scraps and inspect the filament path. Follow the manual’s schedule for checking belts, nozzles, and motion components. Lubricate only the specified parts with an approved product. Maintenance tasks may require cooling and disconnecting power, so check the procedure before beginning.
Common Mistakes to Avoid When Using a 3D Printer
Many beginner problems come from rushing familiar-looking steps. These habits deserve particular attention:
- Using a downloaded project without checking its profiles. Confirm your printer, nozzle, and material, even when the model looks ready to print.
- Skipping cleaning and initial calibration. Automatic features still depend on correct physical setup.
- Choosing an overly complicated first model. Learn with something small enough to inspect and repeat.
- Ignoring the first layer. A job starting successfully on screen does not mean material is adhering correctly.
- Changing several settings together. Adjust one relevant variable and record the result.
- Removing a warm print too forcefully. Cooling often makes release easier and helps protect the model’s base.
Conclusion
Your first successful print starts with preparing the machine, selecting suitable profiles, checking the sliced model, and watching the first layer. Choose something useful and manageable, then make adjustments with a clear purpose and test the results. As you move from a simple cable clip to more ambitious projects, these habits will help you print with greater confidence.
FAQs About Using a 3D Printer
Do You Need to Know 3D Modeling to Use a 3D Printer?
No. Downloadable models let you learn preparation and printing first. Modeling becomes useful when you want a drawer organizer to fit an exact space or need a part with custom dimensions.
Can You Use a 3D Printer Without a Computer?
Yes, when the machine offers built-in models or accepts compatible files that are already sliced. The Flashforge Adventurer 5M series includes built-in models for an initial print. Preparing your own downloaded designs gives you more control through desktop slicing software.
How Long Does a First 3D Print Usually Take?
There is no fixed duration. Model size, layer height, supports, and speed settings all matter. Choose a short project using the slicer estimate, and allow additional time for setup, calibration, and cooling.
Can You Print With a File Made for Another 3D Printer?
You can often reuse the model geometry, but machine-ready instructions require confirmed compatibility. In Flash Studio Desktop, select your own printer, nozzle, and filament profiles, then slice again. Imported 3MF projects also need their settings checked.
Can You Pause a 3D Print and Resume It Later?
Many machines support this through their controls. Follow the model-specific procedure and avoid moving the bed, toolhead, or object manually. Long pauses can affect adhesion or leave a mark. Switching off the printer is not equivalent to pausing.