


Removing a 3D print safely depends on the build plate, filament, bed temperature, and first-layer settings. A cooled flexible steel plate often releases a model with gentle bending, while a rigid surface may require a scraper held at a low angle.
Avoid pulling the model from the top or forcing it off while the bed is warm. Excessive force can crack thin parts, deform the base, or damage the build surface.
Why Is Your 3D Print Stuck to the Bed?
A print usually becomes difficult to remove because the first layer is too compressed, the bed is too hot, the filament bonds strongly to the surface, or too much adhesive was used.

The Nozzle Is Too Close to the Build Plate
When the nozzle starts too close to the bed, it presses the first layer deeply into the surface. The bottom may look unusually flat, glossy, or wider than the rest of the model.
Although a 3d printer for beginners may include automatic leveling, the Z offset should still be checked when prints repeatedly feel welded to the plate. Reducing first-layer compression is more effective than using a sharper removal tool.
The Bed Temperature Is Too High
A hot bed improves adhesion, but excessive heat can keep the first layer soft and pressed into a textured surface. Lower the temperature in small increments, such as 5°C at a time, until the model stays secure during printing but releases after cooling.
Flashforge’s PLA bed temperature guide explains how temperature affects adhesion, elephant’s foot, and first-layer quality.
The Filament Bonds Strongly to the Bed Surface
Some material and surface combinations create a stronger bond during 3d printing. PETG may grip PEI firmly, while TPU can stretch instead of releasing cleanly.
A PLA phone stand may lift off once cool, but a thin TPU gasket on the same plate may need to be peeled slowly around the edge. Use a suitable release layer when recommended for the material and surface.
Too Much Adhesive Was Applied
A thick glue layer can make removal harder by bonding across the entire model base. Old adhesive may also create uneven contact.
Clean the plate before reapplying glue, then use only a thin, even layer where the model will print.
What to Prepare Before Removing a 3D Print
Before handling the model, identify the plate type, let the printer cool, move the nozzle away, and prepare suitable tools.
Check the Type of Build Plate
Rigid glass and fixed surfaces cannot be bent, so the model must be loosened gradually from an edge. A removable flexible steel sheet can be taken out and gently flexed.
The Flashforge Creator 5 uses a removable PEI-coated steel plate and offers a 256 × 256 × 256 mm build volume. This is useful for wide multicolor or multimaterial models because the plate can be removed before the part is released.
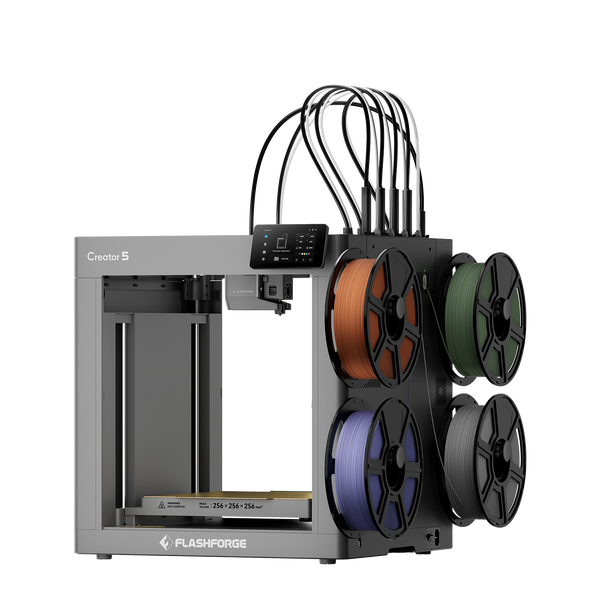
Flashforge Creator 5 4-Toolheads Multi-Color 3D Printer | 500% Faster, Zero Purge Waste
For example, a large multicolor sign is safer to release by flexing the plate on a work surface than by prying one corner inside the printer.
Let the Build Plate Cool Completely
Cooling often weakens the bond naturally as the model and plate contract. A slightly lifted corner or faint clicking sound may indicate that the part is beginning to release.
ABS, ASA, PA, and PC prints need more time because sudden cooling can cause warping or cracking. When using an enclosed abs 3d printer, wait for the chamber and bed temperatures to fall before opening the machine.
The Flashforge Creator 5 Pro combines a fully enclosed structure, active chamber heating up to 65°C, and a removable PEI-coated steel plate. After printing engineering materials, allow the chamber, bed, and model to cool before flexing the plate.
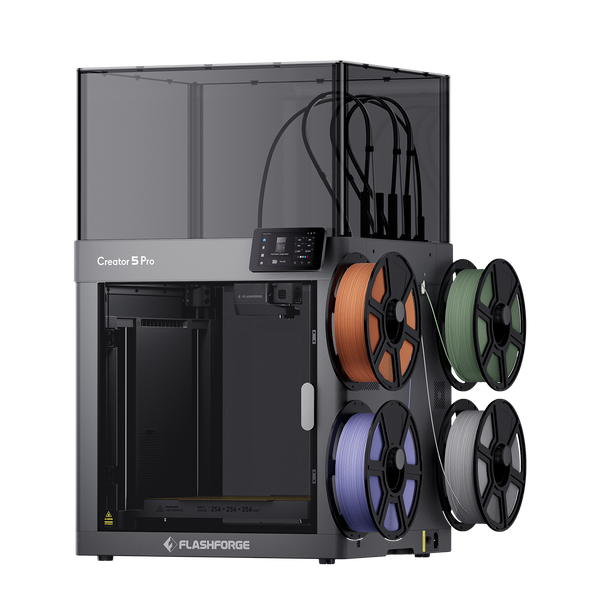
Flashforge Creator 5 Pro 4-Toolheads Enclosed Multi-Color 3D Printer | 500% Faster, Zero Purge Waste
Move the Nozzle Away from the Print
Create enough space around the model before removal. On any 3d printer, raise or park the toolhead through the controls whenever possible.
This is especially important for tall models. A vase that releases suddenly may swing into the nozzle if the toolhead remains close.
Prepare the Right Removal Tools
A plastic scraper, rounded-edge removal tool, and cut-resistant gloves are sufficient for most prints.
Avoid knives, screwdrivers, and damaged scrapers. Sharp tools can gouge PEI, chip glass, or slip toward your hand. Make sure the scraper edge is clean before use.
How to Remove a 3D Print from the Bed Step by Step
Begin with cooling and gentle flexing. Use a scraper only when the model still does not release.

Step 1: Let the Bed and Print Cool Down
Wait until the bed is close to room temperature. Large flat parts may need longer because they retain more heat and have a wider contact area.
Step 2: Remove the Detachable Build Plate
Move the toolhead away, lift the plate according to the printer instructions, and support it with both hands.
Place it on a clean surface before bending. Do not force it upward if clips, locating tabs, or magnetic edges are still holding it.
Step 3: Gently Flex the Build Plate
Hold opposite edges and apply a shallow bend. Rotate the plate and flex it from another direction if only part of the model releases.
Several small bends are safer than one deep bend. Stop if the plate develops a permanent curve or the model begins to crack at the base.
Step 4: Loosen the Print from One Edge
Choose a strong outer edge rather than a thin leg or decorative feature. Work around the perimeter and gradually widen any gap that appears.
A wide bracket may stay attached in the center after its corners lift. Loosening several edges spreads the force more evenly.
Step 5: Use a Scraper at a Low Angle
Keep the scraper nearly parallel to the plate and slide it into an existing gap. Push forward beneath the model rather than downward into the build surface.
Keep your free hand out of the tool’s path. Use a metal scraper only when the build-surface instructions permit it.
What to Check After Removing a 3D Print
Inspecting the model and plate helps identify whether the problem came from removal technique or print settings.
Check the Bottom of the Print for Damage
Look for cracks, stretched corners, missing first-layer sections, or wall separation. Damage concentrated near one corner usually means too much force was applied there.
A uniformly flattened bottom more often indicates that the nozzle was too close during printing.
Check the Build Plate for Scratches
Hold the plate under angled light. Marks that disappear after cleaning are usually filament or adhesive residue. Deep lines that catch a fingernail may indicate surface damage.
Remove Any Residue from the Build Plate
Clean away filament fragments, fingerprints, and glue before the next print. Removable PEI sheets can generally be washed with warm water and mild dish soap. Isopropyl alcohol can remove light oils when allowed by the plate manufacturer.
Do not pour liquid directly into the printer. Flashforge’s article on how to clean a 3D printer bed covers cleaning methods for different build surfaces.
Check the First Layer for Setting Issues
A good first layer should have connected lines without deep grooves, transparent gaps, or raised ridges. In fdm 3d printing, first-layer quality affects both adhesion during printing and release afterward.
When parts on one side of the bed are harder to remove, inspect leveling, plate seating, and the underside of the removable sheet. A small filament fragment under the plate can create uneven first-layer pressure.
Common Mistakes When Removing 3D Prints
Most damage occurs when the model is removed too early or force is applied in the wrong direction.
Forcing the Print Off Before the Build Plate Cools
Warm filament bends more easily. A part that feels firmly attached at 60°C may release with little effort at room temperature.
Unless the material requires warm removal, wait for the plate to cool.
Pulling the Print from the Top
Pulling a tall model from its highest point creates leverage and can crack the base. Keep your hands close to the plate and loosen the lower edge first.
Bending the Flexible Build Plate Too Far
Flexible steel is designed for shallow bending, not folding. Rotate the plate and flex it gently from several directions instead of creating one deep curve.
Holding the Scraper at Too Steep an Angle
A steep angle directs pressure into the surface and increases the risk of scratches. Lower the handle until the blade is nearly flat.
When heavy pressure is required, return to cooling or loosen another edge first.
Conclusion
The safest removal process is simple: let the print cool, remove the flexible plate when possible, and release the model gradually from its edges. A scraper should be the final step rather than the first.
When prints repeatedly stick too hard, review the Z offset, bed temperature, leveling, adhesive use, and material-to-surface combination. Correcting the first layer is safer than applying more force after every print.
FAQ
Why Is a 3D Print Stuck on Only One Side of the Bed?
Uneven adhesion often indicates poor leveling, debris beneath a removable plate, or inconsistent cleaning. Reseat the plate, clean both sides, and run a first-layer test.
Can Removing a Print Affect Bed Leveling?
Normal removal from a detachable plate should not affect leveling. Problems can occur if the bed is pushed, the nozzle is struck, or the plate becomes permanently bent.
How Do You Remove TPU Prints Without Stretching the Model?
Let the TPU cool, loosen a broad edge, and peel it slowly while supporting the base. Keep the movement close to the plate rather than pulling upward.
Will Isopropyl Alcohol Damage PLA?
Brief contact with plain isopropyl alcohol is unlikely to damage a standard PLA print. However, soaking the model is unnecessary, and IPA will not dissolve thick PLA residue.
How Can You Prevent 3D Prints from Sticking Too Hard Next Time?
Check the Z offset and bed temperature, apply adhesive only when necessary, and keep the plate clean. Change one setting at a time and test the result with a small first-layer model.