


Quick answer: Editing an STL file depends on the type of change you need.
- For simple adjustments like scaling, rotating, or cutting, use a slicer or beginner-friendly mesh editor.
-
For adding text, modifying shapes, or repairing models, tools like Tinkercad, Blender, or mesh repair software can help.
-
For precise changes to functional parts, such as holes, brackets, or mechanical components, a CAD workflow is usually the better choice.
Before You Edit: Know What Kind of STL Change You Need
Before choosing software, decide what kind of STL edit you need. This helps you avoid using a complex CAD tool for a simple print setup change, or trying to make precise engineering edits in a tool meant for surface mesh work.
Simple Size and Scale Changes
If you only need to make an STL file bigger or smaller, start in a slicer. Scaling, rotating, mirroring, and arranging models are print preparation tasks. You do not need to rebuild the model just to make it fit your print bed.
This is common when a downloaded model is too large, too small, or imported at the wrong unit scale. STL files do not always carry reliable unit information, so a model designed in inches may open as millimeters, or the other way around. Always check the final dimensions before slicing.
Basic Model Edits Like Cutting or Adding Text
Basic STL editing includes cutting a model into smaller parts, adding raised text, adding a logo, removing a small section, or combining simple shapes. These edits are usually possible with beginner-friendly modeling tools or mesh editors.
This type of edit is useful for nameplates, organizers, cosplay accessories, toys, simple brackets, and decorative models. The goal is not to redesign the whole file. It is to make a small change while keeping the mesh printable.
Functional Part Changes Need CAD Tools
If the STL is a functional part, use a CAD tool when precision matters. Examples include moving screw holes, resizing a mounting slot, adjusting a hinge, changing wall thickness, or modifying a snap-fit feature.
You can edit an STL mesh directly, but it is not the same as editing the original CAD file. If you need accurate dimensions, clean flat faces, aligned holes, or repeated design changes, converting or rebuilding the part in CAD is usually safer.
Broken STL Files Need Mesh Repair First
Some STL files look fine on screen but fail in the slicer. Common problems include holes, non-manifold edges, flipped normals, self-intersections, thin walls, and disconnected shells.
Repair these problems before making new edits. If you edit a broken mesh first, the damage can become harder to fix later. A mesh repair step can often close holes, remove extra internal faces, and make the model easier to slice.
How to Edit STL Files Step by Step
A safe STL editing workflow follows a clear order: open the file, inspect it, repair it, make the edit, check printability, and export a clean version.

Step 1: Open the STL File in the Right Tool
Choose the tool based on the edit. For basic print preparation, a slicer is often the easiest place to start. Flashforge users can open STL files in Flash Studio Desktop to scale, rotate, arrange, slice, and prepare models for supported Flashforge printers. This is especially useful when the change is about print setup rather than rebuilding the model itself.
For deepero gemetry changes, open STL in a mesh editor or CAD tool instead. A slicer can prepare a model for printing, but it is not always the right place to rebuild geometry.
Step 2: Inspect the Model for Problems
Before editing, inspect the STL from several angles. Look for missing surfaces, gaps, floating pieces, overlapping geometry, rough edges, or extremely thin walls.
Also check the model size. If the part imports as very tiny or extremely large, it may have a unit issue. This is one of the most common problems with downloaded STL files. Correct the scale before doing detailed edits, otherwise, the finished model may not fit its intended use.
Step 3: Repair the Mesh Before Making Changes
If the model has holes, open edges, inverted normals, or non-manifold geometry, repair the mesh before editing. Many slicers and mesh tools can detect or repair common STL problems.
After repair, inspect the model again. Automatic repair is helpful, but it can sometimes close openings that were meant to stay open or simplify small details too much. For a decorative model, this may be acceptable. For a functional part, check the repaired area carefully.
Step 4: Make the Actual STL Edit
Now make the change you need. For simple edits, this may mean scaling, cutting, adding text, hollowing a model, or combining shapes. For detailed mesh edits, use selection tools to move, delete, smooth, or rebuild parts of the mesh.
For functional edits, import the STL into a CAD tool and convert it if needed. In some cases, the cleaner approach is to use the STL as a reference and rebuild the key features. This takes longer, but it gives better control over holes, flat faces, tolerances, and part strength.
Keep changes as simple as possible. The more you edit a mesh, the more likely you are to create new print problems.
Step 5: Check Printability After Editing
After editing an STL file, the real test is whether the model slices and prints cleanly. Reopen the file in your slicer and check the layer preview. Look for missing walls, strange gaps, unsupported floating areas, thin sections, or unexpected toolpaths.
For beginners testing resized parts, repaired models, or simple custom designs, a user-friendly printer such as the Flashforge Adventurer 5M can make this step easier. Its automatic leveling, quick-detach nozzle system, CoreXY all-metal structure, and practical 220 × 220 × 220 mm build volume are well suited for everyday STL test prints. Pairing the edited model with the right 3d printer filament also helps reduce print failures, especially when testing small details, thin walls, or functional parts.
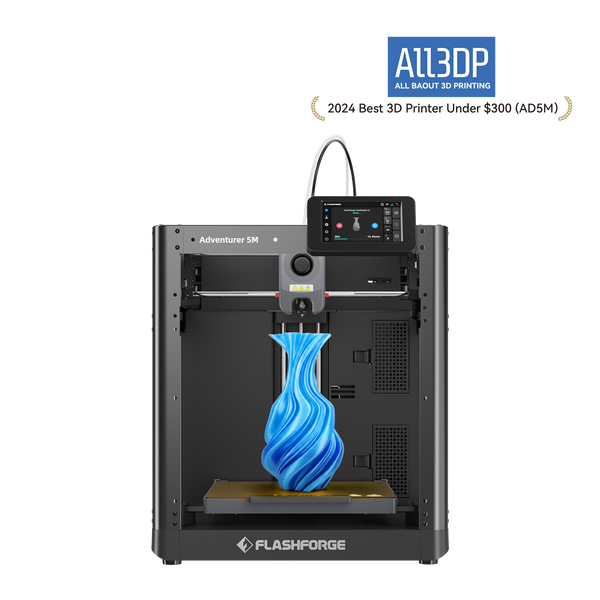
Imprimante 3D Flashforge Adventurer 5M, vitesse élevée de 600 mm/s, adaptée aux débutants
Flashforge’s best hobby 3D printer guide also explains why slicer settings, layer height, infill, speed, supports, and printer maintenance affect final print quality. That makes it a useful next read after editing your STL file.
Step 6: Export the Edited STL File
Once the model passes inspection, export it as a new STL file. Do not overwrite the original unless you are sure you no longer need it.
Use a clear file name, such as phone-stand-resized-v2.stl or bracket-hole-fixed.stl. If your workflow supports 3MF, consider saving a project file too. The 3MF format can store more manufacturing information than STL, including material and color data, according to the Library of Congress 3MF format description.
Best Tools for Editing STL Files
No single tool is best for every STL edit. The right choice depends on the task, your skill level, and whether the model is decorative or functional.
Tinkercad for Beginners
Tinkercad is useful for simple edits such as adding text, cutting holes, combining basic shapes, or making quick decorative changes. It is easy to learn and works well for small projects.
It is not ideal for heavy mesh repair or precise part redesign. Use it when the goal is quick customization rather than engineering accuracy.
Blender for Detailed Mesh Editing
Blender can open STL files and is strong for detailed mesh editing. It works well for organic models, character models, sculpted shapes, surface cleanup, smoothing, and visual design changes.
The learning curve is higher than beginner tools, but it gives much more control over mesh geometry. It is better for artistic edits than precise mechanical changes.
Meshmixer or Similar Repair Tools
Mesh repair tools are helpful when the STL has holes, broken surfaces, disconnected shells, or non-manifold geometry. They can often fix common printability problems before the file enters the slicer.
Use repair tools before making major edits. A repaired STL is easier to cut, scale, combine, or convert later.
Fusion 360 or FreeCAD for Precise Part Changes
CAD tools are better for precise functional edits. Use them when you need accurate dimensions, mounting holes, snap fits, brackets, enclosures, or repeated design changes.
The challenge is that STL files are mesh files, not native CAD files. Some can be converted into editable bodies, but complex meshes may be difficult to convert cleanly. In those cases, rebuild the part using the STL as a reference.
Common STL Editing Tasks and Print Tips
Most STL editing jobs fall into a few common categories. Each one has its own print risk.

How to Resize an STL File
The easiest way to resize an STL file is in a slicer. Import the model, select it, and scale by percentage or by final dimension.
Use uniform scaling when the model needs to keep its proportions. If you scale only one axis, holes, threads, and snap-fit parts may stop working. For functional parts, print a small test section before committing to a long print.
How to Cut or Split an STL File
Cutting an STL file is useful when the model is too large for your FDM 3D printer, needs easier support placement, or should be printed in separate colors or materials.
After splitting, add alignment features if needed. Simple pins, sockets, flat faces, or registration marks can make assembly easier. Also think about where the seam will appear after printing.
How to Add Text, Logos, or Small Details
Adding text or a logo is one of the most common STL edits. Raised text is usually easier to print than engraved text, especially on small parts. Keep letters thick enough to survive slicing and printing.
For logos, simplify the shape before adding it to the model. Very thin lines, tiny gaps, and sharp details may not print well with a standard nozzle.
How to Avoid Problems After Editing
After any edit, slice the model and preview the layers. Pay attention to thin walls, missing surfaces, unsupported overhangs, and small details that disappear in the slicer.
If the slicer preview looks wrong, go back to the editing tool and repair the file again. Do not assume the printer will fix a bad mesh.
Conclusion
Editing STL files is easiest when you match the tool to the job. Use a slicer for scaling, rotation, layout, and print preparation. Use a beginner modeling tool for simple text, cuts, and shape changes. Use a mesh editor for surface edits and repair. Use CAD software when the part needs precision.
If you are editing STL files often and your current machine struggles with setup, leveling, or nozzle maintenance, checking a current 3d printer sale can be a practical way to upgrade your workflow without overcomplicating the printing process.
The most important step is checking printability after editing. A model can look correct on screen and still fail in the slicer. Always inspect the mesh, repair errors, preview the sliced layers, and test print important parts before using them in a final project.
FAQ
Can I Convert an STL File to CAD?
Yes, some STL files can be converted to CAD, but the result depends on the mesh. Simple mechanical shapes are easier to convert. Complex organic models or high triangle count meshes may be difficult to turn into clean CAD geometry. For precise parts, it is often better to use the STL as a reference and rebuild the design.
Is STL or 3MF Better for 3D Printing?
STL is widely supported in 3D printing and works well for simple, single-material models. 3MF can store more information, including units, material data, color information, and print setup details. For basic model sharing, STL is still common. For multi-color, multi-material, or project-based printing, 3MF can be more useful.
Why Does My Edited STL File Fail in the Slicer?
An edited STL file may fail because the mesh has holes, flipped normals, non-manifold edges, overlapping surfaces, thin walls, or disconnected shells. Repair the model first, then reopen it in the slicer and check the layer preview before printing.
Can Blender Open STL Files?
Yes, Blender can open STL files. It is useful for mesh editing, sculpting, smoothing, cutting, and visual model changes. It is less ideal for precise mechanical edits unless you are comfortable working directly with mesh geometry.
How Do I Import an STL File Into Onshape?
To import an STL file into Onshape, upload the file into a document, then insert or reference it in a part studio. An STL usually enters as mesh data, not as a fully editable parametric CAD model. For accurate changes, you may need to rebuild key features using the mesh as a guide.
What Is the Difference Between Creating and Editing STL Files?
Creating an STL file usually starts with a 3D model made in CAD or design software, then exports it as a mesh for printing. Editing an STL file means changing an existing mesh. Editing is often harder because the STL does not contain the original sketches, dimensions, constraints, or design history.