


The best infill pattern for 3D printing depends on what the part needs to do. A display model, a cosplay prop, a flexible TPU part, and a functional bracket all need different internal structures.
Infill affects strength, print speed, filament cost, flexibility, and part weight. The best setting depends on material, print orientation, load, and printer capability—not simply the strongest pattern or highest percentage.
Quick Answer: Best Infill Pattern by Use Case
For most prints, start with these simple choices:
|
Use Case |
Best Infill Pattern |
Typical Density |
Why It Works |
|
Display models and toys |
Lines, lightning, grid |
5% to 15% |
Saves filament and prints faster |
|
General PLA prototypes |
Grid, gyroid |
10% to 20% |
Good balance of speed and strength |
|
Functional parts |
Cubic, gyroid, triangles |
25% to 40% |
Better internal support |
|
Flexible TPU parts |
Gyroid, concentric |
10% to 25% |
Keeps the part flexible |
|
Large props and cosplay parts |
Lightning, lines |
5% to 15% |
Reduces weight and print time |
|
Multi color or multi material parts |
Gyroid, cubic, grid |
10% to 30% |
Balances material use and stability |
How Infill Pattern Affects Strength, Speed, and Filament Cost
Infill is the internal structure inside a 3D printed part. It supports the outer walls, reduces material use, and helps decide how the part reacts to force. Flashforge’s guide to what infill is in 3D printing is a helpful starting point if you want a basic explanation of infill density, patterns, and slicer settings.
Strength Depends on Direction and Wall Thickness
A strong part is not created by infill alone. In FDM 3D printing, parts are built layer by layer, so a part may be stronger in one direction and weaker in another. A hook printed flat can behave very differently from the same hook printed upright.
Research on FDM-printed parts has shown that infill pattern, infill density, and layer thickness can all affect tensile and impact strength. This supports a practical rule: choose infill together with wall count, material, and print orientation, not as a separate setting.
For many functional parts, adding more walls is often more useful than jumping to very high infill. Three or four walls with moderate cubic or gyroid infill can be more practical than using fewer walls with extremely dense infill.
Print Speed Changes with Toolpath Complexity
Simple patterns usually print faster. Lines and grids are easy for the printer to follow, so they are good for quick prototypes, classroom prints, and low-cost parts.
More complex patterns such as gyroid, cubic, triangles, and honeycomb can add toolpath movement. They may improve internal support, but they can also increase print time. If speed matters more than strength, use a simpler pattern at a lower density.
Filament Cost Rises with Infill Density
Infill density directly affects how much 3D printer filament a model uses. A 10% infill model may use much less material than the same model at 40% or 60%.
Higher density can improve stiffness, but it is not always worth the extra material. A display model does not need the same density as a bracket or clip. For large props, low infill with stronger walls often gives a better weight-to-strength balance.
Infill Density and Infill Pattern Work Together
Pattern and density should be chosen together. A strong pattern at very low density may not perform well. A simple pattern at moderate density may be enough for many everyday prints.
For example, 15% grid works well for a simple PLA prototype. A 30% gyroid or cubic pattern is better for a stronger functional part. A 10% lightning pattern may be enough for a large visual prop.
Best 3D Printing Infill Patterns Explained
Each infill pattern has a different balance of strength, print speed, flexibility, and material use.

Gyroid Infill: Balanced Strength and Flexibility
Gyroid infill is one of the best all-around choices. It creates a smooth internal structure that supports the part in multiple directions. It is useful when you want balanced strength, moderate flexibility, and reasonable material use.
Gyroid can also work well for TPU because it supports the part in multiple directions. Its more complex toolpath may take longer than simpler line-based patterns, depending on the model and slicer. It is a practical choice for functional prototypes, flexible parts, and parts loaded from multiple directions.
Cubic Infill: Strong Internal Support
Cubic infill creates a three-dimensional internal structure. It is a good choice for functional parts that need more stiffness than a simple visual print.
Cubic works well for brackets, housings, fixtures, and prototypes that need stronger internal support without using 100% infill. It is usually slower than lines or grid, but it often gives a better strength-to-weight balance for practical parts.
Grid Infill: Simple, Fast, and Reliable
Grid infill is common because it is familiar, widely supported, and reasonably fast for everyday use. It works well for PLA and PETG prototypes, household parts, organizers, and classroom models.
Grid is not always the strongest pattern, but it is often good enough for general printing. It is a practical middle ground when you do not need a specialized pattern.
Lines Infill: Best for Fast and Low-Cost Prints
Line infill is one of the fastest and most material-efficient patterns. It is a good choice for draft prototypes, visual models, lightweight parts, and prints where cost matters more than strength.
The downside is directional strength. Lines may support one direction better than another, so they are not ideal for parts that must handle repeated stress or force from multiple directions.
Triangles and Honeycomb: Strong but Slower
Triangles and honeycomb can create strong internal structures, but they often take longer to print. They may also use more material depending on density and slicer settings.
Use these patterns for rigid mechanical prototypes or parts where strength matters more than speed. For many everyday functional parts, cubic or gyroid may offer a more practical balance.
Lightning Infill: Lowest Material Use for Visual Models
Lightning infill is designed to save filament. It builds internal support only where needed, especially under top surfaces.
This makes it useful for large display models, props, and decorative shells. Avoid lightning for load bearing parts because it does not create a consistent internal structure throughout the model.
Choosing Infill Pattern by Material
Material choice changes how infill behaves. Flashforge’s 3D printer filament types guide can help users compare PLA, PETG, TPU, ABS, ASA, PA, PC, and composite materials before choosing infill settings.
PLA: Easy Printing for Models and Prototypes
PLA works well with most infill patterns. For display models, use lines, grid, or lightning at 5% to 15%. For general prototypes, use grid or gyroid at 15% to 25%. For stronger PLA parts, use cubic or gyroid at 25% to 40%.
PLA is stiff, so high infill can make the part harder but not always tougher. For impact resistance, material choice and wall thickness may matter more than very high infill.
PETG: Durable Prints with Some Flex
PETG is tougher and less brittle than PLA. It works well for clips, organizers, brackets, and everyday functional parts.
Use grid for general PETG parts, gyroid for balanced flex, and cubic when stiffness matters. A good starting point is 15% to 25% for everyday parts and 25% to 40% for stronger parts. PETG can string more than PLA, so tune retraction, cooling, and travel settings for cleaner results.
TPU: Keep the Infill Flexible
TPU is flexible, so infill affects how easily the finished part bends or compresses. Gyroid is a common option for balanced flexibility, while concentric infill can work well for geometries that benefit from following the model’s shape.
For softer TPU parts, start with 5% to 15% infill. For grips, protective parts, or wearable pieces, 15% to 30% may work better depending on the desired flexibility.
For flexible multicolor projects, Flashforge AD5X supports multicolor printing with TPU 64D, along with PLA and PETG. This makes it useful for colorful flexible models, soft figurines, and wearable pieces, while stable filament feeding helps reduce extrusion issues with TPU.
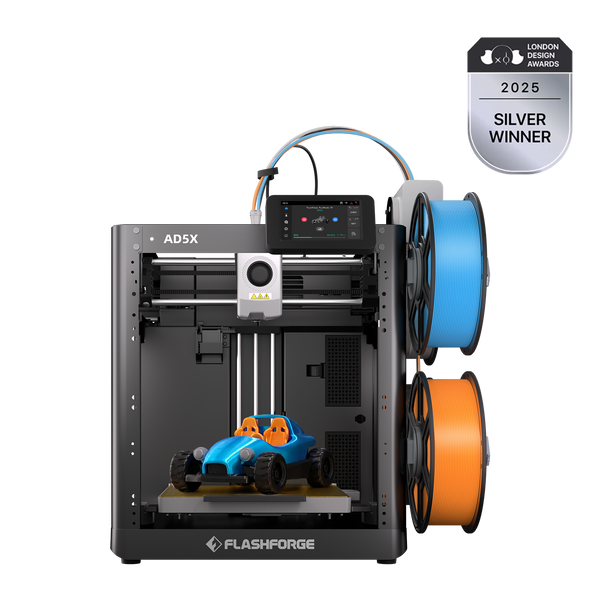
Flashforge AD5X – Imprimante 3D multicolore pour une impression couleur haute vitesse
ABS, ASA, PA, and PC: Match Pattern with Printer Control
ABS, ASA, PA, and PC are used for stronger or more heat resistant parts, but they need more careful printing conditions than PLA or PETG. Warping, layer splitting, and poor adhesion can become bigger problems than infill choice.
For these materials, focus on bed adhesion, chamber stability, drying, and temperature control first. Then choose cubic, gyroid, or triangles at 20% to 50%, depending on the part.
High density infill can increase print time and internal stress. For engineering parts, controlled printing and strong walls are often better than simply using 100% infill.
Recommended Infill Settings for Common 3D Prints
Miniatures, Toys, and Display Models
Miniatures, toys, and display models usually need good surface quality more than internal strength. Use lines, grid, or lightning at 5% to 15% infill. Two to three walls are enough for many models, while very small parts may already print mostly solid, making outer walls more important than infill.
Brackets, Clips, and Functional Parts
Functional parts need stronger settings, but 100% infill is not always the answer. Use cubic, gyroid, or triangles at 25% to 40% infill with three to five walls.
Print orientation is critical. Place the part so layer lines are not the weakest point under the main load. For clips or snap-fit parts, PETG or TPU may work better than PLA.
Large Props and Cosplay Parts
Large props and cosplay parts should stay light. Use lightning, lines, or low-density cubic at 5% to 15% infill, and increase wall count instead of filling the whole part. This keeps the model lighter, lowers filament cost, shortens print time, and makes post-processing easier.
Multi Color or Multi Material Prints
Multicolor and multi-material printing adds another cost and efficiency factor. Infill affects strength, material use, and print time, while material changes and purge settings can further affect total printing time and waste.
Use gyroid, cubic, or grid at 10% to 30%, depending on the model. For color models or mixed material parts, Flashforge Creator 5 is a strong match because it uses four independent FlashSwap toolheads. This structure suits color models, product appearance parts, soft and rigid material combinations, support material workflows, and complex structures where reducing repeated filament changes and purge related waste can improve print efficiency.
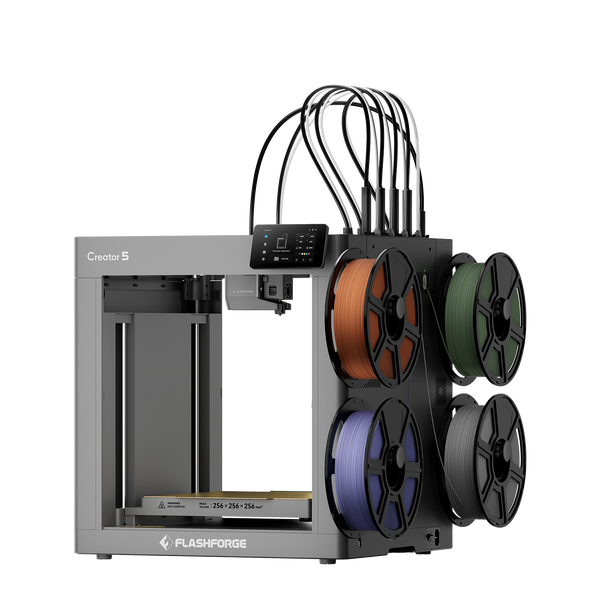
Flashforge Creator 5 4-Toolheads Multi-Color 3D Printer | 500% Faster, Zero Purge Waste
Common Infill Mistakes to Avoid
Using 100% Infill for Every Strong Part
100% infill is overkill for most prints. It uses more filament, takes longer, and can make cooling or dimensional issues harder to manage. Use it only when the part truly needs a dense core, such as small parts that will be drilled, tapped, or heavily compressed.
Choosing a Strong Pattern for a Non Load Bearing Model
Ignoring Print Orientation
Forgetting Material and Printer Limits
A strong pattern cannot fix poor material choice or unstable print conditions. TPU needs stable feeding, while ABS and ASA need better temperature control and PA or PC often require careful moisture management. Before raising infill density, make sure the material, nozzle temperature, bed adhesion, cooling, and printer environment match the job.
Conclusion: The Best Infill Pattern Depends on the Job
The best infill pattern for 3D printing depends on the model’s purpose, material, force direction, speed needs, and filament cost. Gyroid is a strong all around choice for balanced strength and flexibility. Cubic is useful for stronger functional parts. Grid is simple and reliable for general printing. Lines are good for fast and low cost prototypes. Lightning is best for display models and large lightweight shells.
Do not choose infill only by looking for the strongest pattern. A better approach is to balance infill pattern, density, wall thickness, material, print orientation, and printer capability. That is how you get strong parts without wasting time or filament.