


Table of Contents
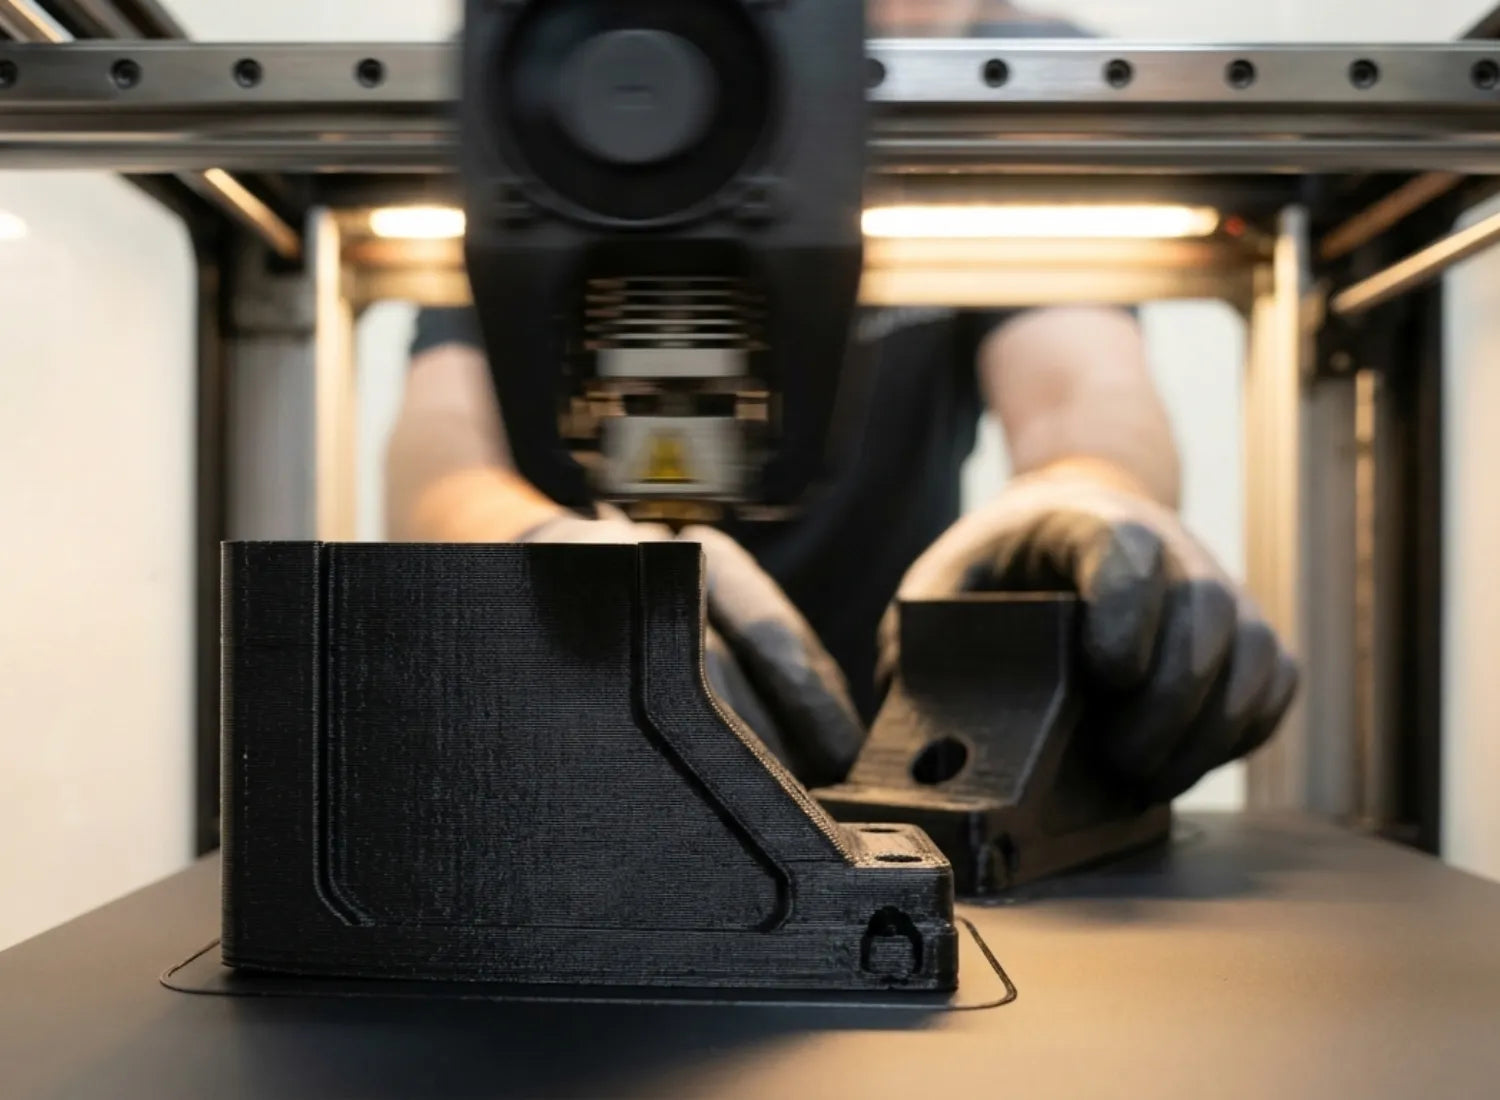
With the rapid evolution and growing popularity of consumer-grade desktop 3D printers, the barrier to entry for FDM technology is lower than ever. These machines are increasingly becoming everyday tools for creative expression and practical problem-solving.
However, understanding the internal mechanics—from precision motion systems and thermal management to electronic control units—is vital for every user. That is why Flashforge is pulling back the curtain on FDM (Fused Deposition Modelling) 3D printing. This guide will help you understand how every component works in harmony to transform a digital design into a tangible physical object. Whether you are a newcomer or a seasoned pro, mastering these core components will help you boost your print quality and significantly extend the lifespan of your equipment.

The Importance of Knowing 3D Printer Parts
When you truly understand the internal anatomy of your 3D printer, you become more than just a user—you become a diagnostic expert. Much like a seasoned mechanic, you gain the intuition to identify issues by observing subtle symptoms, listening to mechanical rhythms, and feeling the machine’s movements. Whether it is a precision error in the motion system, a temperature fluctuation in the hotend, or signal interference on the motherboard, this knowledge transforms you from a passive operator into an active problem solver.
Furthermore, a deep dive into how each component functions allows you to make smarter, more cost-effective upgrade decisions. For instance, you will understand exactly why high-temperature materials require an all-metal hotend rather than a standard one, or how linear rails provide a smoother experience compared to traditional V-wheels.

Mastering these details also helps you stay ahead of potential failures. By understanding the mechanics of heat creep, you can take proactive steps to avoid expensive hardware damage. For those just starting their journey, the Flashforge Wiki offers an excellent knowledge base to explore these technical nuances. Beginning with a well-engineered machine like the Flashforge Adventurer 5M series allows you to enjoy a stable printing experience while you build the expertise needed to master the craft.
Main Categories of 3D Printer Components
The components of a 3D printer fall into three primary categories. When these systems work in perfect harmony, they transform complex engineering into a seamless dance of motion and creativity.
Mechanical
The mechanical system serves as the skeleton of the printer. Aluminum extrusions and rigid frames provide the necessary structural stability, while NEMA 17 stepper motors drive the axes with high precision. Movement is handled by a motion transmission system—using either belts or lead screws—to convert rotation into linear travel.
Guiding these movements are V-wheels or linear rails that allow the print head and build plate to glide smoothly. The stability of this system directly impacts layer alignment and dimensional accuracy. Modern designs like the CoreXY structure found in the Flashforge Adventurer 5M utilize an all-metal frame and dual-motor setup to minimize vibrations, allowing for rock-solid stability even at high speeds.

Thermal
This system is responsible for the delicate balance of heating and cooling. It includes the heated bed, which ensures proper build plate adhesion, and the hotend assembly, which melts solid filament into a liquid state for deposition.
Cooling is handled by two distinct parts: the heatsink fan, which runs constantly to prevent heat creep, and the part cooling fan, which kicks in as needed to solidify each layer. Achieving the right thermal balance is the secret to preventing warping and other print defects.
Electrical
The electrical system acts as the central nervous system of the machine. The motherboard coordinates every function, while stepper drivers regulate the electrical current sent to the motors. A steady Power Supply Unit (PSU) provides the energy, and various sensors—such as auto-levelling probes, filament runout detectors, and accelerometers—provide real-time feedback. These components communicate via G-code instructions to translate your digital design into physical reality.

The Motion System and How It Moves
The motion system is the engine of any 3D printer, responsible for the pinpoint positioning of the toolhead and build plate. While its complexity is often underestimated, it is the primary factor in determining overall print quality.
Aluminum Extrusions and Enclosed Frames
Modern 3D printer frames are typically built from industrial-grade aluminum extrusions, favoured for their high strength-to-weight ratio. The rigidity of these extrusions prevents frame deflection during high-acceleration moves. Many printers utilize an enclosed frame design, which creates a rigid grid of horizontal and vertical beams. This not only improves precision but also provides a controlled environment for thermal management—essential for printing high-temperature materials and ensuring consistent layer adhesion.
For example, the fully enclosed design of the Flashforge Adventurer 5M Pro effectively isolates internal airflow and includes a built-in air filter, making it ideal for shared spaces like offices, schools, or studios.
NEMA 17 Stepper Motors
The NEMA 17 stepper motor is the industry standard, named after its 42x42mm faceplate. These motors typically offer a 1.8-degree step angle, meaning 200 steps per revolution, providing fine-grained positional control. A standard NEMA 17 motor provides ample holding torque to move the toolhead and build plate accurately while maintaining its position. In high-speed applications, micro-stepping becomes critical; high-quality drivers support 1/16 micro-stepping or higher, significantly reducing audible noise and mechanical vibrations during fast travel.
Belts vs Lead Screw Drive Systems
Belts and lead screws represent two different mechanical philosophies. Belt-driven systems (usually GT2 or GT3) utilize pulleys and tensioning mechanisms to offer near-zero backlash. Their low friction allows for high-speed travel on the X and Y axes—regularly reaching speeds of 60 to 200 mm/s. The efficiency of belts makes them the standard for speed; the Flashforge Adventurer 5M hits top speeds of 600 mm/s and 20,000 mm/s2 acceleration thanks to its belt-driven CoreXY motion structure.

In contrast, lead screws offer a massive mechanical advantage and higher holding power, which is vital for the Z-axis that supports the weight of the build platform. While slower (typically 2 to 4 mm per revolution), their self-locking nature ensures the platform stays in place even when the power is off. Most modern FDM printers use a hybrid approach: belts for speed on the X/Y axes and lead screws for load capacity and precision on the Z-axis.

V Slot Wheels vs Linear Rails
The guidance system determines how smoothly the printer moves. V-slot wheels (often made of Delrin) roll within the grooves of aluminum extrusions, creating an affordable and reliable guide. While effective, they do wear down over time and require periodic tensioning.
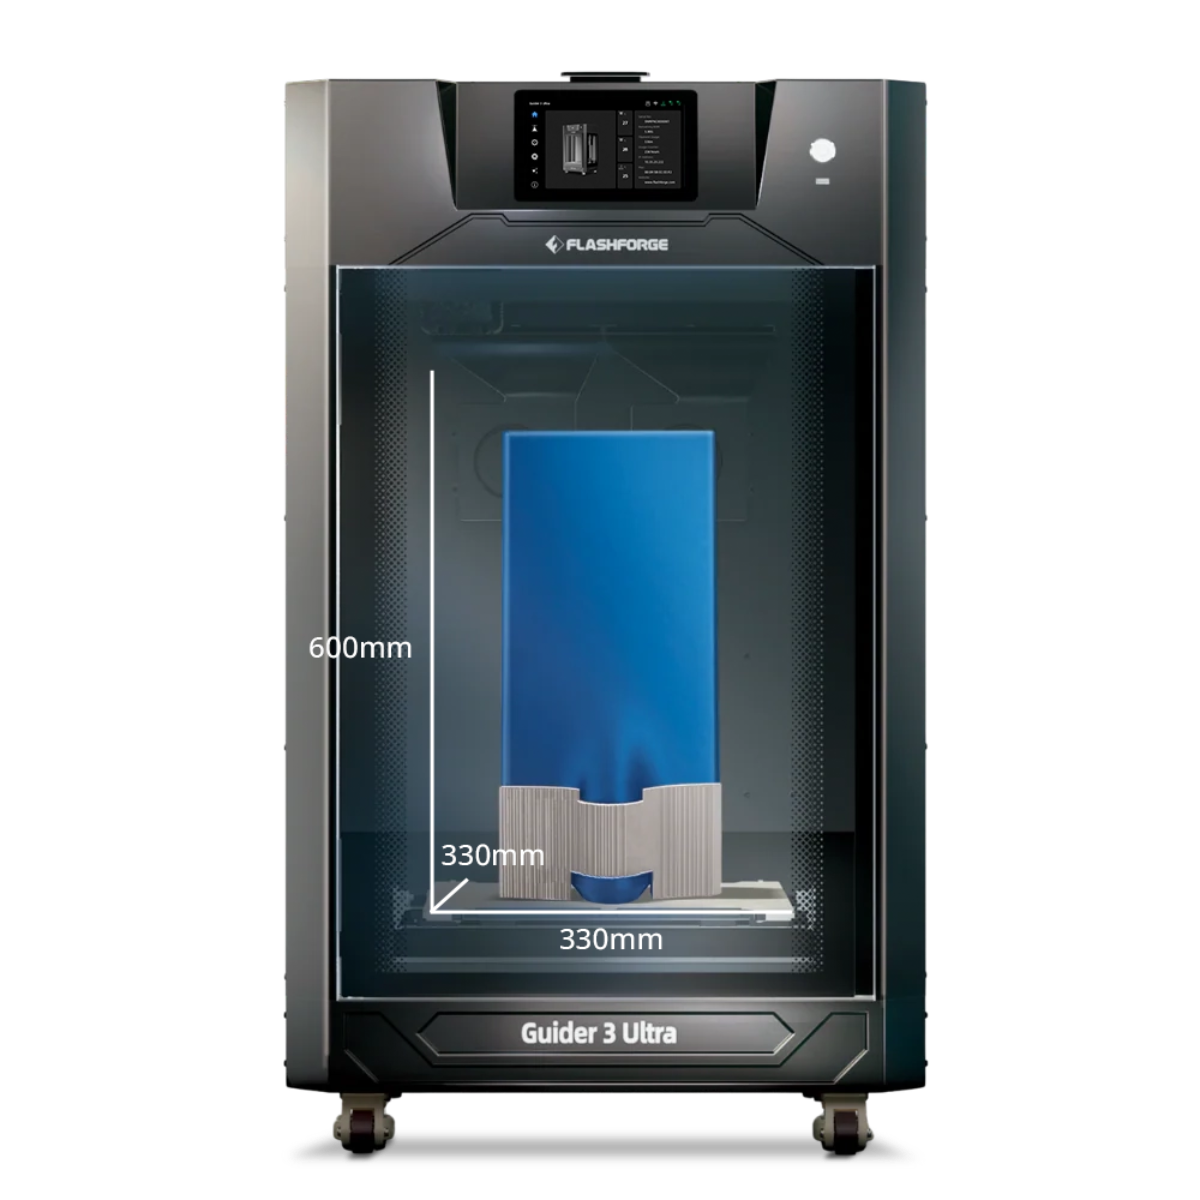
Linear rails use precision-machined steel rails and ball-bearing carriages to offer superior precision and lower friction. These systems boast mechanical tolerances far better than aluminum extrusions, often reaching +/- 0.001 inches. Linear rails also provide better natural damping due to the lubrication within the bearings. While high-end rails produce smoother prints, the actual impact can be marginal compared to overall frame rigidity. However, professional machines like the Flashforge Guider 3 Ultra leverage optimized frame stiffness and motion structures to achieve extreme precision and stability even at high speeds.

The Extrusion System for Melting Plastic
The extrusion system is the critical mechanism that translates a digital design into a physical object. It must precisely control the feeding, melting, and deposition of filament, as any deviation leads to dimensional inaccuracies or surface defects.
There are two primary ways to configure an extrusion system, each with its own trade-offs. For a deeper look, check out this Direct vs. Bowden technology shootout.
-
Bowden Extruders: The drive mechanism (cold end) is mounted on the printer frame, and filament is pushed through a long PTFE tube to the hotend. This lightens the toolhead, allowing for faster speeds and smoother motion—ideal for Delta-style printers. However, the long tube can cause lag and pressure fluctuations, making flexible materials like TPU difficult to print due to the need for long retraction distances.
-
Direct Drive Extruders: The extruder is mounted directly on the toolhead, with the filament travelling less than 5 cm to the nozzle. This provides superior extrusion control and snappy retractions, making it the perfect choice for flexible and abrasive filaments like carbon fibre. While the extra weight can cause vibrations or ghosting, modern designs like the optimized direct drive on the Flashforge Adventurer Series are lightweight enough to maintain precision even at high accelerations.
The Hotend Assembly
The hotend is a finely tuned assembly that operates under extreme conditions. It consists of a heater block, a heater cartridge, a thermistor (temperature sensor), and the nozzle. The most critical part is the heat break, which prevents heat from travelling upward to the cold end—a phenomenon known as heat creep that causes the filament to soften prematurely and jam. High-quality hotends feature smooth internal paths to ensure consistent flow and prevent clogs caused by carbonized residue.
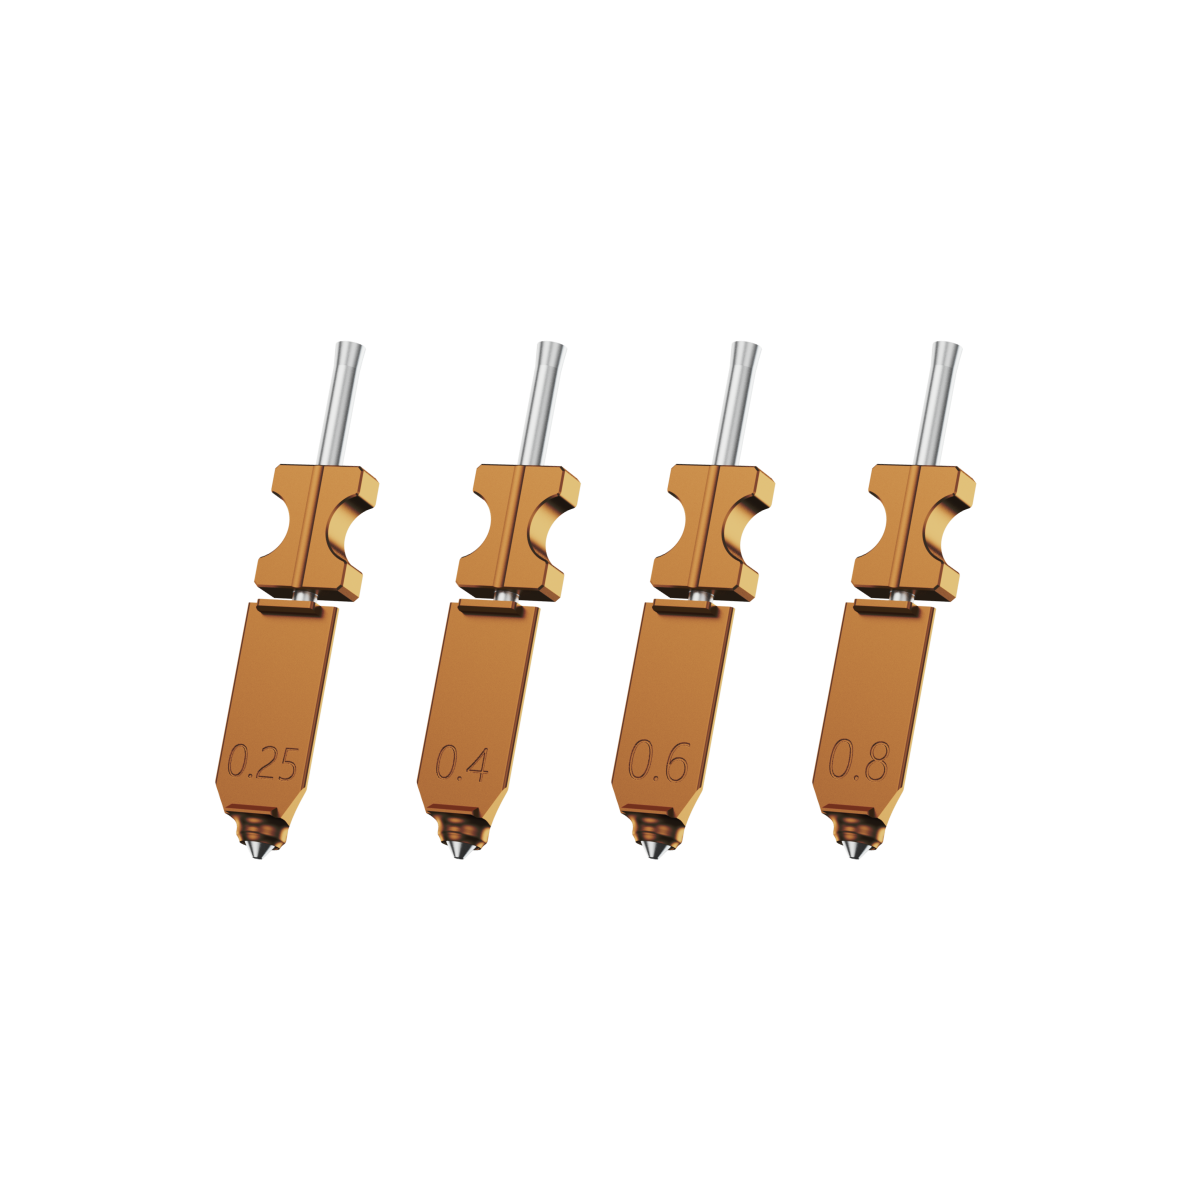
Brass and Hardened Steel Nozzles
While small, the nozzle plays a massive role in print quality.
-
Brass Nozzles: These are the industry standard due to their excellent thermal conductivity. They heat filament evenly for a consistent flow and are naturally less "sticky" for cleaner prints.
-
Hardened Steel Nozzles: Essential for printing abrasive materials like carbon fibre, wood-fill, or glow-in-the-dark filaments. While brass nozzles wear out quickly with these materials, hardened steel can handle the abuse. Note that steel has lower thermal conductivity, so you typically need to increase your print temperature by about 5-10°C.
3D printers like the Adventurer 5M utilize quick-swap nozzle designs, making it easy to switch between materials in minutes.
Hotend Fans vs Part Cooling Fans
Proper airflow is vital for a successful print, and the two fans on your toolhead serve opposite purposes:
-
Hotend Fan: This fan is always on and blows directly onto the heatsink. Its only job is to prevent heat creep by keeping the upper part of the hotend cool.
-
Part Cooling Fan: This fan is controlled by your slicer and blows directly onto the freshly deposited plastic. It helps solidify the material quickly for clean overhangs and bridges. Different materials require different cooling strategies: PLA thrives with 100% cooling, while materials like ABS often require the fan to be off to prevent warping.

The Build Platform Foundation
The build platform is the foundation of every FDM printing process. Any issues with flatness or adhesion will lead to failed prints or defects in the initial layer.
The Heated Bed
The heated bed is a standard feature on modern machines, solving the critical issue of material shrinkage by maintaining a uniform surface temperature. Beneath the surface, you will typically find a resistive heating element—either etched copper on a PCB or a thick-film circuit on an aluminum plate.
Temperature requirements vary by material:
-
PLA adheres best between 50–70°C.
-
PETG requires 80–100°C to prevent warping.
-
ABS needs a much higher range, typically 100–110°C.
A major technical advantage in modern printers is the shift to 24V power systems over older 12V versions. At the same wattage, a 24V system draws half the current, which reduces power loss from wire resistance and allows for thinner, more efficient wiring. For a standard 200–250W bed, this means reaching target temperatures in 2–3 minutes rather than the 8–10 minutes required by 12V systems. To learn more about how these systems integrate into the printing process, check out our guide on what FDM 3D printing is.
Advanced printers also utilize PID (Proportional-Integral-Derivative) controllers. This logic constantly adjusts power delivery to maintain a rock-solid target temperature, preventing the "overshoot" and fluctuations common in simpler on-off systems.
PEI and Glass Build Surfaces
The build surface sits on top of the heated bed and determines how well your print sticks.
PEI (Polyetherimide)
PEI is an amber-colored thermoplastic film that has become the gold standard in the maker community. It offers incredible surface energy that allows materials like PLA, PETG, and TPU to bond perfectly without extra adhesives.
-
Pros: Usually applied to a flexible spring steel sheet, allowing you to simply bend the plate to "pop" the print off. It handles temperatures up to ~110–130°C depending on type.
-
Cons: It can be damaged by PETG or ABS if the bond is too strong; removing these prints too aggressively can tear the film.

Glass (Borosilicate)
Glass plates are thicker (3–5mm) and provide an absolutely flat surface, which is ideal for older printers with warped aluminum beds.
-
Pros: It does not degrade over time and provides a mirror-like finish to the bottom of your prints.
-
Cons: It is heavier, takes longer to heat up, and often requires adhesion aids like glue sticks or hairspray to keep prints from warping.
Auto Bed Levelling Sensors
Manual bed levelling is a tedious and error-prone process that often leads to print failures or nozzle crashes, which is why Auto Bed Levelling (ABL) systems have become essential by using sensors to eliminate the guesswork of measuring the distance between the nozzle and the build plate. Among the three primary sensor types, inductive sensors are highly popular for their reliability and low cost, functioning by detecting changes in a magnetic field when a ferromagnetic object, like a spring steel sheet, enters their range.
While they are incredibly precise with errors under 0.1mm, they are limited to metal surfaces and usually require a metal target to function. In contrast, capacitive sensors monitor electrostatic energy and can detect any material, including glass or PEI, but their sensitivity to temperature and humidity can cause a drift of 0.2mm to 0.3mm, occasionally requiring recalibration.
For those seeking maximum stability regardless of the build surface or environment, physical contact or Hall Effect sensors—like the well-known BLTouch—use a plastic pin to physically probe the bed, making them immune to electromagnetic or environmental interference. Although these sensors are more expensive and mechanically complex, they offer the highest long-term reliability for professional setups. Ultimately, while each technology has its trade-offs, all three provide a consistent first-layer height of approximately 0.24mm in controlled settings, and their inclusion in modern mid-to-high-end printers has significantly lowered the barrier for beginners while boosting overall success rates.
Electronics and Control Boards
The electronic system serves as the brain of the 3D printer, coordinating the precise timing and power delivery of every other component to ensure a successful print.
The Motherboard and Silent Drivers
The motherboard is a dedicated microcontroller that runs firmware—typically Marlin or Klipper—to interpret G-code instructions from your slicer. Its primary responsibilities include translating G-code into step and direction signals, managing temperature feedback via PID controllers to regulate heater power, and processing inputs from various sensors like endstops and filament detectors. Modern boards also feature integrated safety protocols, such as over-temperature and over-current protection, to prevent hardware damage or fire hazards.
Stepper drivers act as the bridge between the motherboard and the motors. While standard drivers like the A4988 provide reliable movement through micro-stepping (from full steps to 1/16 resolution), they can be quite noisy. High-end machines now feature Silent Drivers—typically Trinamic TMC2209 chips—that utilize stealthChop technology. This dynamically adjusts the current to eliminate electromagnetic noise, reducing printer volume by 15–20 decibels. For a home office or bedroom setup, this transforms the machine's operation from a 60dB distraction to a 45dB whisper without sacrificing speed or quality.
The Power Supply Unit
The Power Supply Unit (PSU) is a critical but often overlooked component that converts AC wall power into a steady 12V or 24V DC output. 24V systems have become the industry standard for several reasons. At the same wattage, a 24V system draws half the current of a 12V system, which significantly reduces power loss through wiring resistance. This efficiency allows the heated bed to reach target temperatures up to four times faster. For frequent makers, this cuts preheating times from 10 minutes down to just 2 or 3, providing a major quality-of-life improvement and reducing stress on the electronic components.
Accelerometers for Input Shaping
Accelerometers are a relatively new addition to the 3D printing world, enabling a technique called Input Shaping for Klipper users. Sensors like the ADXL345 are mounted on the toolhead to measure the mechanical resonance frequencies of the frame. These resonances often cause visual defects known as "ghosting" or "ringing"—periodic ripples seen on the surface of high-speed prints. Input Shaping calculates a specific acceleration profile to cancel out these vibrations, much like noise-cancelling headphones. This technology can reduce resonance by up to 95%, allowing you to print at significantly higher speeds with superior surface finish and dimensional accuracy.
Filament Runout Sensors
Filament runout detection is a vital feature that prevents total print failure when a spool is exhausted. Most sensors use a mechanical switch or an infrared (IR) sensor to detect the presence of the material. When the filament ends, the firmware pauses the print and parks the toolhead, allowing you to reload and resume without visible defects. To ensure the most reliable performance and avoid false triggers caused by inconsistent material diameter, we recommend using high-quality Flashforge filament, which is engineered for smooth feeding and precision tolerances.

FAQ
We’ve gathered these frequently asked questions based on our daily conversations with users regarding printer maintenance and operations. We hope this compiled resource for diagnosing and resolving issues about 3d printer equipment provides the support you need to keep your machine running smoothly.
What are the most common consumable parts on an FDM printer?
The most frequent consumables are nozzles, which wear out quickly when printing abrasive filaments like carbon fibre. Brass nozzles are standard for basic materials, but hardened steel lasts much longer under heavy use. Other essential spares include thermistors and heater cartridges because their failure can cause errors or stop printing entirely. You should also monitor the hotend fan, as its failure leads to heat creep. Over time, drive belts stretch, V-wheels wear down, and build-up surfaces like PEI or glass lose their adhesion. Keeping a backup kit with extra nozzles, fans, and belts is the best way to minimize downtime and maintain consistent print quality.
What is the difference between the Extruder and the Hotend?
The Extruder and the Hotend are distinct components, although the terms are often used interchangeably by many makers. Understanding the difference is vital for effective troubleshooting and hardware upgrades.
The Extruder, also known as the cold end, is the mechanical system responsible for pushing filament. It consists of a stepper motor and drive gears that use a tensioning mechanism to grip and feed the plastic from the spool. Its primary job is to provide consistent torque and pressure without crushing the filament.
The Hotend is the thermal assembly where the filament actually melts and deposits. This component includes the heater block, thermistor, heat break, and the nozzle itself. A high-quality hotend ensures uniform melting and rapid thermal response, which directly impacts your final print quality and material compatibility.
Most modern 3D printer machines, like the Flashforge Adventurer series, utilize a modular design that allows you to upgrade these parts independently. For example, you might install a high-torque extruder for better grip or an all-metal hotend to handle high-temperature materials like polycarbonate. Distinguishing between the two is particularly helpful when diagnosing issues because a reported extruder jam is almost always actually a clog located deep within the hotend melt zone.
Can I upgrade my FDM printer's parts?
Yes! Most modern FDM 3D printers are highly upgradeable, letting you improve speed, precision, and reliability as your skills grow. Simple upgrades like magnetic PEI sheets, easy nozzle swaps, or better cooling fans can make a noticeable difference. More advanced modifications—such as installing linear rails, adding Klipper-compatible motherboards, or upgrading stepper drivers—allow for significant performance boosts.
Even budget-friendly additions like filament runout sensors or silent cooling fans, often under $100, can greatly enhance your printing experience. For many makers, these incremental upgrades are more cost-effective, educational, and satisfying than buying an entirely new printer.
Why does my nozzle clog?
Nozzle jams typically stem from wet or low-quality filament that bubbles and leaves carbonized residue inside the tip. Other common culprits include printing at incorrect temperatures, aggressive retraction settings, or heat creep caused by an inefficient cooling fan. To resolve most jams, the Cold Pull method or specialized cleaning filament is highly effective. For a detailed walkthrough, you can follow this guide on how to clean your 3d printer nozzle efficiently. To prevent future issues, always use premium-grade filament and store it in an airtight dry box to keep moisture out.
Conclusion
By now, the magic of 3D printing should feel far less like a mystery and much more like a remarkable feat of engineering. Every successful print is the direct result of precision hardware and the seamless collaboration of internal components. From the finely tuned motion systems to the intricate thermal management and intelligent electronic controls, every single part plays a vital role in the final output.

For makers seeking a reliable balance between ease of use and advanced functionality, Flashforge FDM 3D printers stand as a prime example of modern design principles in action. However, whether you are picking out your very first machine or investing in a professional upgrade, remember that there is no one-size-fits-all approach to 3D printing.
Your understanding of how these different configurations interact will directly translate into better print quality, a longer lifespan for your equipment, and ultimately, a more rewarding experience as you bring your creative visions to life.