


There are three common ways to raise a 3D printer’s heated bed manually: move the Z axis through the control panel, rotate the Z-axis lead screw after switching off the printer or unlocking the motors, or use the bed-leveling knobs for a small correction. The right method depends on whether the bed or toolhead moves vertically. Before making any adjustment, stop the print, turn off the heaters, remove the model, and make sure the nozzle cannot collide with the build plate.
When Do You Need to Raise the Hot Bed Manually?
Manual bed movement is mainly needed for maintenance, position recovery, or minor mechanical adjustment, such as when the bed is parked too low for cleaning, after Z-axis servicing, or when the displayed Z position no longer matches the bed’s actual location. Before adjusting a 3d printer, confirm whether the bed or toolhead moves along the Z axis. Do not raise the bed simply because the first layer will not stick, as poor adhesion may instead result from a dirty build plate, incorrect Z offset, unsuitable bed temperature, or improper first-layer settings.
Prepare the Printer Before Raising the Hot Bed
A short safety check can prevent burns, nozzle collisions, cable damage, and Z-axis misalignment.
Check How Your Printer Moves on the Z Axis
Identify whether the bed, toolhead, or gantry moves vertically. Then check how many lead screws, belts, rails, and motors control that movement.
Even a 3d printer for beginners may use several linked lead screws. Automatic leveling simplifies setup, but it does not mean each screw can be adjusted independently.
Stop the Print and Let the Bed Cool
Cancel the print and switch off nozzle and bed heating. Wait until the build plate, model, and nozzle are safe to touch.Moving a hot bed creates a burn risk, while a softened model may shift and block the Z-axis path.
Remove the Model and Build Plate if Needed
Remove the printed part, purge lines, clips, tools, and loose filament. Take off a removable build plate when this gives safer access to the platform or motion system.Reinstall the plate correctly before leveling. A plate that is not fully seated can affect the Z offset and first layer.
Move the Nozzle Away From the Bed
Move the toolhead away from the center of the build area before raising the platform. This provides more clearance if the bed travels farther than expected.Use the printer’s movement controls whenever possible instead of pushing a locked carriage by hand.
Check Cables and Mechanical Obstructions
Inspect the Z-axis path for loose wires, filament strands, displaced covers, or tools. Make sure the heated-bed cable can move freely without stretching or catching.Also check the lead screws, belts, guide rails, and couplers for dirt, looseness, or visible damage.
How to Raise the Hot Bed Manually
The control panel is usually the safest option, while direct mechanical adjustment should be reserved for maintenance or recovery.

Method 1: Raise the Bed From the Control Panel
Homing gives the printer a known reference position. Skip this step if the nozzle is already too close to the plate or an obstruction could cause a collision.
Look for a menu labeled Move, Motion, Control, Jog, or Axis.
Confirm which control raises the physical bed. On some printers, the same command raises the toolhead instead.
Start with 1 mm or 10 mm movements. Watch the platform from more than one side and listen for clicking, scraping, or motor skipping.
Leave visible clearance between the nozzle and build surface. Do not use the motion menu to press the bed against the nozzle.
Method 2: Turn the Z-Axis Lead Screw by Hand
Never force a stepper motor while it is holding position. Switch off the machine or use the official motor-unlock command.
Locate every lead screw, belt, motor, rail, and coupler involved. Check whether multiple screws are linked.
Turn it a small amount while watching the bed. Reverse direction if the platform moves downward.
There is no universal clockwise direction because screw orientation differs between printers.
On a dual-Z printer, move both sides by the same amount unless the manufacturer provides a specific alignment procedure.
Binding may come from an obstruction, bent screw, dry guide, loose coupler, or mechanical misalignment. Do not apply additional force.
Method 3: Use the Bed-Leveling Knobs
Manual knobs usually sit beneath the bed at three or four points. Some automatically leveled printers do not have them.
Turn each knob by a quarter-turn or less. Confirm whether loosening raises or lowers the bed on your printer.
Adjust all corners by similar amounts when changing the overall bed height. Change one corner separately only to correct local tilt.
Confirm that the nozzle remains clear of the build surface before homing or leveling.
Recalibrate the Printer After Moving the Bed
Manual movement can change the bed’s real position without updating the printer’s coordinates, so recalibration is essential.
Home the Z Axis Again
Once the motion path is clear, home the printer to restore its Z-axis reference. Watch the first homing cycle closely and stop it if the nozzle presses into the plate.
Run Bed Leveling
Clean and reinstall the build plate, remove hardened filament from the nozzle, and run the correct automatic or manual leveling routine.Automatic leveling can compensate for small surface differences, but it cannot correct a severely tilted or mechanically unsynchronized platform.
Check the Z Offset
Adjust the Z offset in the smallest available increments.A nozzle that is too low may scrape the plate or restrict extrusion. A nozzle that is too high produces separated first-layer lines and weak adhesion.
Print a First-Layer Test
Print a wide single-layer pattern across several areas of the bed. The lines should touch without gaps, deep ridges, or transparent scraped sections.
In fdm 3d printing, the first layer supports the entire model. If the lines remain separated, reduce the nozzle-to-bed distance slightly. If material is heavily flattened, raise the Z offset.
Printers with multi-toolhead systems may require additional calibration. The Flashforge Creator 5 Series combines automatic bed leveling with automatic toolhead offset calibration and uses a removable PEI flexible steel build plate.
Creator 5 suits common multi-color and multi-material projects, while Creator 5 Pro adds an enclosed structure and active chamber heating for more demanding materials. When choosing an abs 3d printer, enclosure design and temperature stability are important for reducing warping and layer separation.
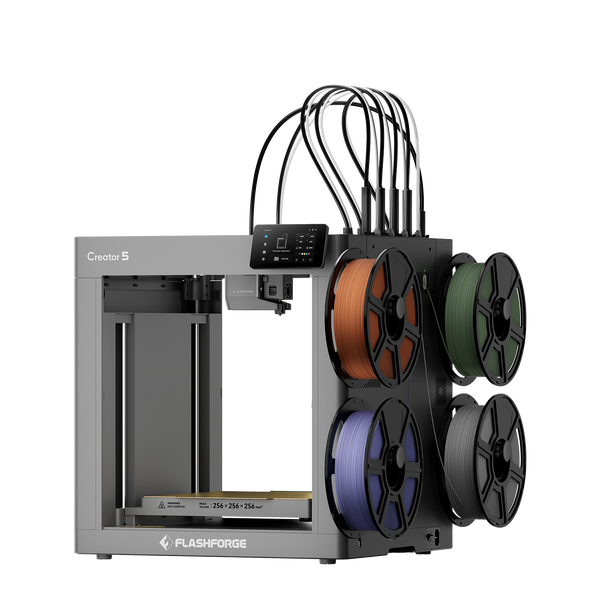
Flashforge Creator 5 4-Toolheads Multi-Color 3D Printer | 500% Faster, Zero Purge Waste
Because manually moving the bed can change the printer’s reference position, complete the checks in this step-by-step 3D printer calibration guide before starting a full print.
Common Problems After Raising the Hot Bed
Most problems after manual movement come from an obstruction, an unsynchronized Z axis, or calibration that has not been updated.

The Bed Will Not Move Up
Check the selected axis, movement direction, motor status, and Z-axis path. Repeated clicking without movement may indicate a jam or skipped motor steps.
One Side Is Higher Than the Other
The lead screws may be out of sync, or a belt or coupler may have moved. Stop adjusting one side and use the manufacturer’s alignment or homing procedure.
The Nozzle Hits the Bed During Homing
Stop the printer immediately. Check the build plate position, homing sensor, probe, wiring, and any objects blocking the platform.
The Printer Shows the Wrong Z Height
This often happens after moving the bed while the printer is off. Re-home the machine before sending further movement commands.
The First Layer Is Still Uneven
Check the plate seating, nozzle cleanliness, leveling result, Z offset, and mechanical alignment. Raising the bed changes its position but does not automatically make it level.
Safety Warnings Before Moving the Hot Bed
Manual adjustment is safest when the printer is cool, the movement path is clear, and the motors are not locked.
Let the Bed and Nozzle Cool
Do not touch or mechanically adjust heated components. Only perform heated calibration when the printer’s official procedure requires it.
Do Not Force Locked Motors
Use the movement menu, switch off the printer, or unlock the motors before turning a lead screw. Forcing the system can damage belts, couplers, screws, or bearings.
Stop if the Lead Screw Feels Stuck
Unusual resistance indicates a mechanical problem. Inspect the screw, rails, coupler, and surrounding area before continuing.
Conclusion
The safest way to raise a heated bed is normally through the printer’s control panel. Hand-turning lead screws should be limited to suitable maintenance procedures, while leveling knobs are only intended for small corrections.
After moving the bed, re-home the printer, run bed leveling, check the Z offset, and complete a first-layer test before starting a full print.
FAQ
The following answers cover common questions about motor status, lead-screw direction, leveling, and uneven movement.
Can I Raise the Hot Bed While the Printer Is On?
Yes, when using the Move or Motion menu. Do not push the bed or rotate the lead screw against locked motors.
Can I Turn the Z-Axis Lead Screw by Hand?
Yes, after switching off the printer or unlocking the motors, provided the printer’s design allows manual movement.
Which Direction Should I Turn the Lead Screw?
There is no universal direction. Turn it slightly while watching the bed, then reverse if the platform moves downward.
Do I Need to Re-Level the Bed After Moving It?
Yes. Re-home the printer, run leveling, check the Z offset, and print a first-layer test.
Why Does My Hot Bed Rise Unevenly?
The lead screws may be out of sync, a coupler may be loose, or part of the Z-axis mechanism may be binding.
What Should I Do if the Bed Is Stuck at the Bottom?
Check for locked motors, obstructions, loose wiring, homing errors, and a jammed lead screw. Do not force the platform upward until the cause is clear.