


3D printing cost is not just the price of filament or resin. A real estimate also includes print time, electricity, failed prints, labor, post-processing, maintenance, and the long-term cost of the printer itself.
This guide explains how to use a simple 3D printing cost calculator mindset to estimate the real cost of one model, a small batch order, or a multi-color printing project. You do not need a complicated spreadsheet to start. You just need to break the job into the right cost categories before you print.
What Does a 3D Printing Cost Calculator Include?
A useful 3D printing cost calculator should separate the visible cost from the hidden cost. The visible cost is usually material. The hidden cost includes machine time, setup, supports, waste, electricity, reprints, and finishing work.
Filament or Resin Cost
Material cost is the first number most users check. For FDM printing, calculate filament cost by weight.
For example, if a 1 kg spool costs $25 and your slicer estimates 80 g of filament, the basic material cost is:
80 ÷ 1000 × $25 = $2.00
This number should include the model, supports, brim, raft, and any extra waste created during the print. For resin printing, the idea is similar, but you may calculate by resin volume or weight depending on your slicer. Resin jobs also require washing, curing, gloves, filters, and disposal steps, so the resin price alone is not the full cost.
Material choice changes the estimate quickly. PLA is usually affordable and easy to print. PETG may cost more but gives better toughness for everyday functional parts. ABS, ASA, TPU, nylon, carbon fiber blends, and other engineering materials can raise both material cost and setup complexity. Flashforge’s guide to 3D printer filament types is a useful reference when comparing filament options by use case, strength, flexibility, and print difficulty.
Electricity Cost
Electricity is often smaller than material cost for a single desktop print, but it still belongs in the estimate. Use this formula:
Electricity Cost = Printer Power in kW × Print Hours × Local Electricity Rate
If a printer averages 0.15 kW during a 10-hour print and electricity costs $0.18 per kWh, the electricity cost is:
0.15 × 10 × $0.18 = $0.27
Your local electricity rate matters. Instead of guessing, check your utility bill or compare it with the U.S. Energy Information Administration’s average electricity price data by state and sector. This gives you a more realistic number when estimating long prints, batch orders, or customer quotes.
Printer Depreciation and Maintenance
The printer itself also has a cost. Nozzles wear out, build plates lose adhesion, belts need adjustment, fans collect dust, and machines used for long jobs need routine maintenance.
A simple way to estimate machine cost is:
Machine Cost per Hour = Printer Price ÷ Expected Productive Print Hours
If a printer costs $500 and you expect 2,500 productive hours from it, the machine cost is $0.20 per hour. A 12 hour print would carry $2.40 in machine cost before labor, material, and profit.
For personal projects, this number may be small. For paid printing, classrooms, labs, and print farms, it becomes important because every long job takes up machine time that could be used for something else.
Labor, Setup, and Post Processing
Labor is the most underestimated part of 3D printing cost. Even a simple print may require file repair, slicing, bed cleaning, filament loading, support removal, sanding, assembly, inspection, packing, and customer communication.
For hobby printing, you may ignore your own time. For paid work, you should not. A model that costs $1.50 in filament may still be expensive to produce if it takes 30 minutes of cleanup and inspection.
How to Calculate 3D Printing Cost Step by Step
The easiest way to calculate 3D printing cost is to start with your slicer estimate, then add the costs your slicer does not fully include.

Step 1: Check the Model Weight in Your Slicer
Import the model into your slicer and choose the real settings you plan to use. Select the material, nozzle size, layer height, wall count, infill, supports, and bed adhesion method.
Do not estimate from model size alone. A hollow vase, a dense bracket, and a decorative figure may look similar in size but use very different amounts of material.
Step 2: Add Support, Brim, Raft, and Purge Waste
Your slicer may include support material and brim weight, but you should still check the details. Supports, rafts, brims, failed first layers, and purge towers can all add cost.
This is especially important for multi color printing. Some color systems create extra purge material during every color change. If the finished model weighs 100 g but the total print uses 160 g after purge and support waste, your cost calculation should use 160 g.
Step 3: Estimate Machine Time
Print time affects electricity, machine wear, labor planning, and printer availability. A small but detailed 40 g model can cost more than a simple 90 g model if it takes much longer to print.
Layer height, nozzle size, speed, acceleration, cooling, and supports all affect time. For paid jobs, machine time should be part of your price, not an afterthought.
Step 4: Add Failure Rate and Reprint Cost
Every 3D printing workflow has failed prints. A realistic quote should include a failure allowance, especially for long jobs, new materials, complex supports, or tight tolerance parts.
For example, if a print costs $12 before failure risk and your average failure rate for that type of job is 10%, add $1.20 as a failure allowance. This does not mean every print fails. It means successful jobs help cover occasional reprints.
Step 5: Add Labor and Profit Margin
For paid work, add labor after calculating material, electricity, machine time, and failure risk. Then add profit.
Do not add profit only to the filament cost. That underprices your work because it ignores setup time, printer availability, skill, finishing, quality checks, and customer service.
Common 3D Printing Cost Formula
A 3D printing cost formula does not need to be complicated. Start simple, then add more detail when the job becomes commercial, multi color, or production focused.
Basic Formula for Hobby Prints
Total Cost = Material Cost + Electricity Cost + Small Maintenance Allowance
This works for personal projects when you do not need to charge for labor. It helps you understand whether a print costs closer to $1, $5, or $20.
Formula for Paid 3D Printing Jobs
Total Cost = Material + Electricity + Machine Time + Labor + Failure Allowance + Profit Margin
Formula for Multi Color 3D Printing
Total Cost = Model Material + Support Material + Purge or Tool Change Waste + Electricity + Machine Time + Labor + Failure Allowance + Profit Margin
Multi color prints often cost more because they take longer, use extra material, and may require more setup. The printer workflow matters here. A shared nozzle system and an independent toolhead system can produce different waste and time profiles, even when the finished model looks similar.
Key Factors That Change Your Final Print Cost
The same model can have several different cost estimates depending on how you slice and print it. Before quoting or starting a long job, check the settings that change cost the most.

Material Type and Filament Price
PLA is a practical starting point for display models, toys, classroom prints, and indoor prototypes. PETG is useful when you need more toughness or temperature resistance. TPU works for flexible parts. ABS, ASA, PA, PC, and composite materials are better for demanding functional parts, but they may need more careful temperature control and a more capable printer.
Flashforge’s guide on how to use a 3D printer for different filaments is a natural next read when you need to match filament choice with slicer settings, bed adhesion, and printer setup.
Print Time and Layer Height
Layer height has a direct effect on print time. A 0.12 mm layer height can improve surface detail, but it may take much longer than 0.2 mm or 0.28 mm. That extra time increases machine cost and slows down your production schedule.
Use the layer height the job actually needs. A display model may justify fine layers. A simple jig, bracket, spacer, or shop tool may not.
Infill Density and Wall Thickness
Infill is one of the easiest places to waste material. Many models do not need 80% or 100% infill. Wall thickness, top layers, bottom layers, and the infill pattern often matter more than simply making the part solid.
A decorative model may work well with low infill. A functional bracket may need stronger walls and a tougher material. The right choice depends on how the part will be used.
Supports and Model Orientation
Supports add cost twice. You pay for extra material, then you spend time removing it.
Before printing, rotate the model and compare slicer estimates. Look at support weight, print time, contact points, and the surfaces that need to look clean. A few minutes of orientation testing can save hours of printing and finishing.
Printer Type and Workflow Efficiency
Printer workflow affects the real cost of a print. A reliable printer with automatic leveling, quick nozzle maintenance, stable motion, and clear slicer profiles can reduce failed prints and hands on setup time.
For everyday PLA and PETG projects, Flashforge Adventurer 5M is a practical starting point because it offers automatic leveling, quick-detach nozzles, a CoreXY all-metal structure, and a 220 × 220 × 220 mm build volume for common desktop prints.
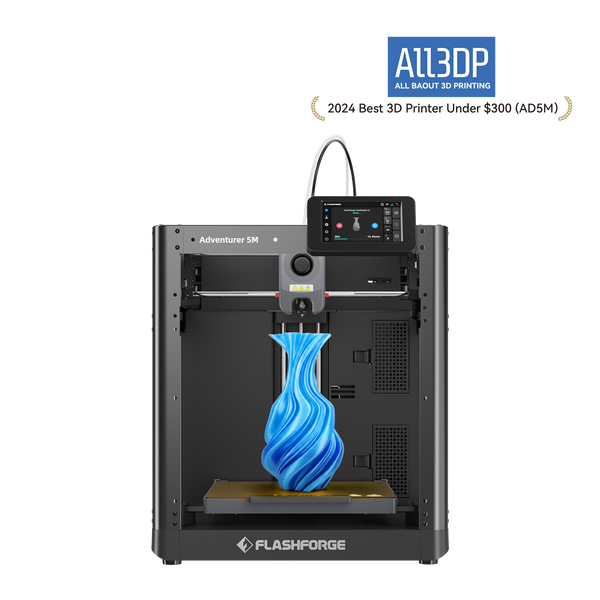
Imprimante 3D Flashforge Adventurer 5M, vitesse élevée de 600 mm/s, adaptée aux débutants
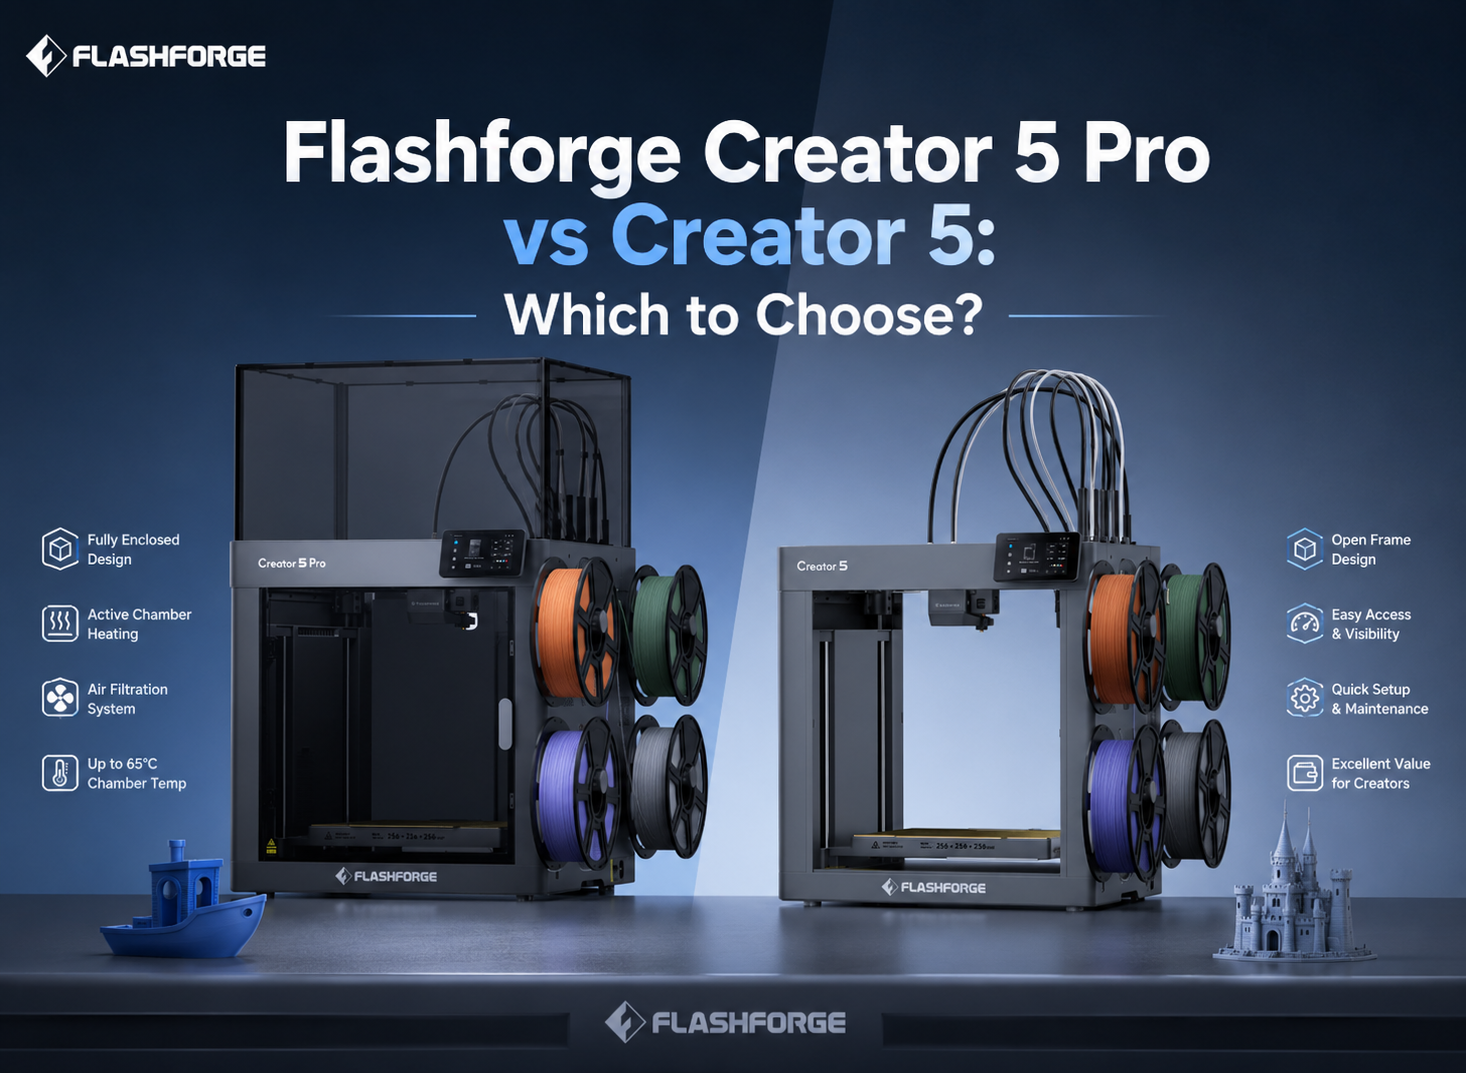
For users calculating multi color print costs, Flashforge Creator 5 is better suited to color or material switching because its four independent toolheads reduce repeated filament changes and purge-related waste. This can make a major difference when a job includes frequent color changes or mixed materials.
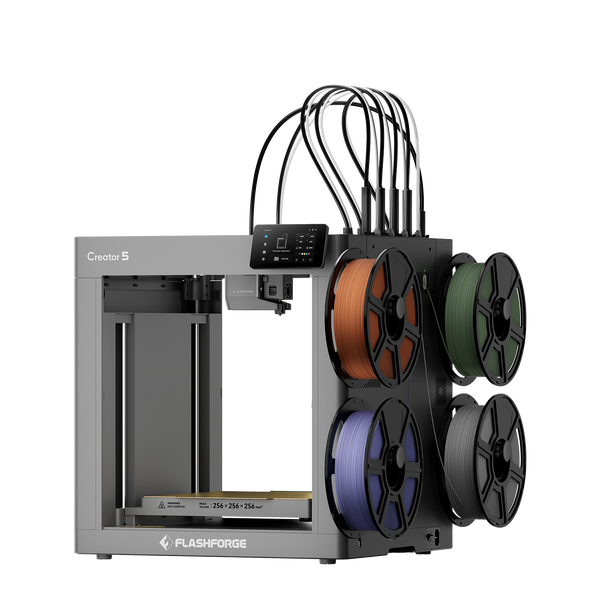
Flashforge Creator 5 4-Toolheads Multi-Color 3D Printer | 500% Faster, Zero Purge Waste
If your workspace runs several printers or uses ABS, ASA, nylon, resin, or composite materials, it is worth reviewing NIOSH’s safe 3D printing guidance for makerspaces, schools, libraries, and small businesses. Ventilation, enclosures, filtration, PPE, and safe material handling can all affect the real cost of a reliable printing setup.
3D Printing Cost Examples by Use Case
The examples below are not fixed prices. They show how to think through the calculation. Replace the sample numbers with your own filament price, electricity rate, labor rate, printer cost, and slicer estimate.
Small PLA Toy or Decorative Model
If the print takes 3 hours and electricity adds only a few cents, the hobby cost may stay close to $1.25 to $1.50. For a paid order, the price should be higher because slicing, printer setup, removal, inspection, and packing all take time.
Functional PETG or ABS Part
A PETG functional part may use 90 g of filament from a $28 spool. The material cost is:
90 ÷ 1000 × $28 = $2.52
If the job takes 6 hours, uses thicker walls, and needs careful first layer setup, the real cost is higher than $2.52. ABS or ASA may add more workflow cost because these materials usually benefit from a more controlled printing environment.
Safety also matters when printing higher-temperature materials or running printers for long periods. NIOSH notes that 3D printing may involve exposure to ultrafine particles, chemicals, and VOCs. For shared workspaces, classrooms, offices, and small production rooms, ventilation, enclosures, material handling, and basic safety controls should be considered as part of the total workflow cost.
Multi Color Model
A multi color decorative model may weigh 120 g when finished, but the full job may use more material because of supports, transition waste, or purge structures. If the total material used is 160 g, the cost should be calculated from 160 g, not 120 g.
Machine time also rises with color changes. A system designed for efficient multi color printing can help reduce waste and manual handling, which matters more as the number of color changes increases.
Small Batch Production Order
Small batch production needs a different calculation. If a customer orders 50 parts, do not simply multiply one hobby print by 50. Batch work may reduce setup time per part, but it increases printer scheduling, inspection, packaging, reprint planning, and deadline risk.
Calculate both cost per part and total batch cost. Include spare parts, reprints, labor, and a deadline buffer. A low quote is not helpful if it leaves no room for failed prints or machine downtime.
How to Reduce 3D Printing Costs Without Hurting Quality
Lower cost does not have to mean lower quality. Most savings come from better settings, better planning, and fewer failed prints.
Optimize Infill Instead of Making Everything Solid
Start by reducing unnecessary infill. For many non-load-bearing models, lower infill with enough walls gives a better balance of strength, weight, and print time.
Do not use one infill percentage for every model. A display figure, drawer organizer, cosplay prop, and mechanical bracket all need different settings.
Choose the Right Material for the Job
Using the strongest material for every print wastes money. PLA is often enough for visual models and indoor objects. PETG may be better for tougher everyday parts. TPU works for flexible items. Engineering materials should be saved for jobs that actually need heat resistance, strength, or chemical resistance.
Material choice also affects failure risk. A cheap filament that fails often can cost more than a slightly better filament that prints reliably.
Reduce Supports Through Better Orientation
Supports increase material use, print time, and cleanup labor. Better orientation can reduce all three.
Before slicing the final job, test a few orientations and compare estimated support weight, print time, and surface quality. The best orientation is not always the one that looks most obvious first.
Use Reliable Printer Settings and Dry Filament
Failed prints are one of the fastest ways to raise cost. Good slicer profiles, a clean build plate, correct bed temperature, dry filament, and stable storage can prevent many common problems.
Wet filament can cause stringing, bubbles, rough surfaces, weak layer bonding, and inconsistent extrusion. Dry storage is especially important for materials such as nylon, TPU, PVA, BVOH, and some composite filaments.
Pick the Right Printer for Your Print Volume
A low cost printer can be enough for occasional hobby prints. For regular orders, classrooms, small studios, or batch production, reliability and workflow speed matter more.
If you print mostly PLA and PETG desktop parts, a stable printer with automatic leveling and easy nozzle maintenance can keep costs predictable. If you print multi color or multi material models often, a system designed for that workflow can reduce waste, manual handling, and downtime.
The cheapest printer is not always the lowest-cost printer over time. A machine that reduces failed prints, setup time, purge waste, and maintenance frustration can lower the real cost per successful part.
Conclusion
A good 3D printing cost calculator looks beyond filament price. It includes material, electricity, machine time, maintenance, labor, post processing, failure risk, and profit when the job is paid.
For simple hobby prints, a basic formula is enough. For customer work, batch orders, or multi color projects, a more complete formula protects your time and keeps pricing realistic. The more often you print, the more workflow efficiency matters. Reliable setup, fewer failed prints, less purge waste, and the right printer for the job can reduce cost without lowering quality.
FAQ About 3D Printing Cost
Why Are Multi Color 3D Prints More Expensive?
Multi color 3D prints are usually more expensive because they can use extra material during color changes, take longer to print, and require more setup. The final model weight is not enough to estimate the real cost. You also need to include purge material, support material, added machine time, and a higher failure allowance for complex jobs.
How Much Should I Charge for a 3D Printed Part?
Charge based on the full job cost, not just filament. A paid quote should include material, electricity, machine time, labor, failure allowance, post processing, packaging, and profit. For simple parts, you can use a basic material plus machine hour formula. For complex parts, calculate each cost area separately.
Is 3D Printing Cheaper Than Buying a Finished Product?
3D printing can be cheaper for custom parts, prototypes, replacement pieces, small batches, and designs that are hard to buy ready made. It may not be cheaper for mass produced products, especially if the print takes many hours or needs heavy post processing. The value of 3D printing is strongest when customization, speed, or low volume production matters more than retail unit price.