


Table of Contents
A clean 3D printer bed is one of the simplest ways to improve first-layer adhesion and reduce avoidable print failures. Dust, fingerprints, adhesive residue, and small fragments of 3D printer filament can prevent the first layer from bonding evenly to the surface.
Cleaning does not require aggressive scrubbing or strong solvents. In most cases, a soft cloth, warm water, mild dish soap, and isopropyl alcohol are enough. The correct method depends on the build plate material and the type of residue left behind.
This guide explains how to clean a 3D printer bed safely, how often to clean it, and how to improve first-layer adhesion after maintenance.
Why Keeping a 3D Printer Bed Clean Matters
The build plate supports every layer of 3D printing. When the first layer does not adhere correctly, the model may shift, curl at the corners, or detach before the print is complete.
The dust and grease buildup can reduce adhesion. This is why a platform that looks clean may still perform poorly after repeated handling.
Regular cleaning helps in three ways.
First, it improves first-layer consistency. A clean surface gives the extruded filament a more predictable contact area.
Second, it protects print quality. Small pieces of hardened filament, glue, or dust can create uneven areas on the bottom of the model.
Third, it helps extend the plate's usable life. Gentle routine maintenance reduces the need for aggressive scraping later.
Cleaning should be part of normal printer care, not an emergency fix after a failed print.

What Types of 3D Printer Beds Are Commonly Used?
Different bed materials provide different surface finishes, adhesion levels, and maintenance requirements.
When comparing the best 3D printer for a particular workflow, it helps to look beyond speed and build volume. A removable, easy-to-clean build plate can make everyday maintenance much simpler.
| Build Plate Type | Typical Characteristics | Cleaning Priority |
| Glass surface | Flat, smooth, and easy to inspect | Prevent scratches and remove fingerprints |
| PEI spring steel sheet | Flexible, removable, and widely used for FDM printing | Remove grease without damaging the coating |
| Textured plate | Creates a patterned bottom finish and improves contact area | Clean grooves without abrasive scrubbing |
| Specialty plate | May use smooth PEI, PC stickers, or other coatings | Match the cleaning method to the installed surface |
Glass Print Bed Surfaces
Glass beds provide a smooth, flat surface. They are easy to inspect because residue and smudges are usually visible.
Wait until the plate has cooled before cleaning it. Remove loose material with a plastic scraper. Use warm water and mild dish soap for deeper cleaning. A microfiber cloth can help remove fingerprints without scratching the surface.
Avoid metal tools and abrasive pads. A scratch may affect the bottom finish of future prints and make residue harder to remove.
PEI Spring Steel Build Sheets
PEI spring steel sheets are common because they combine reliable adhesion with easier model removal.
The sheet can usually be removed from the printer and flexed gently after the print cools. This reduces the need to scrape the surface aggressively.
A removable plate can also make routine cleaning easier. The Flashforge Adventurer 5M Pro uses a flexible removable PEI steel plate, so the surface can be taken off the printer for cleaning and reinstalled after it has dried completely.
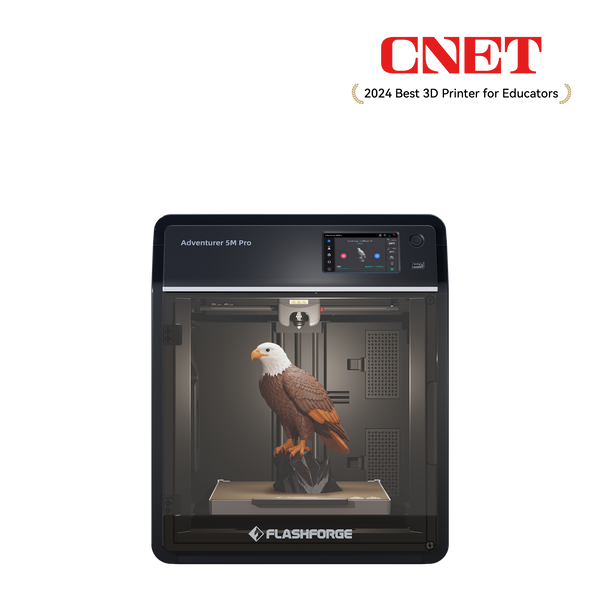
Adventurer 5M Pro
PEI surfaces still need careful handling. Use a soft cloth. Avoid metal tools, harsh scrubbing, and unnecessary solvent exposure.
Textured Build Plate Surfaces
A textured build plate creates a patterned finish on the bottom of the printed object. The surface can also increase the contact area between the plate and the extruded filament.
Textured plates need gentle cleaning because residue can remain inside the small surface grooves. A soft cloth, warm water, and mild dish soap are usually the safest starting point.
Do not use steel wool or a wire brush. These tools can abrade the coating and change the surface texture.
Magnetic and Specialty Bed Materials
Some printers support several removable build plates for different materials and surface finishes.
The Flashforge AD5X uses a PEI flexible steel sheet. Flashforge also offers compatible build plate options for the AD5X and AD5M Series, including dual-texture PEI, smooth PEI, and high-temperature PC surfaces.
The Flashforge build plate page recommends dual-texture PEI and smooth PEI options for materials such as PLA, PETG, TPU, PLA-CF, and PETG-CF. It lists the high-temperature PC plate for ABS, ASA, and PC printing.
Build plate care should match the installed surface. If you are comparing the best budget 3D printer, check whether replacement plates are available and whether the printer supports surfaces suited to the materials you plan to use.
What Tools and Materials Are Safe for Cleaning a 3D Printer Bed?
You do not need a large maintenance kit. A few basic tools can handle most routine cleaning jobs.
Isopropyl Alcohol and Microfiber Cloths
The official Flashforge build plate maintenance guide recommends isopropyl alcohol and a soft cloth for stubborn residue.
Isopropyl alcohol, often called IPA, is useful for wiping away fingerprints, oils, and light residue. Apply the IPA to a clean microfiber cloth rather than pouring it directly onto the printer. Wipe the removable plate gently and allow the surface to dry before reinstalling it.
IPA is useful for routine wiping, but it is not a substitute for deep cleaning. When oils or adhesive residue remain after several prints, wash the removable plate with warm water and mild dish soap.
Dish Soap and Warm Water Cleaning
Warm water and mild dish soap are suitable for deeper cleaning when the plate has visible residue or persistent adhesion problems.
Remove the plate from the printer first. Wash only the removable build surface. Rinse away the soap completely and dry the plate before reinstalling it.
It is recommended to use warm water and mild soap while avoiding harsh scrubbing, and to clean regularly with water and a gentle cleaning agent to maintain adhesion.
Plastic Scrapers and Soft Cleaning Tools
A plastic scraper can remove loose fragments without scratching the surface as easily as a metal tool.
Use the scraper gently and keep it at a low angle. Wait until the plate has cooled. Many prints release more easily after the surface returns to room temperature.
A microfiber cloth, soft sponge, and plastic scraper are enough for most maintenance tasks.
Cleaning Products and Tools to Avoid
Avoid steel wool, wire brushes, metal blades, and abrasive pads. These tools can scratch glass and damage coated surfaces.
Do not treat acetone as a universal build plate cleaner. Plate materials react differently to strong solvents. A solvent that works for one surface may damage a coating, sticker, or adhesive layer on another.
Only use acetone or another strong solvent when the build plate manufacturer explicitly allows it. When the surface type is unclear, start with warm water, mild dish soap, and a soft cloth.
How Do You Clean a 3D Printer Bed Step by Step?
A simple, consistent cleaning routine helps maintain performance. Always let the build plate cool completely before removing prints or performing maintenance.
Removing Loose Filament and Dust
Start by removing loose dust and visible fragments. Take the removable plate off the printer when possible. Use a dry microfiber cloth or a soft brush to clear dust. Remove small pieces of hardened 3D printer filament with a plastic scraper.
Do not force the scraper under a print that is still firmly attached. Allow the plate to cool first. A flexible steel sheet can often be bent gently to release the part.
Wiping the Surface with Isopropyl Alcohol
Apply a small amount of IPA to a clean microfiber cloth.
Wipe the surface evenly. Focus on the areas where prints usually sit and where fingerprints are visible. Allow the alcohol to evaporate before returning the plate to the printer.
This is a useful quick-cleaning method between prints. It removes oils that may not be obvious at first glance.
Deep Cleaning with Soap and Water
Use warm water and mild dish soap when a quick IPA wipe no longer restores adhesion. Remove the build plate and wash it gently. Do not scrub aggressively. Rinse the surface carefully so no soap film remains.
Deep cleaning is particularly useful after repeated use of glue stick, hairspray, or other adhesion aids.
Proper Drying Before Printing
Dry the plate fully before reinstalling it.
Use a clean microfiber cloth or allow the plate to air-dry. Check both sides of a removable sheet. Water trapped beneath a magnetic plate can interfere with installation and may affect the underlying surface.
Avoid touching the cleaned printing area with bare fingers. Skin oils can reduce adhesion.
Reinstalling and Releveling the Build Plate
Place the dry build plate back on the printer. Confirm that it sits flat and that no dust, filament pieces, or debris remain underneath it.
Run leveling when needed, especially after changing the plate type or reinstalling a removable surface.
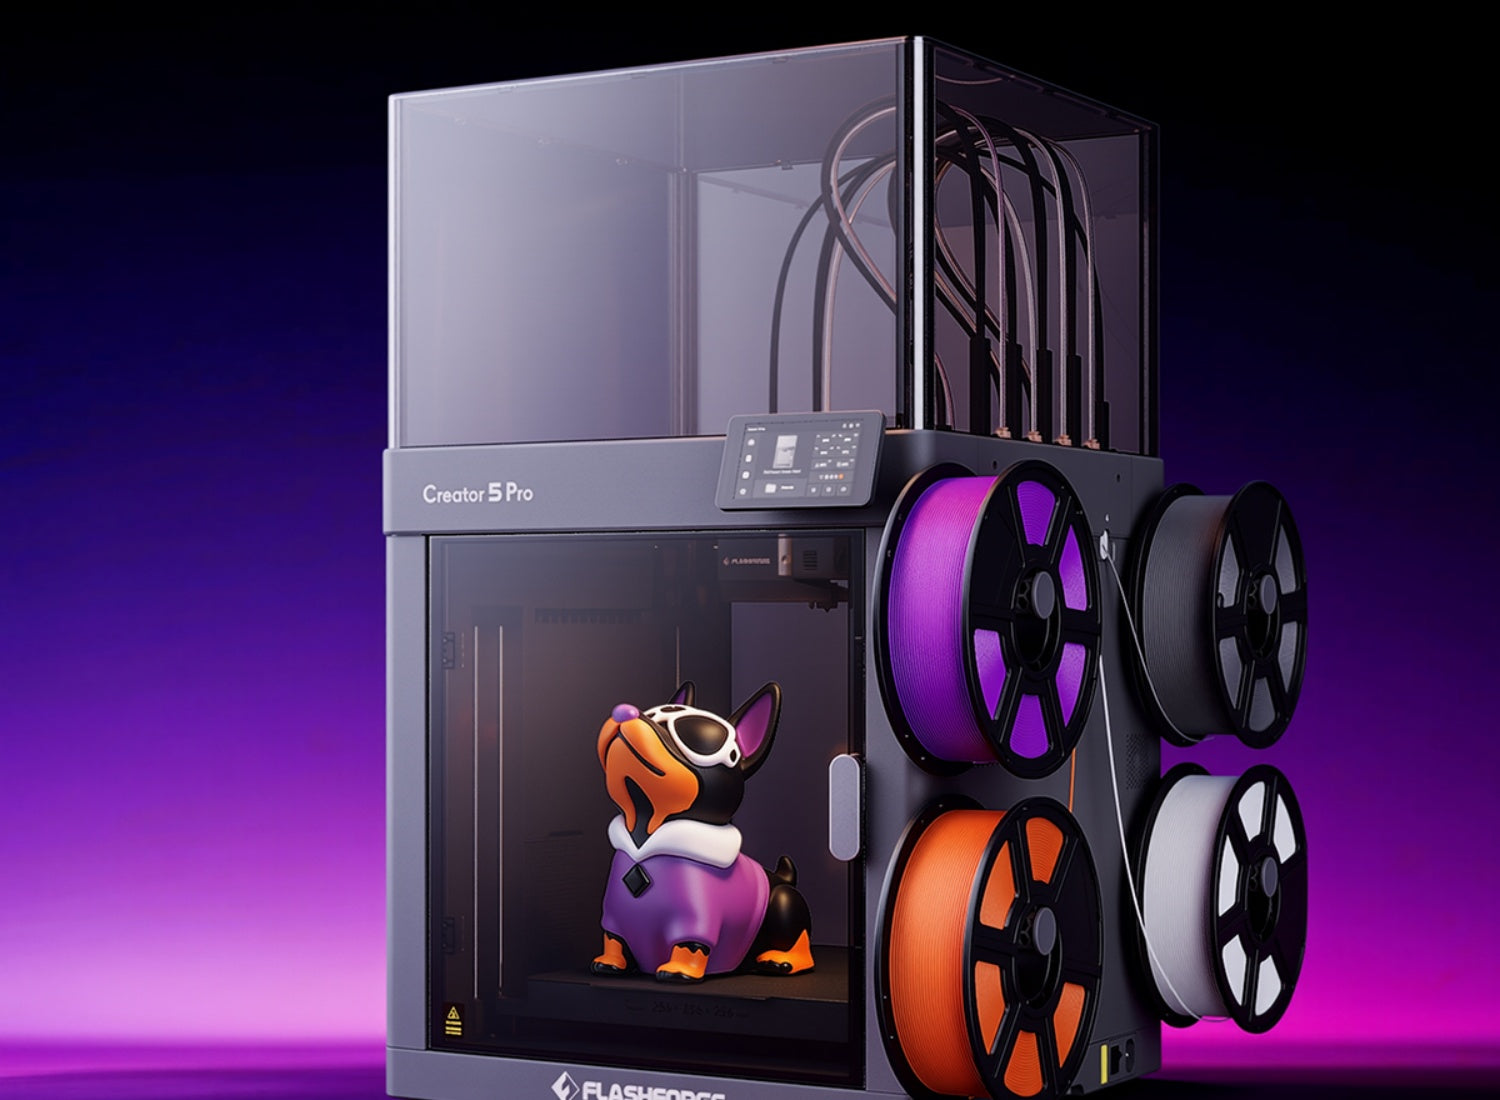
The Flashforge Creator 5 Pro combines a textured PEI flexible steel build plate with automatic leveling. This helps simplify the setup step after routine cleaning.
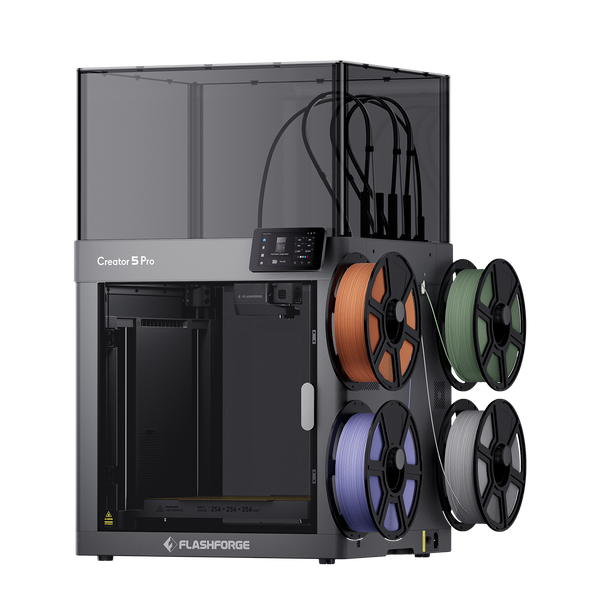
Flashforge Creator 5 Pro 4-Toolheads Enclosed Multi-Color 3D Printer | 500% Faster, Zero Purge Waste
How Should Different Bed Materials Be Cleaned Safely?
The general cleaning steps remain similar, but each surface needs slightly different handling.
Scratch-Free Cleaning for Glass Beds
Glass is smooth and easy to inspect, but it can be scratched by aggressive tools.
Use warm water, mild dish soap, and a microfiber cloth. Remove hardened residue with a plastic scraper at a low angle.
Allow the glass to cool before cleaning. Rapid temperature changes can place unnecessary stress on the plate.
Maintaining PEI Sheets Without Damaging the Coating
PEI sheets work best when the coating remains clean and intact.
Use IPA for quick wiping and warm water with mild dish soap for deeper cleaning. Avoid metal scrapers and rough abrasives.
Let the plate cool before flexing it to release a model. The Flashforge PEI build plate page notes that models can more easily separate from the plate after cooling to room temperature.
Cleaning Textured Building Surfaces
Textured surfaces can hold fine dust and residue inside their grooves. Wash the plate gently with warm water and mild dish soap. Use a soft brush only when necessary. Choose a brush that will not scratch or flatten the coating.
Dry the surface carefully. Residue inside the texture can cause inconsistent first-layer contact.
Caring for Magnetic and Specialty Beds
Remove the flexible sheet before washing it. Do not soak the printer's magnetic base.
Clean the removable surface according to its material. A smooth PEI sheet, a textured PEI plate, and a PC sticker plate may need different handling.
After cleaning, check the underside of the removable sheet and the magnetic base. Even a small filament fragment trapped beneath the plate can create an uneven printing surface.
How Can You Remove Stubborn Residue and Adhesives?
The safest method depends on what remains on the plate.
Begin with the gentlest option. Avoid scraping aggressively or applying strong solvents without checking the build plate instructions.
Removing PLA Buildup from the Surface
Allow the bed to cool fully before removing PLA residue. Flex a removable steel sheet gently or use a plastic scraper.
When choosing 3D printer filament, consider how the material interacts with the installed build plate. Even an easy-to-print filament can leave residue when the first layer is pressed too firmly against the surface.
Safe PETG Residue Removal
PETG can adhere strongly to some surfaces. Wait until the plate reaches room temperature before removing the print. Flex a removable plate gently rather than forcing a scraper underneath the part.
If residue remains, use warm water and mild dish soap. Follow the build plate instructions before using glue or another release layer in future prints.
Cleaning ABS and Other Hard Residue
Let the plate cool before removing ABS residue. Start with a plastic scraper, then use warm water and mild dish soap for any remaining buildup.
For more information about printing ABS in a controlled environment, read the Flashforge guide to choosing an ABS 3D printer.
Removing Glue Stick, Hairspray, and Adhesive Residue
Remove the plate from the printer and wash it with warm water and mild dish soap.
Use a soft sponge or cloth. Rinse thoroughly. Any remaining soap or adhesive film can interfere with the next print.
Avoid applying thick layers of glue stick or hairspray. Adhesion aids should support the print, not create a heavy coating that requires aggressive cleaning.
Using Heat to Loosen Stuck Material
Mild heat can help loosen residue, but use it carefully.
Use the printer bed rather than an open flame or an uncontrolled heat source. Warm the plate only enough to soften the residue slightly. Then turn off the heat and remove the material with a plastic scraper.
Do not scrape forcefully while the plate is very hot. High temperatures increase the risk of burns and may damage the surface.
How Often Should You Clean a 3D Printer Bed?
Cleaning frequency depends on how often the printer runs, which materials you use, and whether you apply adhesion aids.
Quick Cleaning Between Prints
Inspect the plate after every print. Remove loose debris and wipe away visible fingerprints. A quick IPA wipe can help when the surface has been handled or when first-layer adhesion begins to decline.
You do not need to wash the plate after every print when the surface remains clean.
Weekly Deep Cleaning Practices
For a printer used regularly, a weekly wash is a practical starting point. Remove the plate and wash it with warm water and mild dish soap. Adjust the schedule when residue builds up faster or when the printer is used less frequently.
A deep clean is also useful before an important long print.
Adjusting Frequency by Filament and Usage
Your cleaning schedule should reflect how often the printer runs and which materials you use. The type of 3D printer filament, first-layer pressure, print frequency, and use of adhesion aids can all affect how quickly residue builds up.
Signs Your Bed Needs Immediate Cleaning
Clean the bed when the first layer begins to detach, corners start lifting, or residue becomes visible.
Other warning signs include fingerprints, uneven bottom surfaces, glue buildup, small fragments embedded in textured areas, and inconsistent adhesion across different parts of the plate.
Do not immediately increase the bed temperature to compensate for a dirty surface. Clean the plate first.

How Can You Improve First-Layer Adhesion After Cleaning?
Cleaning solves many adhesion problems, but it is not the only factor.
Check the temperature, leveling, nozzle gap, material profile, and storage method before starting the next print.
Correct Bed Temperature Settings
Use a bed temperature that matches the filament and plate type.
The correct setting depends on the selected material. PLA, PETG, ABS, ASA, and engineering filaments do not require the same temperature.
Use the recommended printer profile as a starting point. Increase or decrease the temperature only after checking the first-layer result.
When and How to Use Adhesion Aids
Glue stick, hairspray, and other adhesion aids can help in selected cases, but they should not replace correct leveling or a clean surface. Apply a thin, even layer only where the model will print. Avoid heavy buildup.
The Flashforge build plate page notes that some dual-texture PEI applications may require glue, while other compatible surfaces are designed for different material needs.
Verifying Bed Level and Nozzle Gap
If adhesion remains inconsistent after cleaning, check the bed level and nozzle gap.
A nozzle positioned too far from the bed may produce a loose first layer. A nozzle positioned too close may press the filament too firmly into the surface and make removal difficult.
After reinstalling a removable sheet, return to the earlier leveling step and confirm that the plate sits flat.
Proper Build Plate Storage Practices
Store spare build plates in a clean, dry location. Keep the surfaces separated so they do not scrape against each other.
When comparing a 3D printer for sale, check whether removable plates and replacement surfaces are available. These small maintenance details can save time long after the initial purchase.
Conclusion
A clean 3D printer bed is key to strong first-layer adhesion, consistent print quality, and reliable performance. Start with the gentlest cleaning method—remove debris, wipe away oils with IPA, and use warm water with mild soap for deeper cleaning. Always dry the build plate completely before reuse.
Keep in mind that different surfaces, including glass, smooth PEI, textured PEI, and PC plates, require different care. While cleaning is important, proper leveling, nozzle height, bed temperature, and filament selection also play a major role in print success. A few minutes of routine maintenance can help prevent hours of failed prints.
FAQ About Cleaning a 3D Printer Bed
Can I use alcohol wipes to clean a 3D printer bed?
Yes, when the wipes contain plain isopropyl alcohol and do not leave fragrances, moisturizers, or other additives behind.
Use the wipe gently and allow the surface to dry before printing. Check the build plate instructions first because specialty surfaces may require a different cleaning method.
Can I wash my 3D printer bed with soap and water?
Yes, when the build plate is removable, wash the removable surface with warm water and mild dish soap. Rinse it thoroughly and dry both sides before reinstalling it.
It should be noted that do not pour water onto the printer or soak the magnetic base.
Does isopropyl alcohol destroy PLA?
IPA is commonly used as a build-plate wipe. It should not be treated as a reliable solvent for removing thick PLA residue.
Use a plastic scraper or a gentle soap-and-water wash for hardened PLA buildup. Reserve IPA for fingerprints, oils, and light surface residue.
How to clean a 3D printer bed without alcohol?
Remove the build plate and wash it with warm water and mild dish soap.
Use a microfiber cloth or soft sponge. Rinse the plate carefully and allow it to dry completely before reinstalling it.
This method is suitable for routine deep cleaning and for removing adhesive residue.
How to make PLA shiny again?
Cleaning the build plate will not restore the shine of a finished PLA model.
For a smoother printed surface, review the Flashforge guide on how to smooth 3D prints. If the goal is a smoother bottom surface, a smooth PEI build plate may help create a different finish than a textured plate.
The Flashforge PEI build plate guide shows that dual-texture PEI, smooth PEI, and high-temperature PC surfaces produce different bottom finishes.