



A turtle for your desk, a moving octopus, or a miniature of your dog can all be 3D printed animals, but they call for different choices. A rounded turtle may be a comfortable first project. An octopus needs space between its joints so they can move. A pet portrait needs both a complete 3D shape and the details that make the animal recognizable.
This guide starts with animal model ideas, then walks through finding a file, choosing material, printing it, and improving the finished figure. If you are new to 3D printing, begin with a sturdy, simple shape and save the delicate features for a later project.
What Kinds of 3D Printed Animals Can You Make?
Animal models can be made for movement, display, games, or everyday use. Knowing what you want the finished object to do makes it easier to choose a suitable design. You can browse models on VoxelShare for inspiration, then check each model’s details before downloading it.
Articulated Animals That Move After Printing
In 3D printing, an articulated snake or octopus has connected sections that can move. Some are print-in-place models: their parts are designed to come off the printer already connected, without assembly. Look for instructions from the designer, because the small gaps between joints must remain open during printing.
Realistic Pet Figures and Keepsakes
A pet figure can capture a familiar sitting pose, distinctive ears, or coat markings. Start with several clear photos if you want a model of a real animal. The photos provide references, but the pet’s full shape still has to be created as a printable 3D model.

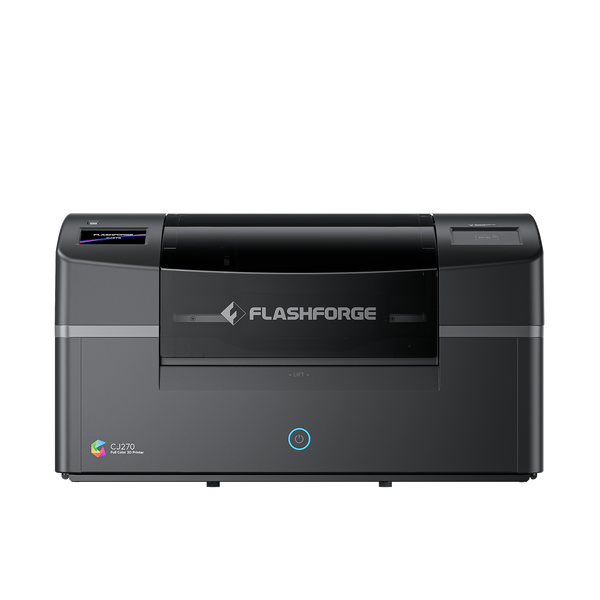
For a small display piece where subtle coat colors matter, the Flashforge CJ270 offers a full-color material-jetting process. It builds the shape and color together from a prepared model; it cannot turn a single photo directly into a complete figurine. Flashforge’s guide to turning a photo into a printable model explains what must happen between the image and the print.
Animal Miniatures for Games and Displays
Small foxes, wolves, birds, or fantasy creatures can become tabletop pieces or shelf displays. Their size makes fine details harder to reproduce: a thin ankle or raised wing may need support or a stronger design. Check the model at the size you actually plan to print, since shrinking it can make those features even thinner.
Animal-Themed Decor and Useful Objects
An animal can also be part of a pen holder, planter cover, bookend, or nameplate. Here, appearance is only one consideration. Check that a holder fits what it needs to hold and that a decorative base can stand steadily. If an object will carry weight or be used regularly, evaluate its structure rather than choosing a file solely for its shape.
| Animal model | Best for | Main printing challenge |
|---|---|---|
| Rounded turtle or penguin | First prints and desk displays | Keeping the first layer secure |
| Articulated snake or octopus | Moving models | Keeping joints separate |
| Small game miniature | Tabletop displays | Preserving thin details |
| Pet portrait | Personal keepsakes | Preparing the shape and color data |
| Animal-themed holder | Everyday use | Checking fit and stability |

Which Animals Are Fun to 3D Print?
Once you know the type of project you want, choose a particular animal. The pose and model design matter more to printability than the species itself, so use these ideas as starting points and inspect the file before printing.
1. Turtle — An Easy First Animal Print
A turtle with a broad, flat underside and sturdy legs is a good first choice. Look for a shell with visible detail but avoid a model whose head or narrow tail extends far into the air. A stable base gives the first printed layers more contact with the build plate.
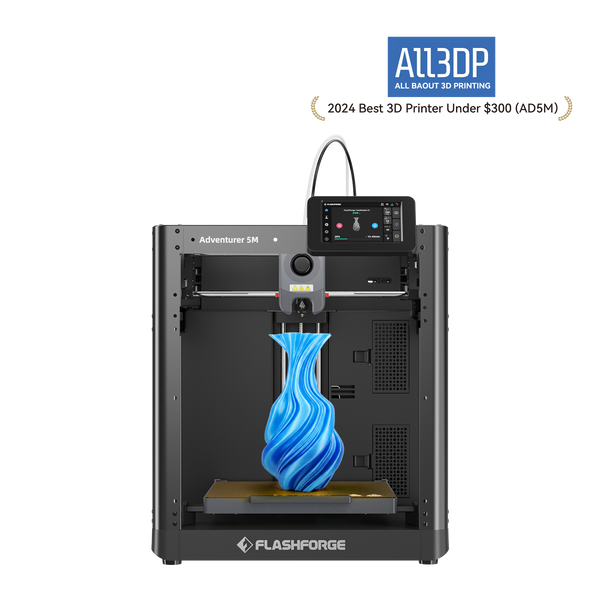
For simple, single-color animal figures, the Flashforge Adventurer 5M is an approachable option. Its automatic leveling helps prepare the build surface, although you should still keep the plate clean and check that the first layer attaches properly.
Imprimante 3D Flashforge Adventurer 5M, vitesse élevée de 600 mm/s, adaptée aux débutants
2. Penguin — A Simple Desk Decoration
A standing penguin has a clear silhouette and often works well as a small desk figure. Choose one with wings close to its body for an easier print. A design with wings stretched outward may need more support.
Its contrasting colors also make it a candidate for multicolor printing. If you want those colors built into the object rather than painted afterward, the Flashforge AD5X can automatically switch among up to four loaded filament colors. Choose a file prepared for color assignments, or be ready to assign the colors yourself in the slicing software.
3. Cat — A Personalized Gift or Display Piece
A sitting cat can make a recognizable gift without requiring a complicated pose. Check that its tail joins the body securely or rests on the base; a long, thin tail standing apart is more vulnerable during printing and cleanup. If the cat has distinctive markings, decide whether to paint them, use separate filament colors, or prepare a full-color model.
4. Frog — A Small Model With Plenty of Character
A crouching frog offers room for expressive eyes and a playful pose while keeping much of its body close to the build plate. Before printing, rotate the model in the slicer and look beneath its chin and front legs. If those areas begin in midair, they may need support or a different orientation.
5. Articulated Snake — A Print-in-Place Project
A snake is a natural fit for repeated moving segments. Download a file specifically designed for print-in-place use, and follow the designer’s instructions for orientation and settings. Avoid casually shrinking it: the gaps between segments shrink too, which can leave the joints stuck together.
6. Octopus — A Playful Articulated Model
An octopus can have several jointed arms spread across the build plate, making the first layer especially important. Confirm that every arm begins where the file’s designer intended and stays attached during the early stages of printing. After removal, test each joint gently rather than pulling a whole arm at once.
7. Dog — A Keepsake Inspired by a Real Pet
A dog figure feels personal when its ears, posture, and facial shape resemble the pet you know. A sitting pose is usually a more manageable starting point than a running one with thin legs. If you want a close likeness, gather photos from the front and sides before modeling; one picture cannot show the parts hidden from the camera.
How to 3D Print an Animal Model
The steps below describe printing with plastic filament, as used by the Adventurer 5M and AD5X. A full-color material-jetting printer such as the CJ270 uses different materials and preparation steps, so follow its own workflow for a pet portrait.
Finding and Downloading Animal 3D Models
Search a model community such as VoxelShare by animal name, then open the model page instead of downloading the first appealing image. Check its dimensions, file format, intended printer type, and any notes about supports or moving joints. If you plan to sell prints, check the creator’s usage terms, including whether any applicable Creative Commons license allows commercial use.
For a first attempt with a desktop 3D printer, choose a model with a flat base and few thin parts. You can try a more elaborate figure after learning how your printer handles small details.
Choosing the Right Filament for Animal Models
3D printer filament is the plastic fed into a printer and melted to form the model one layer at a time. PLA is a straightforward choice for an indoor decorative turtle or penguin. PETG may suit a figure that will be handled more often, while TPU is used when flexibility is an intended feature. Check that your printer, nozzle, and chosen profile support the particular material before loading it.
Preparing and Slicing the Model for Printing
Open the downloaded file in slicing software, which converts the 3D shape into instructions for the printer. Confirm the model’s size, select the correct printer and filament, and position the animal so it has a stable area on the build plate.
Next, preview the sliced result layer by layer. Look for a tail that starts in the air, support under a frog’s chin, or separate segments on an articulated snake. Fix those issues in the preview before starting the print.

Adjusting Print Settings for Fine Details and Smooth Surfaces
Begin with a tested profile for your printer and filament rather than changing many settings at once. For a small face or textured shell, a finer layer height may show more detail, but it generally increases print time. If an ear or leg appears too thin in the preview, enlarging or strengthening the model may help more than changing a quality setting.
For moving animals, preserve the model designer’s intended joint gaps. A settings change that puts extra material into those spaces can stop the finished parts from moving.
Removing Supports and Finishing Your Printed Animal Model
Let the model and removable build plate cool before removing the print. Take supports away slowly around ears, legs, and tails, working on one area at a time. If a support is firmly attached to a delicate feature, do not twist the entire figure to free it.
Check articulated joints individually and clear away loose material you can reach without forcing them. For a display piece, lightly clean visible support marks before painting or adding a base.
What Are the Best Materials for 3D Printed Animals?
The best material depends on what the animal is meant to do. The following choices apply to filament printing; the CJ270’s dedicated full-color materials are a separate system. Flashforge’s filament guide provides further detail on material properties and printer requirements.
PLA for Decorative Animal Figures and Beginner Projects
PLA is a practical place to start for an indoor figure that will sit on a shelf or desk. It suits projects where the shape and surface detail matter more than flexibility. Use a profile intended for your specific PLA and printer, and avoid assuming that a decorative print is suitable for every kind of handling.
PETG for More Durable Animal Models
PETG is useful when a model needs more toughness than a basic display piece, such as an animal-themed holder that will be picked up regularly. It can behave differently from PLA during printing, so choose a PETG profile and check the first layer and surface finish before committing to a detailed figure.
TPU for Flexible and Soft Animal Designs
TPU bends, making it an option for a model deliberately designed to flex. It is more demanding to feed and print than a typical rigid filament. A design made for PLA will not necessarily move or fit the same way when printed in TPU, so check the file designer’s material guidance and compatibility with your chosen TPU 3D printer first.
Comparing Filament Properties for Different Animal Models
For a first turtle or penguin, start with PLA. Consider PETG when a finished item needs to withstand more frequent handling, and TPU when the design specifically calls for a flexible material. Material alone cannot rescue a fragile shape: a very thin leg can still break, so inspect the model and its intended use alongside the filament choice.
How to Improve the Quality of 3D Printed Animal Figures
If a print looks rough or loses detail, identify the visible problem before changing settings. Small, controlled adjustments make it easier to see what helped.
Choosing the Right Layer Height for Small Details
Layer height is the thickness of each printed layer. Finer layers can make a rounded face or curved shell appear smoother, but they also add printing time. Start with a standard profile, examine the result, and use a finer setting when the model is large enough for that extra detail to show.
Reducing Stringing and Surface Imperfections
Thin strands between a frog’s legs or an octopus’s arms are called stringing. Check that the filament is stored properly and use the material’s recommended profile before adjusting temperature or retraction. If you make a change, test it on a small model so you can tell whether it improves the surface.
Printing Thin Legs, Tails, and Other Delicate Parts
When a feature repeatedly breaks, look at the model itself. A thicker tail, a leg connected to a base, or a larger print may be more reliable than finer settings. Also check support placement: supports should hold difficult areas during printing without making the feature hard to release afterward.
Adding Color and Texture to Finished Animal Models
Paint can add eyes, spots, and coat markings to a single-color print. Clean up support marks first, test your finish on an inconspicuous area, and build up details gradually. For designs with a few distinct color regions, a multi color 3D printer offers another route. A pet portrait with more varied color needs a prepared full-color model and a suitable process, rather than simply assigning more filament colors.
Conclusion
Choose your first animal by its shape as well as its appearance. A broad-based turtle or compact penguin lets you practice model preparation and first-layer checks; a snake or octopus adds the challenge of moving joints. Once those basics feel familiar, you can take on a detailed miniature or a pet keepsake designed around an animal you know.
FAQ
What Is the Easiest Animal to 3D Print for Beginners?
A turtle with a flat underside and sturdy legs is a sensible first choice. A compact, standing penguin can also work well. In either case, inspect the actual file: a simple pose with fewer thin or overhanging features matters more than the animal’s name.
Can You 3D Print an Animal With Moving Parts?
Yes. Choose a model designed with separate joints, including a print-in-place file if you want the parts to be connected when printing finishes. Follow the designer’s orientation and material notes, and preview the spaces between joints before printing.
Why Are the Joints on My Articulated Animal Stuck?
The joint gaps may have closed because of the model’s scale, first-layer spreading, or excess material during printing. Let the model cool, inspect where the parts meet, and avoid forcing a thin joint. If it will not move, review the designer’s settings and test a small section before printing the whole animal again. Flashforge’s guide to printing figures with moving joints explains why clearance between parts matters.
Can You Turn a Photo of Your Pet Into a 3D Printed Figure?
Yes, but the photo must first be used to create a complete 3D model. Multiple views help show the pet’s shape; a color image alone cannot supply the geometry of its unseen sides. If you want realistic coat markings, the finished model also needs usable color or texture data for the chosen printing process.
How Long Does It Take to 3D Print a Small Animal?
There is no reliable time for every small animal. Size, layer height, support structures, material, and color changes all affect the job. After choosing your model and settings, check the slicer’s time estimate, allow room for variation, and include cooling and support removal in your plans.
