

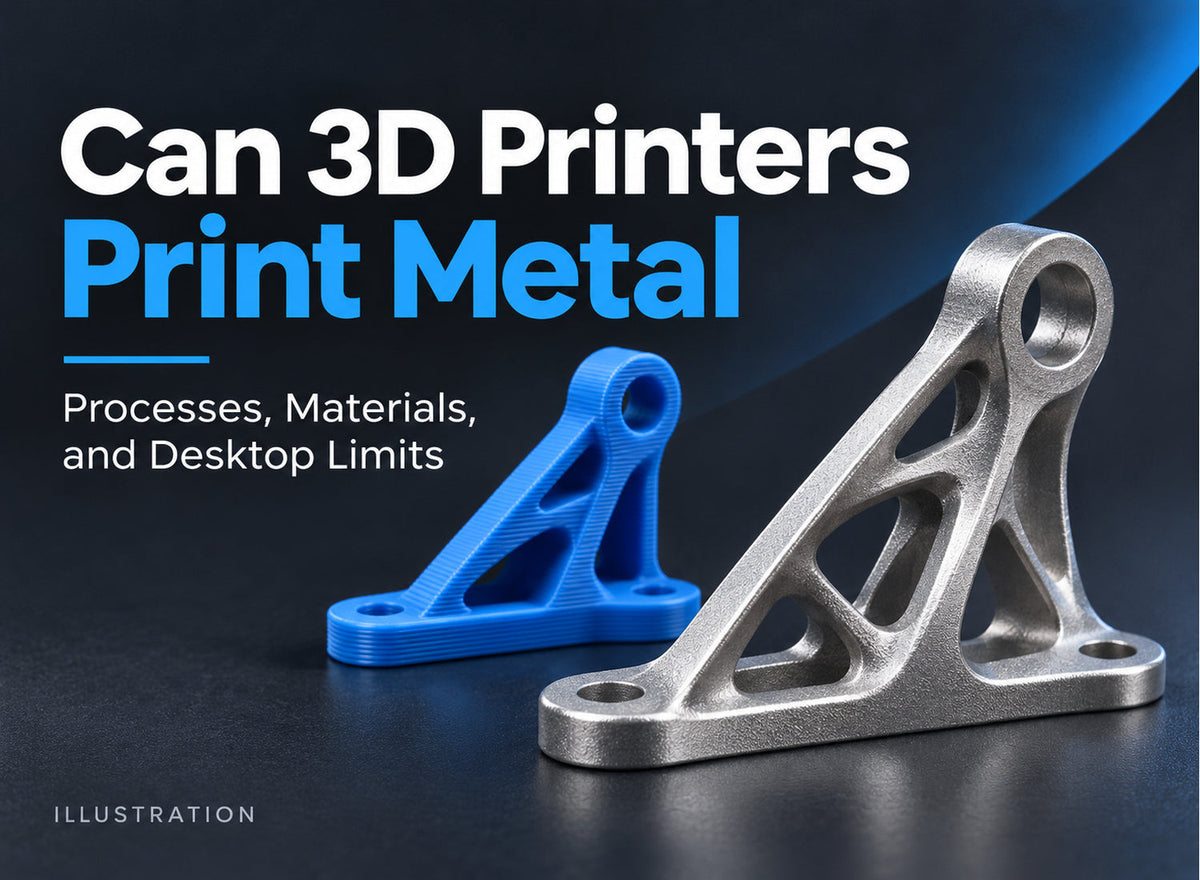
Yes, 3D printers can print metal, but the printer and material must belong to a compatible metal manufacturing process. An ordinary desktop filament printer cannot melt steel or titanium simply by switching spools. Some specialized systems build metal directly; others print a shape that becomes a metal part only after additional processing.
That distinction matters when you want a replacement bracket, a decorative object, or a prototype for a future metal component. This guide explains the main routes, what “metal filament” can mean, and where a desktop plastic printer fits into the project.
What Counts as Metal 3D Printing
The useful question is what the finished object contains and what properties it needs. A shiny surface, a metal-filled feedstock, and a finished metal component describe different things.

In 3D printing, a process builds geometry from a digital model. That broad label does not tell you whether the result is plastic, a composite, or metal. When comparing a desktop 3D printer, check its supported materials and processing requirements before assuming that “metal” is an option.
| Route | What leaves the printer | What you ultimately get |
|---|---|---|
| Direct metal printing | A metal build needing post-processing | A finished metal component after the required work |
| Bound metal printing | Metal powder held together by binder | A metal component after debinding and sintering |
| Metal-look or decorative metal-filled plastic | A polymer or polymer composite object | A plastic-based part with a metallic appearance or feel |
Decorative materials belong in a different purchasing category from industrial metal feedstocks. Read the technical description of any 3D printer filament: the name alone does not establish its composition, compatibility, or suitability for a loaded component.
How Printers Make Real Metal Parts
Metal printing includes several manufacturing routes. NIST’s overview of additive manufacturing technologies distinguishes powder bed fusion, directed energy deposition, and binder jetting, among other processes. Their different ways of placing and joining material explain why the equipment varies.
Powder Bed Fusion
Powder bed fusion uses a laser or electron beam to fuse selected regions of metal powder. Repeating that operation across successive layers creates the part. The build still needs the finishing and inspection specified for its application.
Directed Energy Deposition
Directed energy deposition feeds material into a region heated by a concentrated energy source. Metal joins the underlying surface as it is deposited. This is a separate equipment category from a desktop printer that extrudes softened plastic.
Binder Jetting
Binder jetting places a binder into a powder bed to hold the desired shape together. In a sintering-based metal workflow, printing creates an intermediate object; subsequent processing produces the consolidated metal component. Include those later stages when comparing delivery times and costs.
None of these routes can be enabled by fitting a different nozzle to a conventional plastic machine. Browse printer accessories to match approved replacement parts to your model, rather than treating an accessory as a conversion kit for a different manufacturing process.
Can a Regular FDM Printer Use Metal Filament
Sometimes it can handle a compatible specialty filament, but that does not mean it produces a finished metal part. FDM, or fused deposition modeling, normally feeds thermoplastic filament through a heated nozzle. Flashforge’s explanation of fused deposition modeling and its uses covers that basic workflow.
Before buying a spool, determine which of the following material categories it belongs to. The distinction changes both the equipment requirements and the next step after printing.
Metallic Appearance and Decorative Fillers
Some filaments create a metallic appearance through pigments or other additives. Others contain metal particles within a polymer. These materials can suit display pieces, costume details, or decorative models, but the finished object remains plastic-based unless the material is specifically engineered for a validated metal conversion process.
A bronze-colored print is therefore not evidence of bronze-like strength, heat resistance, or conductivity. Check the exact grade’s data sheet instead of transferring properties from its color or marketing name. Metal-filled blends may also be abrasive, so confirm nozzle requirements and the printer manufacturer’s compatibility guidance.
Bound Metal Feedstock
Bound metal feedstocks contain metal powder and a binder that makes the material printable. The printed “green” part is an intermediate shape. Debinding removes the binder, and sintering consolidates the remaining metal. Research listed by Oak Ridge National Laboratory on material extrusion of stainless steel feedstocks demonstrates why binder removal and thermal post-processing are essential parts of such workflows.
Compatibility involves more than nozzle temperature. Feedstock handling, extrusion hardware, build preparation, and the downstream processing service must all work together. Use only a combination explicitly supported by the material supplier and equipment provider. A printer’s support for abrasive plastic composites does not establish support for sinterable metal feedstock.
Sintering also changes dimensions. The supplier or processing provider should specify how to compensate for shrinkage and support the part during processing. Avoid applying a generic scaling percentage from an unrelated material. Confirm acceptance criteria before printing, particularly if you plan to mail green parts to a service.

Choose a Route Before Buying Equipment
Start with the job the part must do. A prototype that checks whether a handle fits a hand has different requirements from a bracket that carries a working load. Defining that difference prevents an expensive purchase based on appearance alone.
Decide Whether the Part Actually Needs Metal
Write down the operating temperature, expected loads, exposure conditions, and required dimensions. If the goal is visual presentation or checking assembly clearances, a plastic prototype may answer the immediate question. If metal properties are essential, specify an alloy and manufacturing route with a qualified provider.
For example, you could print a plastic mockup of a mounting bracket to check hole locations and access for a screwdriver. That mockup can reveal a design problem before you order the metal version. It cannot validate the final bracket’s load capacity or fatigue life. Keep the geometry check separate from performance qualification.
Compare Complete Costs and Lead Times
Request a quote for the finished deliverable. A useful comparison includes preparation, printing, post-processing, inspection, and shipping, along with any minimum order or setup charge. Machine purchase price and the price of a printed part answer different questions.
Ask what condition the quoted part arrives in. Support removal, surface finishing, heat treatment, and machining may be separate operations, depending on the process and specification. A low printing quote can become a poor comparison if the other quote includes a finished, inspected component.
For occasional metal parts, an external service lets you evaluate the result without first building an entire production workflow. Frequent, repeatable demand may justify evaluating equipment ownership. Compare that decision against the staffing, workspace, maintenance, and post-processing resources you would need.
Prepare the Design for Its Final Process
Discuss orientation, thin features, enclosed cavities, support access, and critical surfaces with the provider before releasing a design. An STL file describes shape, but a drawing communicates dimensions and acceptance requirements. Identify which holes or mating surfaces need particular attention.
If your next purchase is for plastic design iterations, Flashforge’s FDM printer guide by use case provides a broader selection framework. Choose that printer around the prototypes you expect to make rather than assuming it will later become a metal system.
Where Flashforge Fits in a Metal Part Project
A desktop plastic printer can support development before the metal manufacturing stage. Flashforge Creator 5 models are relevant here for geometry checks, presentation models, and compatible polymer prototypes. The recommendations below concern plastic printing; they do not establish compatibility with bound metal feedstocks.

Creator 5 for Everyday Prototype Iteration
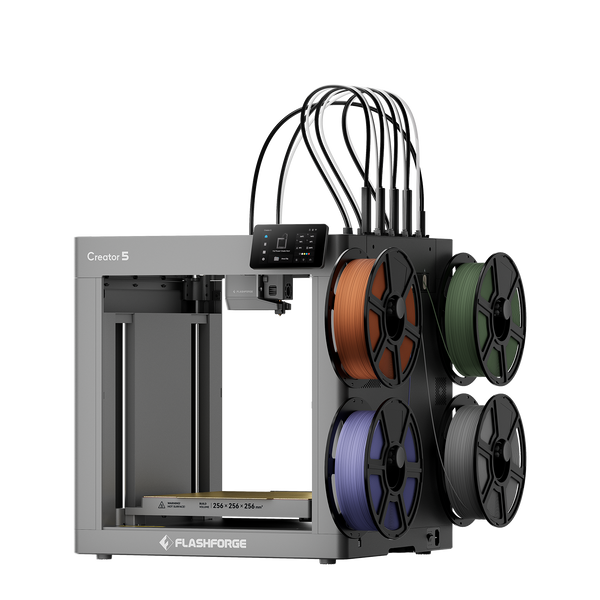
The Flashforge Creator 5 has four independent toolheads and a 256 × 256 × 256 mm build volume. Its open-frame design suits supported materials such as PLA and PETG for checking shape and assembly. Separate toolheads can assign a compatible support material to another nozzle when the geometry benefits from it.
For a project that needs a multi head 3D printer, that separation offers a practical way to manage model and support materials. Confirm the material pairing and slicer profile before starting. A clean support interface helps you examine the prototype, while the final metal design still needs its own manufacturing review.
Creator 5 Pro for Engineering Polymer Prototypes
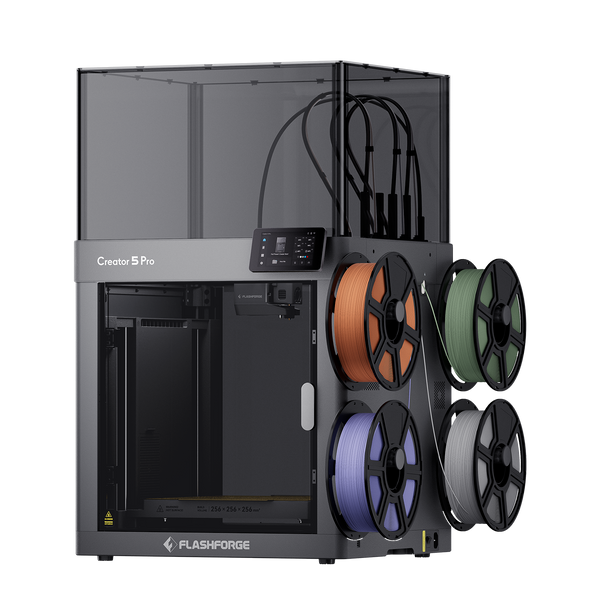
The Flashforge Creator 5 Pro adds an enclosed chamber with active heating up to 65°C. For supported engineering filaments, controlling the build environment helps address warping during prototype production. Its four independent toolheads also support compatible multi-material workflows.
An enclosed 3D printer is worth considering when the prototype material needs stable thermal conditions. Select a filament supported by the machine and follow its drying and printing guidance. An engineering polymer prototype can answer useful design questions, but its behavior does not substitute for testing the intended metal component.
Frequently Asked Questions
These questions address details to clarify before ordering a part or choosing a material.
Can a Plastic Print Be Used to Make a Casting
Yes, some casting workflows use printed patterns. Ask the foundry which pattern material and design rules it accepts before printing. The printer makes the pattern, while the casting process makes the metal component; ordinary plastic is not automatically suitable for every foundry workflow.
Does Metal Printing Eliminate Machining
No. A part may still need machining where mating surfaces, threads, or dimensional requirements exceed the chosen printing process’s capability. State these requirements when requesting a quote so the provider can plan the necessary finishing operations.
Is a Metal Print Always Stronger Than a Plastic Print
Material names alone cannot answer that question for a particular design. Alloy, geometry, processing, defects, and loading conditions all matter. Use relevant material data and application-specific validation instead of assuming every metal print is suitable for a structural job.
Can I Order One Metal Part Without Buying a Printer
Yes. A manufacturing service can assess a one-off project and quote the appropriate process. Provide the model, quantity, material requirements, and critical dimensions. Ask about minimum charges and whether the quoted price includes the finishing you need.
Will a Magnet Prove That a Printed Part Is Metal
No. Magnetic response varies among metals and alloys, and some filled polymers may respond to a magnet. For a purchased part, request the material identification and documentation appropriate to the application rather than relying on a magnet test.
Start With the Required Finished Part
Choose a validated metal process when metal properties are essential. For fit or assembly checks, use a compatible Flashforge plastic printer to refine the design before ordering metal parts.