


A calibrated 3D printer produces a consistent first layer, accurate dimensions, clean corners, and stable extrusion. Calibration is not a single setting, however. It combines mechanical checks, bed setup, extrusion testing, and material-specific adjustments.
This guide focuses on FDM printers. Menus vary by model, so follow the manufacturer’s instructions, change one setting at a time, and record the original value.
What Does 3D Printer Calibration Actually Mean?
FDM 3D printer calibration aligns the machine’s movement, sensing, extrusion, and slicer settings so the printed result matches the intended model. It may include bed leveling, Z-offset, extrusion flow, nozzle temperature, retraction, dimensional accuracy, vibration compensation, and pressure advance.
Newer 3D printing systems automate parts of the process, but their sensors cannot compensate for a dirty nozzle, loose belt, wet filament, or incorrectly installed build plate.
Calibration vs Bed Leveling: What’s the Difference?
Bed leveling is one part of calibration. It helps the nozzle maintain a consistent distance from the build surface. Manual leveling physically adjusts the bed or gantry, while automatic leveling probes several points and creates a compensation map.
Calibration is broader. Even the best home 3D printer with a level bed cannot correct excessive flow, unsuitable temperature, loose hardware, or an inaccurate Z-offset. If the first layer still fails after leveling, another part of the setup may be responsible.

Automatic vs Manual 3D Printer Calibration
Automatic calibration uses sensors and firmware routines to measure and apply compensation. Depending on the printer, it may cover bed leveling, toolhead offsets, vibration, or dynamic flow.
Manual calibration uses test prints and measurements. A reliable workflow runs the available automatic routines first and verifies the result with a controlled test print.
When Should You Calibrate a 3D Printer?
Check the relevant calibration:
- When setting up a new desktop 3D printer
- After moving or transporting the printer
- After changing the nozzle, hotend, extruder, or toolhead
- After replacing the build plate
- When switching to a very different filament
- When the first layer becomes inconsistent
- When prints show repeated dimensional or surface problems
- After major maintenance, repairs, or a nozzle collision
A 3D printer filament change does not always require complete recalibration. Changing between similar PLA filaments may only require a first-layer check, while moving from PLA to TPU or nylon may require new temperature, flow, retraction, and pressure-advance settings.
How to Calibrate a 3D Printer Step by Step
Complete these steps in order. Advanced tuning will not produce reliable results while mechanical or first-layer problems remain.
Step 1: Check the Printer Before Calibration
Turn off the printer and allow heated parts to cool. Confirm that the frame and build plate are stable and the toolhead has no visible play. Inspect belts, rails or wheels, lead screws, and fasteners.
Each axis should move smoothly without binding, grinding, or an obvious loose section. Calibration cannot reliably compensate for a slipping belt, damaged bearing, loose nozzle assembly, or unstable build plate.
Step 2: Clean the Nozzle and Build Plate
Remove plastic residue from the nozzle using the recommended procedure. Material on the tip can affect probing and first-layer height. Clear a partly clogged nozzle before evaluating flow.
Clean the build surface with a method suitable for its material. Remove dust, skin oil, old adhesive, and plastic fragments, then make sure a removable plate is correctly seated.
Step 3: Level the Print Bed
Preheat the printer if its instructions recommend it. Manually adjust the specified points until the nozzle gap is consistent, or run the complete automatic probing sequence without touching the machine.
The Flashforge Adventurer 5M suits users new to calibration because automatic leveling and a quick-detach nozzle simplify setup and maintenance. The first layer should still be checked after changing a nozzle or build surface.
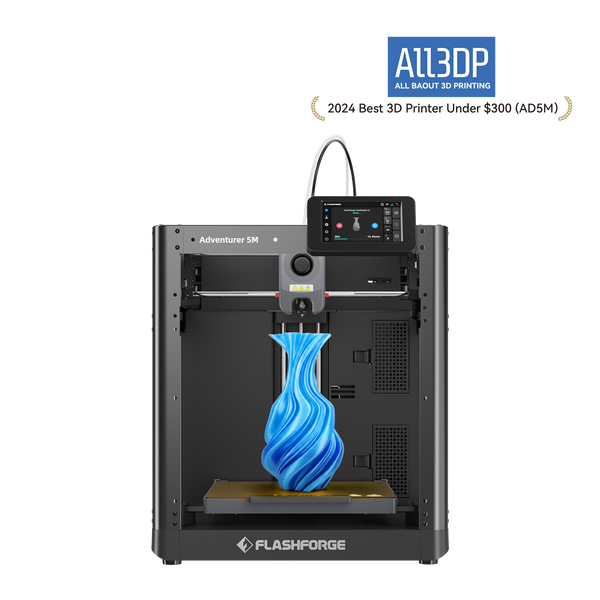
Imprimante 3D Flashforge Adventurer 5M, vitesse élevée de 600 mm/s, adaptée aux débutants
Step 4: Set the Correct Z-Offset
The Z-offset fine-tunes the working distance between the nozzle and build surface after leveling. Print a single-layer pattern across several parts of the plate and inspect the deposited lines.
- Nozzle too high: Lines remain separated, look rounded, or detach easily.
- Nozzle too low: Filament is overly flattened, ridged, translucent, or scraped.
- Correct height: Adjacent lines join into an even surface without gaps or deep grooves.
Adjust the value in small increments. Positive and negative directions vary by firmware, so follow the printer’s interface. Flashforge’s guide to AD5M first-layer and vibration calibration provides a model-specific example.
Step 5: Calibrate Extrusion and Flow
Machine-level extrusion settings control how much filament is fed for a commanded movement. Change these values only if the printer supports user adjustment and a measured test shows a repeatable error.
The slicer’s flow ratio or extrusion multiplier adjusts extrusion for a particular filament. Start with a trusted profile and print a suitable flow test. Look for connected walls and solid top surfaces without swollen edges, rough overfill, or gaps. Do not use flow to hide a clogged nozzle, slipping drive gear, or wet filament.
Step 6: Calibrate Nozzle Temperature
Begin within the filament manufacturer’s recommended range. Print a temperature tower that changes temperature in controlled steps while other settings remain constant. Compare layer bonding, bridging, overhangs, stringing, and surface finish.
Too little heat can cause weak bonding or poor flow, while too much can increase stringing and soften details. Save separate profiles when different materials or brands need different settings. Flashforge’s guide to using different 3D printing filaments offers additional material guidance.
Step 7: Calibrate Retraction
Retraction pulls filament back during travel moves to reduce oozing. Begin with the profile intended for your printer, then print a retraction test and adjust distance and speed gradually.
Too little retraction can leave strings. Too much can cause gaps, filament grinding, or clogs. Temperature, filament moisture, travel paths, and pressure advance also affect stringing, so retraction should not be adjusted in isolation.
Step 8: Check Dimensional Accuracy
Print a calibration cube or another model with known dimensions, allow it to cool, and measure each axis with a reliable caliper. Compare the measurements with the model dimensions.
Before changing motion values, check flow, shrinkage, line width, and first-layer compression. A wider base usually indicates elephant foot rather than an axis error. Inconsistent differences may indicate loose belts, pulleys, or skipped steps.
Step 9: Tune Vibration Compensation and Pressure Advance
On a high speed 3D printer, vibration compensation, or input shaping, reduces ringing caused by rapid direction changes. Pressure advance controls extrusion during acceleration and deceleration to improve corners and reduce blobs or gaps. Both should be tuned after the mechanics, temperature, and basic extrusion are stable.
Use the printer’s automatic routines when available. The Flashforge Creator 5 Pro has four independent toolheads and supports automatic multi-toolhead offset calibration, automatic leveling, dynamic flow calibration, and smart compensation. These functions reduce the complexity of aligning several toolheads and controlling extrusion during multicolor, multi-material, or high-speed printing.
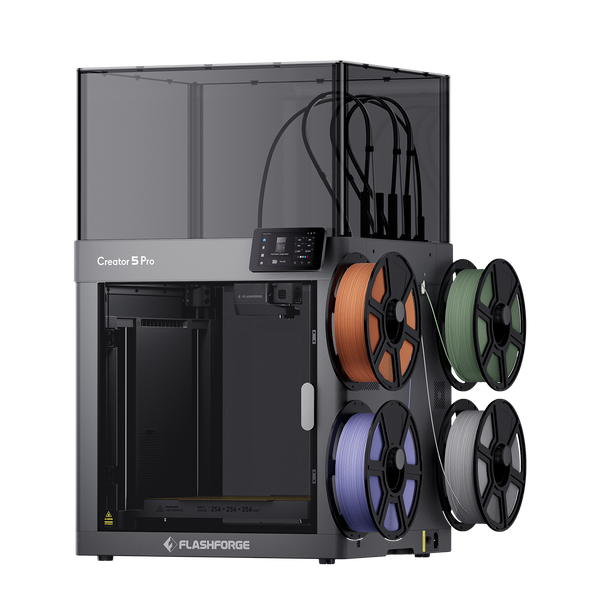
Flashforge Creator 5 Pro 4-Toolheads Enclosed Multi-Color 3D Printer | 500% Faster, Zero Purge Waste
After changing a nozzle or toolhead component, rerun the recommended calibration. For manual firmware tuning, use the correct documentation instead of copying another machine’s values. Klipper documents pressure advance and resonance compensation.
How to Check Whether Your Calibration Is Correct
Use the following three tests to confirm that the main calibration settings are working together correctly.

Run a First-Layer Test
Use a pattern that reaches the center and several areas near the edges. The surface should be consistently fused across the plate. If one area looks correct and another does not, rerun leveling and inspect the plate installation before changing the global Z-offset.
Print a Calibration Cube
Check for straight walls, clean corners, stable layer lines, and accurate dimensions. Inspect the bottom separately because first-layer compression can distort the base even when the upper dimensions are correct.
Use a Temperature Tower or Retraction Test When Needed
Choose the test that matches the symptom. Use a temperature tower after changing material or when heat affects bonding and finish. Use a retraction test for strings across travel moves. For ripples after corners, run the printer’s vibration test or print a suitable ringing model.
Common 3D Printer Calibration Problems and What They Mean
| Print problem | Suggested areas to check |
|---|---|
| First layer does not stick | Plate cleanliness, Z-offset, leveling, first-layer temperature and speed |
| First layer is thin or scraped | Z-offset, nozzle residue, plate installation |
| Gaps between first-layer lines | Z-offset, flow, partial clog, filament feed |
| Stringing | Filament moisture, temperature, retraction, pressure advance |
| Bulging corners | Flow, pressure advance, acceleration, temperature |
| Ripples after corners | Belts, frame, toolhead security, vibration compensation |
| Incorrect dimensions | Flow, shrinkage, first-layer compression, axis calibration where supported |
| Wider bottom edge | Z-offset, bed temperature, first-layer flow, elephant-foot compensation |
| Sudden layer shifts | Belts, pulleys, obstruction, speed, acceleration, or missed steps |
| Random under-extrusion | Nozzle clog, wet filament, extruder grip, temperature, filament path |
Common 3D Printer Calibration Mistakes
- Changing several settings at once
- Calibrating with a dirty nozzle or build plate
- Treating auto leveling as a replacement for checking the first layer
- Copying settings from a different printer
- Using flow adjustments to hide a clog or mechanical problem
- Measuring a calibration print before it cools
- Changing axis values without checking shrinkage or elephant foot
- Tuning high-speed features before fixing mechanical problems
- Forgetting to save successful settings
How Often Should You Calibrate a 3D Printer?
There is no universal schedule. If the printer has not been moved, no hardware has changed, and the first layer and dimensions remain consistent, routine cleaning and a quick visual check are normally enough.
Check calibration again after transport, nozzle or hotend work, a build-plate change, toolhead maintenance, a collision, a major firmware update, or a repeatable print defect. Start with the affected area. For example, a different filament may require temperature and flow tuning without requiring a new bed mesh.
Conclusion
Reliable 3D printer calibration follows a clear order. Check the mechanics, clean the nozzle and plate, level the bed, and correct the first layer before tuning extrusion, temperature, retraction, and dimensions. Complete vibration or pressure-advance calibration last. Automatic systems can simplify this workflow, but a controlled test print remains the best confirmation that the settings are working.
FAQ
Do I need to calibrate a new 3D printer?
Yes. Complete the manufacturer’s setup and automatic routines, then verify the first layer because shipping and assembly can affect calibration.
How often should I calibrate my 3D printer?
Recalibrate when the printer, hardware, material requirements, or print behavior changes. A stable printer does not need a complete calibration before every job.
Does auto leveling mean I do not need to calibrate the printer?
No. Auto leveling compensates for differences across the bed. It does not correct every Z-offset, extrusion, temperature, dimensional, or mechanical issue.
What should I calibrate first on a 3D printer?
Begin with mechanical inspection and cleaning. Level the bed and verify the Z-offset before tuning extrusion or material settings.
How do I know if my Z-offset is correct?
First-layer lines should join evenly without gaps, scraping, deep ridges, or excessive transparency.
Why Is My First Layer Uneven After Auto Leveling?
Check for nozzle residue, a dirty or incorrectly seated plate, an unsuitable Z-offset, loose hardware, or a bed mesh that was not applied.
Do I need to recalibrate after changing the nozzle?
Recheck the first layer and run any nozzle-related routine recommended for the printer. Multi-toolhead systems may also need toolhead-offset calibration.
Should I calibrate flow for every filament?
Not always. Recheck it when changing material type or brand, or when a repeatable extrusion problem appears.
Can poor calibration cause layer shifting?
Excessive speed or acceleration can contribute, but sudden shifts more often indicate loose belts or pulleys, an obstruction, or missed steps.